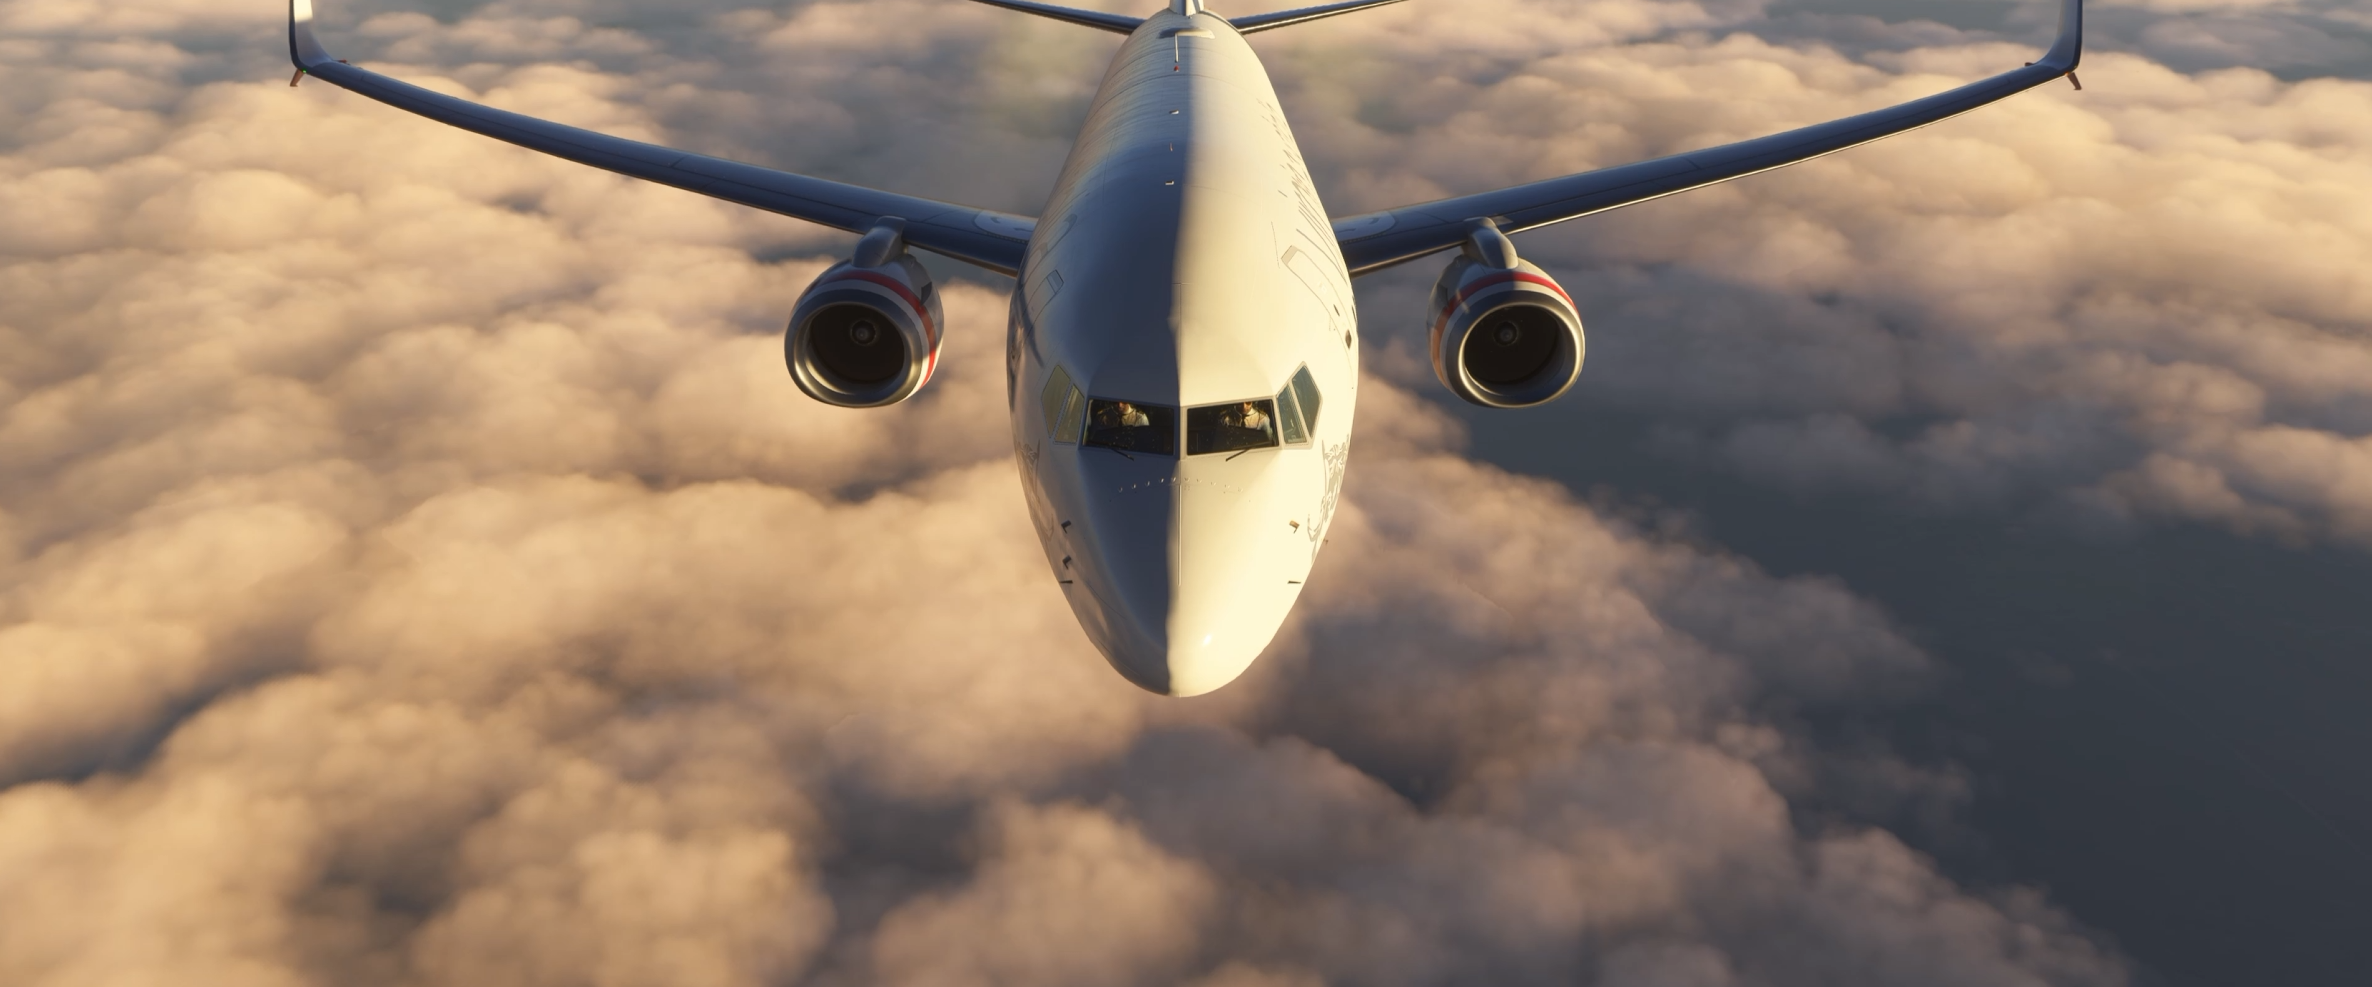
How to Use Flight Simulator First Officer in MSFS 2024

Add-ons First Officer for FS2024

Flying a modern airliner in Microsoft Flight Simulator 2024 can become surprisingly busy. You may be programming the aircraft, working through checklists, preparing for pushback, watching the flight instruments and trying to remember what needs to happen next. It is enjoyable when everything comes together, but there are times when it feels as though you are doing the work of an entire flight crew by yourself.

That is where Flight Simulator First Officer may help.

Rather than simply adding background voices, Flight Simulator First Officer is intended to give you a virtual crew member who can assist with cockpit procedures and reduce some of the workload. The idea is not necessarily to fly the aircraft for you. It is to make an airline flight feel more like a shared cockpit operation, where duties are divided between the captain and first officer.

In this guide, I will explain how I approach Flight Simulator First Officer in MSFS 2024, what to expect when you first use it, how it fits into a normal airline flight and how to avoid making it more complicated than it needs to be.

FlightSimulationShowcase Verdict

Helps make the simulator feel more real? ✅ Yes — particularly when flying airliners
Performance impact 🟢 Low
Learning curve 🟡 Moderate at first
Value for money ★★★★☆
Would I recommend it? ✅ Yes, for simmers who enjoy realistic airline procedures
Would I install it again? ✅ Yes, if I wanted more realistic crew interaction

Quick Answer

Flight Simulator First Officer adds a virtual first officer to supported airline operations in Microsoft Flight Simulator. Depending on the aircraft and configuration being used, the first officer can help with cockpit procedures, checklist flows and some of the routine tasks that would normally be shared between two pilots.

The easiest way to begin is to start at a parking gate, load the aircraft in a known condition and follow the flight in its normal order: cockpit preparation, engine start, taxi, take-off, climb, cruise, descent, approach and landing. Do not activate every available option immediately. Begin with the basic assistance, learn what the first officer is doing and gradually add more automation as you become comfortable.

For airline simmers, the main benefit is not simply convenience. It is the feeling that you are operating as part of a crew rather than managing an entire airliner alone.

Table of Contents

What is Flight Simulator First Officer?

Flight Simulator First Officer is designed to add a virtual first officer to your flight simulator experience. Instead of completing every cockpit task yourself, you can share some of the workload with a computer-controlled crew member.

This is particularly useful in an airliner because real airline cockpits are normally operated by two pilots. The captain and first officer divide their duties, monitor one another and work through established procedures. One pilot may be flying the aircraft while the other handles radios, checklists, aircraft systems or supporting tasks.

In a home simulator, we normally do everything ourselves. We prepare the aircraft, enter the route, operate the overhead panel, start the engines, taxi, fly, communicate with air traffic control and manage the approach. That can be rewarding, but it is not necessarily a realistic representation of how a two-pilot airline cockpit operates.

A virtual first officer helps fill that missing position.

Worth Knowing

A first-officer add-on does not automatically make every flight more realistic. The benefit depends on how you use it. If you allow the program to perform almost every task without understanding what is happening, you may feel less involved. Used sensibly, however, it can improve both immersion and workload management.

What Does the First Officer Do?

The exact duties available may depend on the version of Flight Simulator First Officer, the aircraft you are flying and the options you have selected. In general, a virtual first officer may assist with procedural cockpit tasks and help move the flight from one phase to the next.

These tasks may include:

  • assisting with cockpit preparation;
  • helping complete aircraft flows;
  • working through checklists;
  • operating selected switches or aircraft systems;
  • supporting engine-start procedures;
  • assisting during taxi and before take-off;
  • helping manage climb, cruise, descent and approach procedures;
  • performing after-landing duties; and
  • Helping secure the aircraft at the end of the flight.

The important word is assisting. I would not approach the add-on as an automatic airline pilot. I would treat it as another crew member whose job is to reduce repetitive workload while leaving me responsible for the aircraft and the overall flight.

It Is More Than a Collection of Sounds

There is a difference between an add-on that plays cabin announcements and one that interacts with cockpit procedures. Passenger sounds can certainly improve the atmosphere, but a first-officer program is intended to affect the way you operate the aircraft.

That is why there can be a learning curve. You are not simply pressing a button to hear a voice. You are learning how the virtual crew member expects the flight to progress.

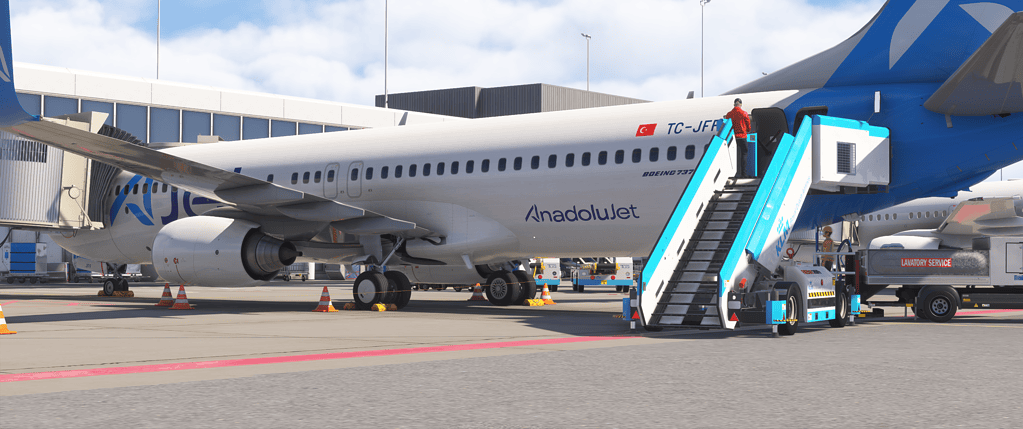
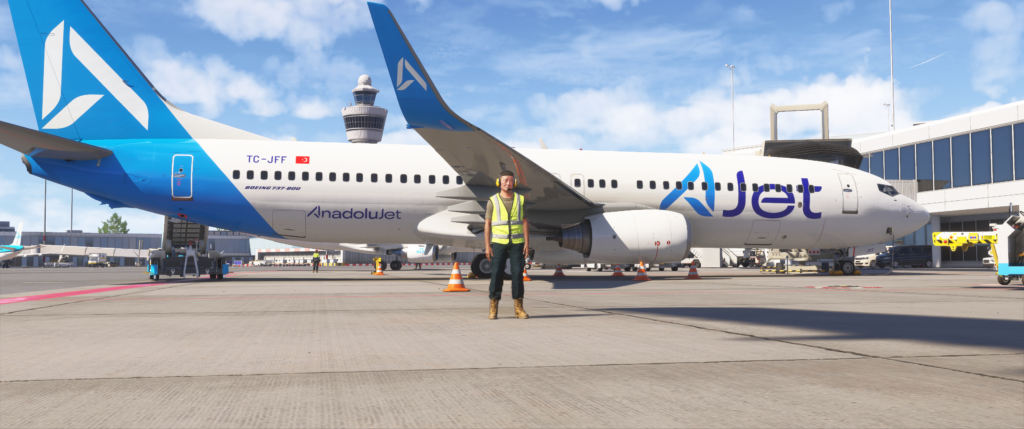
Supporting image: Flight Simulator First Officer running beside MSFS 2024 while a Boeing 737 is parked at a gate during cockpit preparation.

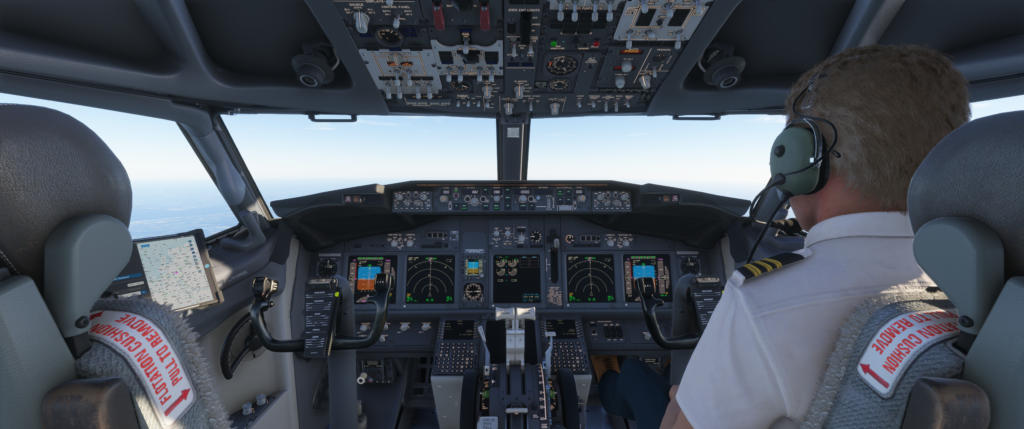
Flight deck and the First officer

Before You Begin

Before starting your first flight, I recommend keeping things simple. Choose an aircraft you already know reasonably well and use a short route between two familiar airports.

Your first flight is probably not the time to learn a new aircraft, a new airport, a complicated departure and a first-officer program all at once. If something unexpected happens, it becomes difficult to know whether the problem is caused by the aircraft, the add-on or something you have missed.

Beginner Tip

Use an aircraft you already understand and choose a flight of around 45 minutes to one hour. A familiar aircraft lets you watch what the first officer is doing without also trying to learn the cockpit.

Start at a Parking Gate

For the most complete experience, I would begin at a parking gate rather than loading directly onto the runway. Starting at a gate gives the program time to follow the normal sequence from cockpit preparation through to engine start and taxi.

A runway start may already have the engines running and many aircraft systems configured. That can skip some of the procedures a virtual first officer is designed to assist with.

There is nothing wrong with using a runway start when you simply want a quick flight. However, if you are learning Flight Simulator First Officer, a gate start makes it easier to understand the complete workflow.

Prepare a Simple Flight Plan

Create your flight plan before becoming too involved with the first-officer program. You can use the MSFS flight planner or a service such as SimBrief, depending on the aircraft and the way you prefer to fly.

For the first test flight, I would avoid an unusually complicated route. A straightforward short-haul flight is enough to experience cockpit preparation, engine start, take-off, cruise, descent, approach and landing.

Setting Up Flight Simulator First Officer

The precise layout may change as the program is updated, but the general approach should remain similar. Start Flight Simulator First Officer as instructed by the developer and make sure it can detect or connect to Microsoft Flight Simulator 2024.

Before beginning the flight, check the following:

  • MSFS 2024 is running correctly;
  • Your selected aircraft is supported by the version or profile you are using;
  • Flight Simulator First Officer shows that it is connected;
  • The correct aircraft or operating profile has been selected;
  • The audio volume is high enough to hear the first officer;
  • The program is not hidden behind the simulator if you still need to access it; and
  • You understand which tasks are assigned to you and which tasks are assigned to the first officer.

That final point is important. If you do not know who is supposed to perform a task, you may both wait for one another—or you may change a switch immediately before the virtual first officer attempts to do the same thing.

Important Note

Do not assume that every aircraft will work in the same way. Aircraft developers model systems differently, and an automated cockpit action that works correctly in one aircraft may behave differently in another. Always use the correct aircraft profile and check current compatibility information.

Do Not Turn On Everything Immediately

When I install a new add-on, there is always a temptation to activate every feature and see what it can do. With a first-officer program, that can make the first flight confusing.

I would begin with the default or recommended settings. Learn the basic sequence first. Once you understand when the first officer performs each task, you can decide whether you want more assistance or more direct control.

Using Flight Simulator First Officer on Your First Flight

The easiest way to understand the add-on is to follow a complete flight from beginning to end.

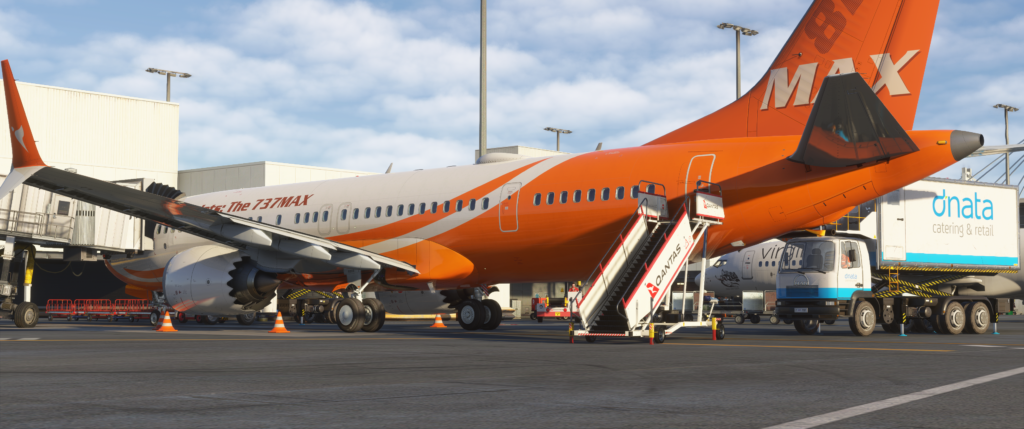
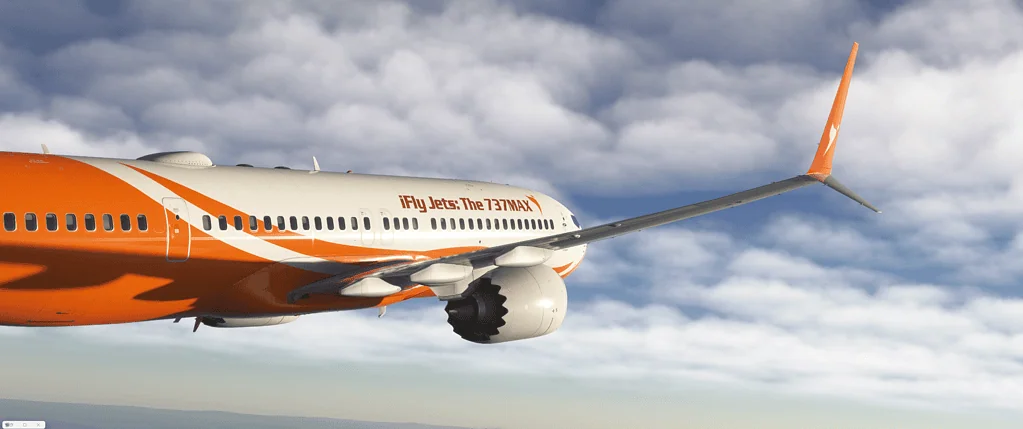
iFly 787MAX. at the gate
iFly 787MAX. at the gate, with boarding stairs and support vehicles.

1. Load the Aircraft at the Gate

Choose your departure airport and load the aircraft at a suitable parking gate. If the aircraft supports a cold-and-dark state and you are comfortable using it, this can provide the most complete procedural experience.

If you are still learning the aircraft, there is no need to make the flight unnecessarily difficult. A powered aircraft at the gate may be a better starting point. The aim is to understand the first-officer workflow, not prove that you can complete every procedure from memory.

2. Connect Flight Simulator First Officer

Open the first-officer program and confirm that it has connected to the simulator. Select the correct aircraft or profile if required.

Take a moment to look through the available options. Check the audio settings and note any controls used to begin procedures, advance the flight phase or respond to checklist items.

If the program provides an automatic mode and a more manual mode, I would begin with the recommended setting. You can change the level of automation later.

3. Complete the Cockpit Preparation

Prepare the aircraft as you normally would. Load or enter the flight plan, check the fuel and payload, confirm the departure runway and review the initial route.

Allow the first officer to complete the tasks assigned to that position. Watch the cockpit while this happens. Do not simply assume everything has been completed correctly.

This is one of the parts I find most interesting. Seeing another crew member operate switches and complete procedures can make the cockpit feel active rather than static. It also gives you more time to concentrate on the flight plan and what the aircraft will be doing after departure.

4. Work Through the Checklists

Checklists are an important part of the crew experience. Depending on the program’s setup, checklist items may be spoken, confirmed automatically or require a response from you.

Do not rush through them. Listen to each item and check the aircraft rather than treating the checklist as background sound.

Real Pilot Tip

A checklist is normally used to confirm that important actions have been completed. It is not simply a list of switches to operate as quickly as possible. Even in the simulator, taking a moment to verify each item makes the procedure more meaningful and helps develop better habits.

5. Engine Start and Pushback

Once the aircraft is ready, begin the pushback and engine-start sequence. If you also use GSX, allow each program time to complete its part of the operation.

A busy gate departure can involve several systems at once: passenger boarding, doors, ground power, pushback, engine start and cockpit procedures. Avoid clicking ahead too quickly. Wait for one stage to finish before starting the next.

If the first officer is expected to operate parts of the overhead panel, watch the sequence. This will help you understand what is happening and make it easier to identify a missed step if something does not work.

6. Taxi and Before Take-Off

During taxi, your attention should be on controlling the aircraft, following the taxi route and remaining aware of other traffic. This is where a virtual first officer can begin to feel genuinely useful.

Instead of trying to steer the aircraft while also completing every cockpit action, you can concentrate on taxiing while the first officer assists with the appropriate procedures.

Before entering the runway, check that the aircraft is properly configured. Confirm the flap setting, trim, flight controls, transponder, lights and take-off information as appropriate for the aircraft you are using.

7. Take-Off and Climb

You remain responsible for flying and monitoring the aircraft. Follow the planned departure, watch the flight instruments and make sure the aircraft is doing what you expect.

The first officer may assist with supporting procedures as the aircraft climbs. Listen for calls and watch for cockpit changes, but do not allow them to distract you from controlling the aircraft.

Once the aircraft is established in the climb, the workload usually begins to reduce. This is a good time to check that the route, altitude and aircraft configuration are correct.

8. Cruise

Cruise is generally the quietest part of the flight. Use the time to review the arrival, expected weather, runway and descent plan.

A first-officer program may make the cockpit feel less empty during this phase, but I would not expect constant activity. Real airline flights also include long periods of monitoring and preparation.

9. Descent and Approach

Prepare for the arrival before the aircraft reaches the top of descent. Check the weather, select the expected approach and review any altitude or speed restrictions.

This is where workload can increase quickly. You may be managing the descent, watching speed, changing altitudes, configuring the aircraft and preparing for the approach. Sharing some procedural tasks with a virtual first officer can make this part of the flight feel more organised.

Do not rely on the first officer to correct poor descent planning. If the aircraft is too high, too fast or incorrectly configured, you still need to recognise the problem and take action.

10. Landing and Shutdown

After landing, clear the runway and allow the after-landing procedure to begin when appropriate. Taxi to the assigned gate and complete the shutdown sequence.

Finishing the flight properly is worth doing. Parking at the gate, shutting down the engines and securing the aircraft gives the flight a natural ending rather than simply returning to the main menu immediately after landing.

My Recommendation

For the first few flights, watch what the virtual first officer is doing. Once you trust the sequence and understand the division of duties, you can spend less time watching switches and more time flying the aircraft.

msfs-airliner jumpseat 787 max

How Much Should You Automate?

This is probably the most important decision.

There is no correct amount of automation for everyone. Some simmers enjoy completing every cockpit procedure themselves. Others are mainly interested in flying the aircraft and would rather have assistance with repetitive switch work.

I prefer a middle ground.

I still want to understand what the aircraft is doing and remain involved in the important decisions. At the same time, I do not feel that I need to operate every switch personally for a flight to be enjoyable.

If a virtual first officer handles realistic supporting duties while I manage the aircraft, flight plan and overall operation, that feels like a sensible use of automation.

The best setup is the one that improves immersion without making you feel like a passenger in your own simulator.

Common Mistakes

Trying to Learn Everything at Once

Do not combine a new aircraft, a complicated route, unfamiliar airports, GSX, Passenger2 and Flight Simulator First Officer on the same first flight. Add one new element at a time.

Using the Wrong Aircraft Profile

Make sure the selected profile matches the aircraft you are flying. Similar aircraft are not necessarily identical behind the scenes.

Moving Ahead Too Quickly

Allow procedures to finish before beginning the next stage. Rapidly clicking through commands can cause the flight sequence to become confused.

Performing the First Officer’s Tasks

If you immediately operate every switch yourself, the virtual first officer may have little left to do. Learn the division of duties and allow the program to complete its assigned actions.

Not Monitoring the Aircraft

Automation should be monitored. Check that switches have moved correctly and that the aircraft is properly configured before continuing.

Expecting Every Aircraft to Behave Identically

Different aircraft use different systems and may require separate profiles or procedures. Compatibility should always be checked before planning a flight.

Troubleshooting Flight Simulator First Officer

The Program Does Not Connect to MSFS 2024

Confirm that MSFS 2024 is running and that the aircraft has fully loaded. Restart the first-officer program and check whether it reports a simulator connection.

If the problem continues, make sure you are using the current version and follow the developer’s installation instructions. Updates to MSFS 2024 can occasionally affect third-party utilities, so current compatibility information is important.

The First Officer Is Not Performing Any Actions

Check that the correct aircraft or profile has been selected. Also confirm that the flight is in the expected phase and that any required procedure has been started.

If you have already completed the first officer’s assigned tasks manually, there may be nothing left for the program to do.

I Cannot Hear the First Officer

Check the program’s audio settings and the Windows Volume Mixer. Make sure the application has not been muted and that the sound is being sent to the correct speakers or headset.

A Switch Does Not Move

First, check whether the aircraft is supported. If only one switch fails while everything else works, the aircraft may use a different system or control method.

Do not repeatedly trigger the same procedure. Check the aircraft state and restart the procedure only if the program’s instructions recommend doing so.

The Procedure Has Stopped

Look for a checklist item, aircraft condition or response that may be required before the sequence can continue. The program may be waiting for you rather than being frozen.

Troubleshooting Tip

If something goes wrong, test the add-on with a simple flight and the recommended aircraft state before reinstalling anything. Reinstallation should not be the first response to every problem. A missed setting, incorrect profile or incomplete procedure is often easier to fix.

Who Is Flight Simulator First Officer Best Suited To?

Flight Simulator First Officer is likely to appeal most to people who enjoy airline flying and want a more active cockpit environment.

It may suit you if:

  • You regularly fly airliners in MSFS 2024;
  • You enjoy realistic cockpit procedures;
  • You want to share some of the workload;
  • You like spoken checklists and crew interaction;
  • You use other immersion add-ons such as GSX or Passenger2, or
  • You want the cockpit to feel less like a single-person operation.

It may be less useful if:

  • You mainly fly small general-aviation aircraft;
  • You prefer to operate every switch yourself;
  • You normally begin flights on the runway;
  • You only want cabin announcements, or
  • You prefer very quick flights with minimal preparation.

Does It Make MSFS 2024 More Immersive?

For airline flying, I believe the idea certainly has the potential to improve immersion.

A modern airliner is designed around a crew. When one person operates both sides of the cockpit, something is missing. A virtual first officer cannot completely reproduce the judgement and interaction of another person, but it can make the cockpit feel more active and make the division of duties more believable.

The greatest benefit may not be the number of switches the program operates. It may be the way the flight begins to feel like a crew operation.

That fits the philosophy behind FlightSimulationShowcase.com:

Helping your simulator feel more real.

Frequently Asked Questions

Does Flight Simulator First Officer fly the aircraft for me?

It is better to think of the program as a crew-assistance add-on rather than an automatic pilot. You remain responsible for managing and monitoring the aircraft. The available assistance depends on the aircraft, profile and options being used.

Do I need to start at a gate?

A gate start is recommended if you want to experience the complete workflow, including cockpit preparation, engine start, taxi and shutdown. A runway start may skip many of the procedures the add-on is intended to support.

Can I use Flight Simulator First Officer with MSFS 2024?

Use the current version intended or confirmed for MSFS 2024 and check the developer’s latest compatibility information. Third-party utilities can change as the simulator and supported aircraft are updated.

Does it work with every aircraft?

No assumption should be made that every aircraft is supported. Check the current aircraft list and use the correct profile for the aircraft you intend to fly.

Can I still operate switches myself?

Yes, although it is worth learning which duties are assigned to the first officer. If you complete every action before the program reaches it, you may interfere with the intended workflow.

Does Flight Simulator First Officer affect FPS?

A utility of this type would normally be expected to have a relatively small performance impact compared with demanding scenery, aircraft or graphics settings. Performance can vary between systems, so monitor your own simulator if you notice any change.

Can I use it with GSX?

A first-officer program and GSX perform different roles. GSX focuses mainly on ground services and passenger-handling operations, while a virtual first officer assists inside the cockpit. They can complement one another, but it is important to allow each procedure to finish and avoid triggering several actions at once.

Is it suitable for beginners?

It can be, particularly if the assistance reduces workload. However, I would still learn the basic aircraft systems rather than relying on automation without understanding what it is doing.

Is it useful if I already use checklists?

Yes. The attraction is not only having a checklist. It is adding crew interaction and sharing some of the cockpit workload.

Will it make airline flying easier?

It may reduce the number of routine tasks you need to perform, but there is an initial learning period. Once you understand the workflow, the cockpit should feel more organised rather than more complicated.

Summary

Flight Simulator First Officer is designed to add something that is naturally missing when we fly an airliner at home: another pilot.

The best way to learn it is to keep the first flight simple. Choose an aircraft you already know, start at a gate, use a short familiar route and follow the flight in its normal order. Do not activate every option immediately, and do not rush through the procedures.

I would also spend the first few flights watching what the first officer does. Understanding the sequence is far more useful than allowing the program to operate in the background without knowing what is happening.

For me, the right amount of automation is somewhere in the middle. I still want to fly the aircraft, make the decisions and understand the systems. However, sharing realistic cockpit duties with a virtual first officer can reduce workload and make an airline flight feel more like a crew operation.

If that is the experience you are looking for, Flight Simulator First Officer may earn a permanent place in your simulator.

How to Use Passenger2 in MSFS 2024

Add-ons First Officer for FS2024

A Simple Immersive Setup Guide

I enjoy anything that makes Microsoft Flight Simulator feel less like a computer program and more like an actual flight. Passenger2 can help with that by adding passengers, cabin crew, announcements, boarding and reactions to the way you fly.

The part that may put some people off is the airline-management side. Creating routes, managing finances and operating a virtual airline may appeal to some flight simmers, but it is not what everyone wants. Personally, I am more interested in the atmosphere it can add to an ordinary flight.

This guide explains how to use Passenger2x in its simplest form with Microsoft Flight Simulator 2024. We will use Load & Go, which lets Passenger2 handle most of the background work while you concentrate on flying.

FlightSimulationShowcase Verdict

Helps make the simulator feel more real? ✅ Yes
Performance impact 🟢 Low
Learning curve 🟢 Easy in Load & Go mode
Value for money ★★★★☆
Would I recommend it? ✅ Yes, for airline flying
Would I install it again? ✅ Yes

Quick Answer

The easiest way to use Passenger2x in MSFS 2024 is to select Load & Go. This mode removes the airline finances, route management and most of the setup. Start MSFS 2024 at a parking gate, prepare your aircraft, open Passenger2x and create a flight using your departure, destination and aircraft details.

Passenger2 can then provide boarding activity, cabin announcements, passenger reactions, in-flight service and a report at the end. You do not need to build a virtual airline to enjoy the passenger side of the program. Passenger2x runs separately from MSFS and connects to it on the same computer.

What Does Passenger2 Add to MSFS 2024?

Microsoft Flight Simulator does an excellent job of putting us in the cockpit, but it does not always give us much sense that anyone is travelling behind us. We can prepare the aircraft, follow the flight plan and land at the destination, yet the cabin often feels completely separate from the experience.

Passenger2x is designed to add that missing human side. It simulates passengers, cabin services, crew interaction, announcements and passenger responses to what happens during the flight. It can monitor such things as delays, rough flying, diversions and the way the flight is handled.

It does not place individually animated passengers in every seat. The immersion comes through sounds, information, cabin activity and the feeling that you’re flying now affects the people on board.

Worth Knowing: Passenger2x is not an aircraft add-on and does not change your aircraft’s flight model or systems. It runs as a separate program and adds a passenger and airline layer around the flight.

Passenger2x Modes Explained

Passenger2x includes three main ways to use the program. Choosing the correct one makes a considerable difference to how complicated it feels.

Advanced Mode

Advanced Mode opens the full airline-management system. You can create routes, manage fleets, adjust services, operate loyalty programs and deal with the financial side of running an airline.

There is plenty here for someone who wants a long-term virtual airline project, but it is considerably more than we need for a simple immersive flight.

Simple Mode

Simple Mode reduces some of the management. You still manage a fleet, but you do not have to become involved in the full route and financial system.

This may be worth exploring later if you enjoy Passenger2 and want a little more involvement without taking on everything.

Load & Go

Load & Go is the mode I recommend for this guide.

The developer describes it as the option with no airline management. The program handles the service choices and lets you get directly into the flight.

This is the best starting point for someone who simply wants:

  • Passenger boarding and cabin atmosphere
  • Cabin crew announcements
  • Passenger reactions
  • In-flight services
  • A reason to fly smoothly
  • A report at the end of the flight

You can always investigate Simple or Advanced Mode later. There is no need to begin there.

What You Need Before Starting

Passenger2x supports Microsoft Flight Simulator 2024 and 2020, as well as several other flight simulators. For MSFS 2024, it connects through SimConnect and runs on the same computer as the simulator. You do not need a second computer or tablet.

Before starting, you will need:

  • Microsoft Flight Simulator 2024 installed and working
  • A Passenger2x licence
  • The free Passenger2 Manager
  • An active internet connection
  • A suitable passenger aircraft
  • Your departure and destination airports

Passenger2x requires an internet connection when it loads for activation, updates and online functions. It is therefore worth checking your connection before beginning a flight.

How to Install Passenger2x

  1. Purchase Passenger2x from the official Passenger2 website.
  2. Download and install Passenger2 Manager.
  3. Open Passenger2 Manager and sign in to your account.
  4. Activate your Passenger2x licence.
  5. Use the Manager to download and install the current version.
  6. Install any free sound or aircraft DLC you intend to use.
  7. Open Passenger2x once before your first proper flight and check its settings.

Passenger2 Manager is the control centre used for activation, updates and management of the Passenger2 products. Keeping the program updated through the Manager is preferable to downloading files manually.

Important Note: Menu wording and screen positions may change as Passenger2x is updated. The overall process should remain similar, but use the current on-screen prompts if they differ slightly from this guide.

Aircraft at Flight Simulation Showcase with airline branding and ground support vehicles.
How to Set Up a Simple Passenger2 Flight

This is the basic sequence I would use for an ordinary airline flight. The aim is to keep Passenger2 in the background rather than spend half an hour managing the add-on before we leave the gate.

1. Plan a Suitable Flight

Choose a normal passenger route and aircraft. A short flight of roughly 45 minutes to two hours is ideal while learning the program.

For example:

You can plan the route in SimBrief, the MSFS World Map or your preferred flight-planning program. Passenger2 does not replace your normal flight planning.

2. Start MSFS 2024 at a Parking Gate

I recommend beginning at a parking gate with the aircraft in a cold-and-dark or turnaround state. Passenger2 can still be used when starting elsewhere, but a gate gives the whole process a proper beginning.

Starting at a gate allows you to experience:

  • Pre-flight preparation
  • Passenger boarding
  • Cabin and boarding sounds
  • Door closure
  • Safety announcements
  • Pushback and taxi

Beginning on the runway skips much of what makes a passenger add-on worthwhile.

3. Prepare the Aircraft

Before beginning boarding, complete the basic cockpit preparation. Depending on the aircraft, this may include:

  • Battery or ground power connected
  • Navigation lights set correctly
  • Flight plan loaded
  • Fuel entered
  • Payload checked
  • Departure performance prepared
  • Parking brake set
  • Passenger doors open

You do not have to complete every cockpit procedure before opening Passenger2, but it helps to have the aircraft stable at the gate.

4. Open Passenger2x

Start Passenger2x and allow it to connect to MSFS 2024. Check that the correct simulator is selected in the Passenger2 settings.

The connection should normally be automatic once MSFS is running and the aircraft has loaded. Passenger2x uses SimConnect for Microsoft Flight Simulator.

5. Select Load & Go

Choose Load & Go rather than Advanced or Simple Mode.

This tells Passenger2 that you do not want to manage routes, finances, contracts or a virtual airline. The program will make many of the service decisions for you.

6. Enter the Flight Details

Follow the flight setup screen and enter or confirm the important information requested by Passenger2. This will generally include details such as:

  • Departure airport
  • Destination airport
  • Aircraft type
  • Expected flight time
  • Passenger or service information

Make sure your departure and destination match the flight loaded in MSFS. Entering the wrong airport can affect the completion and reporting of the flight.

7. Start Boarding

Once the flight is ready, begin the boarding process. Leave the parking brake on and keep the passenger door open while boarding takes place.

This is where Passenger2 begins to make the aircraft feel occupied. Depending on your chosen settings and installed audio, you may hear boarding sounds, cabin ambience, music and crew announcements.

Beginner Tip: Do not rush your first flight. Let the boarding sequence play and watch how Passenger2 moves through each stage. Once you understand the timing, it becomes easy to fit it into your normal cockpit preparation.

Aircraft on runway at Flight Simulation Showcase event.

8. Complete Boarding and Secure the Cabin

When boarding is complete:

  • Close the passenger doors
  • Confirm the cabin is ready
  • Complete the safety sequence
  • Start the engines
  • Begin pushback when appropriate

If Passenger2 provides a cabin-secure or crew-ready indication, wait for it before beginning the take-off sequence.

Using Passenger2 During the Flight

Once airborne, you do not need to stare at the Passenger2 window. The add-on is most effective when it becomes part of the background atmosphere.

Fly Smoothly

Passenger2 can react to rough flying, so avoid unnecessarily sharp turns, sudden pitch changes and heavy landings. The program includes rough-flying detection and can change passenger reactions according to your handling.

Real Pilot Tip: Passenger comfort is largely about anticipation. Make power, pitch and bank changes gradually. Begin descents early enough that you are not forced to dive towards the airport or use the speedbrake aggressively during the final stages.

Use the Seatbelt Sign Sensibly

Turn the seatbelt sign on for take-off, landing and turbulence. Once established in a smooth cruise, you can turn it off if conditions allow.

Do not repeatedly switch it on and off without a reason. Treat it as you would during an actual passenger flight.

Allow Cabin Services to Run

Passenger2x can provide in-flight meals, drinks, entertainment, lighting and crew interaction. In Load & Go, much of this is handled for you, which is exactly what we want for a simple setup.

Longer flights naturally give the cabin service more time to develop. On a very short flight, do not expect the same service sequence you would receive on a long sector.

Respond to Events Without Panicking

Passenger2 can include delays, diversions, emergencies and passenger mood changes. You do not have to enable every possible event immediately.

For your first few flights, keep things simple. Learn the normal sequence before adding emergencies or unusual situations.

Arrival and Completing the Flight

During descent, make sure the cabin is prepared early enough. Turn on the seatbelt sign and avoid leaving the arrival preparation until you are already established on final approach.

After landing:

  1. Vacate the runway safely.
  2. Taxi to the assigned parking gate.
  3. Set the parking brake.
  4. Shut down or secure the aircraft as required.
  5. Wait for Passenger2 to recognise the end of the flight.
  6. Open the passenger door when it is safe to do so.
  7. Begin disembarkation.
  8. Review the completed flight report.

The report can include passenger satisfaction, reviews and information about how the flight was handled. Passenger2 also detects diversions and rough flying, so an unscheduled landing or uncomfortable flight may influence the outcome.

I would not become too obsessed with achieving a perfect score. The report is most useful when it encourages better planning and smoother flying, rather than turning every flight into an examination.

Using Passenger2x with GSX Pro

Passenger2x includes GSX Pro synchronisation for boarding and disembarkation. This can help the two programs follow the same passenger process rather than having one finish while the other is still boarding.

The combination can work very well:

  • GSX supplies visible ground vehicles and airport activity.
  • Passenger2 supplies cabin sounds, crew interaction and passenger reactions.
  • Your aircraft provides the cockpit systems and flight itself.

However, I recommend learning Passenger2 on its own first. Once you know what a normal Passenger2 flight looks like, add GSX and configure the synchronisation.

Common Mistake: Starting Passenger2 boarding and GSX boarding separately without synchronisation can result in different boarding times or passenger totals. Use the supported GSX sync option when running both together.

Does Passenger2x Affect FPS?

Passenger2x runs as a separate application rather than adding a large visual environment to MSFS. According to the developer, it has a very small performance footprint and should not reduce frame rate or visual quality, with most users reporting no noticeable effect.

That makes sense because Passenger2 is mainly processing flight data, audio, passenger responses and its own interface. It is not rendering detailed scenery or hundreds of visible cabin passengers inside MSFS.

Performance Impact: Low. On a reasonably modern computer, I would not expect Passenger2x to produce a noticeable FPS reduction. As with any program running beside MSFS, memory and processor use will vary slightly between systems.

Common Passenger2 Mistakes

  • Choosing Advanced Mode by accident: Use Load & Go unless you genuinely want airline management.
  • Starting on the runway: This skips boarding and much of the cabin atmosphere.
  • Entering the wrong destination: Check that Passenger2 matches your MSFS flight plan.
  • Closing the doors too early: Wait until boarding is complete.
  • Forgetting the parking brake: Keep the aircraft secure during boarding.
  • Rushing the descent: Sudden manoeuvres and aggressive speed changes can affect passenger comfort.
  • Using too many add-ons immediately: Test Passenger2 by itself before combining it with GSX, third-party ATC and other utilities.
  • Expecting visible passengers: Passenger2 mainly creates immersion through sound, interaction, monitoring and reports.

Troubleshooting Passenger2x

Passenger2x Does Not Connect to MSFS 2024

The Flight Does Not Start

  • Check that all required flight details have been entered.
  • Confirm the departure airport matches your current MSFS location.
  • Make sure the aircraft is stationary with the parking brake set.
  • Check that Passenger2 shows an active simulator connection.

There Are No Announcements or Cabin Sounds

  • Check Passenger2’s internal sound volume.
  • Confirm Windows is sending Passenger2 audio to the correct device.
  • Check that your selected audio or announcement pack is installed.
  • Make sure Passenger2 is not muted in the Windows Volume Mixer.
  • Try one of the included sound packs before using custom audio.

Passenger2 Does Not Recognise the Landing

Is Passenger2x Worth Buying?

Passenger2x is best suited to people who regularly fly passenger aircraft and feel that something is missing once the cockpit doors close.

It is less useful if you mainly fly fighters, aerobatic aircraft, gliders or short solo general-aviation flights. You could still use it occasionally, but it would not earn its place in quite the same way.

For airline flying, Load & Go removes the biggest concern I had about Passenger2. You do not have to operate a virtual business simply to hear passengers and cabin crew during the flight.

Every add-on should earn its place. In this case, Passenger2x earns it by adding atmosphere and consequences without asking us to learn another aircraft system or accept a noticeable performance penalty.

Frequently Asked Questions

Do I need to create an airline in Passenger2x?

No. Select Load & Go and Passenger2x will handle the background choices without requiring route, fleet or financial management.

Do I need to start at a gate?

It is not always technically essential, but I strongly recommend it. Boarding, cabin preparation and door closure are important parts of the experience.

Can I use Passenger2x with MSFS 2024?

Yes. Microsoft Flight Simulator 2024 is officially supported.

Does Passenger2x reduce FPS?

The developer describes the performance footprint as very small and says it should not reduce frame rate or visual quality. Actual results can still vary between computers.

Can Passenger2x work with GSX Pro?

Yes. Passenger2x includes GSX Pro synchronisation for boarding and disembarkation.

Does Passenger2x show passengers inside the aircraft?

Its main focus is passenger simulation, sounds, services, reactions and flight reporting rather than filling every aircraft cabin with detailed visible passenger models.

Can I use my own airline announcements?

Yes. Passenger2x supports custom announcements, boarding music and safety material. Real airline media is not supplied because of copyright restrictions.

Does Passenger2x need an internet connection?

Yes. It connects to Passenger2 servers for activation, updates and online functions.

Can I use Passenger2x with any aircraft?

Passenger2x has a growing catalogue of supported aircraft and additional aircraft can be added through free DLC. The developer also states that a minor difference between the aircraft selected in Passenger2 and the one flown in the simulator does not prevent the flight from being recorded.

Summary

Passenger2x can appear rather involved when you first see its airline-management features, but you do not have to use them. Load & Go provides a much easier way to add passengers, cabin crew, announcements and a sense of responsibility to an ordinary MSFS 2024 flight.

My preferred approach is to start at a gate, prepare the aircraft, let Passenger2 handle the cabin side and then concentrate on flying smoothly. Add GSX later if you want visible ground handling and synchronised boarding.

Passenger2x will not appeal to every type of flight simmer. However, if you fly airliners and want the aircraft to feel occupied rather than empty, it can add something MSFS does not provide particularly well on its own.

Most importantly, it helps make the simulator feel more real without creating a noticeable performance burden. For me, that is the reason it earns its place.

SUBSCRIBE

How to Make Microsoft Flight Simulator 2024 More Immersive

msfs-2024 Advanced flight simulator at home

Last updated: June 2026

There’s a real difference between making Microsoft Flight Simulator 2024 more realistic and making it more immersive — and it’s worth thinking about which one you’re actually after.

Realism is usually about accuracy. Correct aircraft systems, proper checklists, real procedures, authentic ATC phraseology, real-world navigation. Flying the way it would be done in real life.

“Immersion is a slightly different feeling.”

Immersion is that sense of actually being there. Sitting in the cockpit, looking out over the nose, listening to the engine, watching weather build on the horizon, picking out runway lights through the haze, or feeling that quiet little bit of tension as you turn onto final.

As a real pilot and long-time flight simmer, I think this is where MSFS 2024 can be genuinely wonderful. It doesn’t have to be technically perfect to feel convincing. Sometimes a simple flight at sunrise — with good sound, good lighting, live weather, and the right aircraft — can feel more satisfying than a perfectly flown flight that somehow leaves you cold.

This article isn’t about turning your spare room into an airline training centre. Most of us aren’t doing that, and that’s absolutely fine.

This is about practical ways to make MSFS 2024 feel more alive, more believable, and more enjoyable to fly.

Some of these ideas cost nothing. Some involve a hardware upgrade. Some involve add-ons. And some are just about changing how you fly.

That’s part of the fun.

Quick answer: The best ways to make Microsoft Flight Simulator 2024 more immersive are to improve your display, sound, lighting, flight controls, weather, camera movement, and flight planning — and to choose add-ons that make the world feel alive rather than ones that just add complexity.

Quick Answer

The biggest immersion upgrades in Microsoft Flight Simulator 2024 are usually your display, sound, head tracking, live weather, and giving each flight a clear purpose. You don’t need an expensive cockpit setup — small changes often create the biggest improvements.

Realism vs Immersion: They’re Not Quite the Same Thing

Before getting into the upgrades and add-ons, it’s worth clearly separating these two ideas.

Realism is about accuracy:

  • Does the aircraft system behave correctly?
  • Are the checklists accurate?
  • Is the flight model believable?
  • Are navigation procedures correct?
  • Does ATC use realistic phraseology?

Immersion is more about feeling:

  • Does the cockpit feel alive?
  • Does the aircraft sound convincing?
  • Does the weather make you think?
  • Does the display pull you into the world?
  • Does the flight feel like it has a purpose?

The two overlap, of course. A more realistic aircraft can absolutely be more immersive, and accurate weather will make you fly more carefully. But you can also have a very immersive flight without doing everything by the book.

A sunset run along the coast in a simple aircraft — room lights dimmed, good audio, live weather, and a beautiful view — can be incredibly immersive without a single checklist in sight.

That’s often the kind of experience flight simmers are really chasing.

1. Start with the Screen: Your Monitor Is Your Window

Your monitor is one of the biggest immersion factors simply because it is your window into the sim.

If the screen feels small, flat, washed out, or too distant, the whole experience suffers. You’re flying the same aircraft in the same simulator, but your brain isn’t being pulled into the world in the same way.

A better monitor won’t make you a better pilot overnight, but it can make the simulator feel dramatically more engaging.

Why a Larger Monitor Helps

A larger monitor gives you more visual presence. More cockpit. More sky. More runway. More of the world around you.

This matters because flying is a very visual activity. You’re constantly looking outside, scanning instruments, checking the horizon, watching for traffic, judging distances. When the display is too small, the sim can feel like you’re looking at a picture of flying. When it’s large enough, it starts to feel like you’re looking through a cockpit window.

Ultrawide Monitors

For flight simulation, ultrawide monitors make a lot of sense. A 34-inch ultrawide gives you a noticeably wider view than a standard screen, and a 49-inch super-ultrawide can feel almost like two monitors joined without the centre bezel.

This is especially useful in cockpit views — you can see more of the instrument panel and the outside world at the same time. Great for airliners, great for circuits and approaches, and simply beautiful for scenic flying.

OLED and Night Flying

OLED is particularly interesting for flight sim because of the contrast. Deep blacks, rich colours, and strong contrast make night flying, city lights, dawn approaches, and cockpit lighting look far more convincing.

If you enjoy flying around sunrise and sunset or late at night, an OLED monitor can be a significant step up. That said, price, screen size, brightness, burn-in concerns, and graphics card demands are all worth thinking about before committing. It’s a meaningful purchase, not a casual one.

iFly 787MAX flying through a cloudy sky,

2. Set the Room Up for Flying

This is one of the cheapest immersion upgrades and one of the easiest to overlook.

Your room matters.

If you’re flying with bright overhead lights, screen reflections, clutter in your peripheral vision, and distractions nearby, the simulator has to work harder to pull you in.

Try dimming the room and sitting somewhere calmer. For night flights especially, this makes a huge difference.

Fly in the Dark (or Near-Dark)

Night flying in MSFS 2024 feels genuinely better when the room is also dark. The cockpit lighting stands out. Runway lights look more convincing. City glow beneath you feels more real. Your attention naturally shifts into the sim rather than around the room.

You don’t need to sit in complete darkness — but reducing the ambient light makes a big difference.

Soft Bias Lighting

A small amount of soft light behind the monitor reduces eye strain and improves the overall mood of your setup. Warm white or subtle amber works nicely if you want that relaxed cockpit feel.

I’d avoid harsh colours or flashing RGB effects for serious flying. They might look good in photos, but they can be distracting when you’re trying to stay in the zone.

3. Improve the Sound

Sound is one of the most underrated parts of flight sim immersion.

A lot of simmers focus heavily on graphics — and fair enough, because MSFS 2024 can look stunning. But sound is what gives the aircraft weight, movement, and life.

The engine note matters. Wind noise matters. The squeak of a touchdown matters. Cockpit rattles matter. Runway rumble matters. ATC audio matters.

When the sound is weak or thin, the aircraft feels less real.

Good Speakers Make a Difference

You don’t need a home theatre setup, but better speakers will give you more depth and presence than basic computer speakers. Try to position them roughly at ear level and aimed toward you if you can.

Consider a Subwoofer

A subwoofer adds a subtle low-end layer — engine rumble, touchdown thud, ground roll, distant thunder. It doesn’t need to be loud. The goal isn’t to shake the room; it’s to add a physical quality to the experience that speakers alone can’t quite do.

Headphones Work Really Well Too

Good headphones block out room noise and let you hear smaller details — cockpit sounds, ATC, wind changes — up close and focused. For late-night flying, they’re often the best option.

4. Use the Right Aircraft for the Immersion You Want

Not every aircraft creates the same kind of experience.

Some are immersive because they’re complex. Others are immersive because they’re simple and let you enjoy the view. The best aircraft for immersion depends entirely on what you feel like flying.

For relaxed scenic flying:

  • Small GA aircraft
  • Light sport aircraft
  • Floatplanes
  • Helicopters
  • Classic and vintage aircraft

For procedure-based immersion:

  • Airliners
  • Business jets
  • Complex turboprops
  • IFR-capable GA aircraft

For challenge and skill:

  • Taildraggers
  • Helicopters
  • Bush aircraft
  • Older aircraft with less automation

I think simmers sometimes get too caught up chasing the “best” aircraft when the better question is: what kind of flying do I actually feel like tonight?

5. Use Live Weather, Even When It’s Not Perfect

Live weather is one of the easiest ways to make MSFS 2024 feel less predictable — and that’s a good thing.

Perfect weather is pleasant, but it gets a bit dull. Real flying rarely involves perfect conditions all the time. Wind direction, cloud base, visibility, turbulence, rain, and changing light all affect how a flight feels. Even a short local flight becomes more interesting when the weather is doing something.

Why Weather Adds Immersion

Weather gives the flight context. You’re not just flying from A to B — you’re flying today’s conditions. You might need to think about runway choice, crosswind, visibility, or whether you even want to fly at all.

As a real pilot, I can say this is a big part of what makes aviation feel alive. Weather isn’t decoration — it’s part of the decision-making.

Real Pilot Tip

In real flying, weather isn’t background scenery — it’s part of every decision you make. Even a simple local flight feels more authentic when you adapt to changing wind, cloud, visibility, and runway conditions instead of always flying in perfect weather.

6. Fly at Sunrise, Sunset, and Night

The time of day completely changes the feel of a flight.

Midday flying can be clear and practical, but sunrise and sunset often create the most atmosphere. Long shadows, warm light, low sun angles, glowing cloud edges, and city lights coming alive make the sim feel cinematic.

Night flying is a different world again. Runway lights, taxiway signs, cockpit lighting, and city glow create a wonderful sense of depth — especially on a good monitor in a darker room.

7. Add Head Tracking

Head tracking might be one of the single best immersion upgrades you can make.

Once you can naturally look around the cockpit — glance at instruments, check the runway over your shoulder, look through turns — the simulator feels far more connected to your body. Instead of pressing buttons or dragging a mouse to move the view, you just move your head.

That feels genuinely different.

Why It Works So Well

In real flying, your head is always moving. You’re not locked to one fixed angle. You look outside, scan the panel, check the runway, look for traffic, keep your awareness moving.

Head tracking helps recreate that behaviour. For VFR flying, circuits, approaches, taxiing, and scenic flights, it can make a big difference.

8. Consider VR — But Be Honest About the Trade-Offs

Virtual Reality Headset for Flight Simulations.

Virtual reality can be incredibly immersive in Microsoft Flight Simulator. The feeling of sitting inside the aircraft is hard to match. Looking around the cockpit naturally, judging height, seeing the aircraft around you in 3D — it can be quite special.

But VR isn’t for everyone.

The trade-offs can include:

  • Higher performance demands
  • Lower image clarity compared to a good monitor
  • Comfort issues on longer flights
  • Headset weight and heat
  • More setup time
  • Difficulty using keyboards, charts, and external tools

For short, scenic, high-immersion flights, VR can be brilliant. For longer flights, writing notes, or making videos, a large monitor is often more practical.

VR isn’t essential — it’s another option worth knowing about.

9. Upgrade the Controls You Actually Touch

Flight simulator cockpit setup in home
Flight simulator cockpit setup in the home

The controls matter because they’re your physical connection to the aircraft.

Even a beautiful simulator can feel detached if the controls are imprecise or uncomfortable. You don’t need everything at once, but upgrading the controls you use most often makes flying feel much more believable.

Joystick or Yoke

If you mostly fly Airbus-style aircraft, fighters, helicopters, or GA aircraft with sticks, a good joystick makes sense. If you fly Cessnas, Pipers, business jets, or Boeing-style airliners, a yoke can feel more natural. There’s no single right answer — it depends on what you fly most.

Throttle Quadrant

A separate throttle quadrant makes throttle movement more physical and deliberate. Especially useful for multi-engine aircraft, turboprops, airliners, and anything with mixture or propeller controls.

Rudder Pedals

Rudder pedals are one of the most important immersion upgrades you can make. They make taxiing, take-off, landing, crosswind correction, and coordinated turns feel far more authentic.

You can still fly and enjoy the sim without them. But with them, the aircraft just feels more complete.

10. Use Add-ons That Add Purpose, Not Just Complexity

Add-ons can genuinely improve immersion — but only if they add something meaningful.

It’s easy to overload the sim with add-ons and end up with more menus, more setup, and more things to troubleshoot. The best immersion add-ons are the ones that make the world feel alive or give your flight a real sense of purpose.

ATC Add-ons

Better ATC can make a big difference. When air traffic control feels believable, the whole flight feels more structured. Clearances, handoffs, altitude changes, and approach clearances give the flight a real-world rhythm. For many simmers, ATC is one of the weakest parts of the default experience, so a good add-on here can be a serious upgrade.

Passenger Add-ons

Passenger simulation can make airline and charter flying feel more purposeful. Instead of flying an empty aircraft from one airport to another, you feel like you’re carrying people who expect a smooth, comfortable trip. Even simple things like boarding sounds, cabin announcements, or a landing score can make a flight feel more alive.

Ground Service Add-ons

Pushback, baggage loading, catering, fuel trucks, stairs, jetways, ground crew — these details help create the feeling that the aircraft belongs in a working airport environment. Especially useful if you enjoy airliner operations.

Camera and Sound Effect Add-ons

Camera shake, touchdown effects, ground roll, turbulence movement, and subtle cockpit vibration can all make the aircraft feel less static. The key word here is subtle — when overdone, these effects become distracting. When used carefully, they’re great.

11. Use Flight Planning Tools

Flight planning adds purpose.

Even if you’re not trying to fly like an airline captain, planning a route gives the flight a beginning, middle, and end. You know where you’re going, why you’re going there, what route you’ll fly, and what weather you might encounter. That turns a casual departure into a small but satisfying aviation exercise.

Tools like SimBrief and Navigraph are very useful for IFR flights and airliner operations. For simpler VFR flights, even a rough route idea is enough.

A simple flight planning checklist:

  • Choose a departure airport
  • Choose a destination
  • Check the weather
  • Pick a route
  • Choose an aircraft that suits the flight
  • Decide whether it’s VFR or IFR
  • Think about fuel
  • Review the runway layout
  • Plan the arrival

You don’t have to make this complicated. The goal isn’t paperwork — it’s purpose.

12. Fly Real Routes and Real Places

One of the best ways to feel more immersed is to fly somewhere that actually means something to you.

That might be:

MSFS 2024 is especially powerful when you use it to explore the real world. Flying over places you know can be surprisingly moving — you recognise coastlines, roads, rivers, towns, mountains, familiar airports. The sim stops being just software and becomes a way of revisiting the world from above.

That’s immersion at its best.

13. Give Each Flight a Reason

A flight feels more immersive when it has a reason — even a simple one.

  • A short scenic flight at sunrise
  • A delivery run between regional airports
  • A passenger service to somewhere sunny
  • A training circuit in windy conditions
  • A night approach into a busy airport
  • A bush landing on a short strip
  • A real-world airline route recreation

When there’s a reason for the flight, you’re more invested in it. You’re not just loading the sim and taking off. You’re going somewhere, doing something, or recreating an experience.

14. Use Career Mode and Activities When They Suit You

MSFS 2024 includes career-style flying and aviation activities, and these can add a real sense of purpose — for some people.

Not everyone wants that kind of structure all the time. Some simmers prefer complete freedom; others enjoy missions, progression, and objectives. There’s no right or wrong approach.

If career activities make the sim feel more alive for you, use them. If you’d rather create your own flights and fly wherever you feel like, do that instead.

15. Reduce On-Screen Distractions

One of the quickest ways to improve immersion is to remove anything that reminds you you’re sitting at a computer.

That might mean hiding unnecessary toolbars, closing floating menus, turning off performance overlays, dimming notifications, and generally keeping the screen clean.

The less clutter you see, the easier it is to believe in the cockpit.

16. Set Up Useful Camera Views

Good camera views make a real difference.

Ideally, you want quick access to:

  • Main pilot view
  • Instrument view
  • Overhead panel (if relevant)
  • Throttle or centre console
  • Left and right window views
  • External cinematic views

For video creation, this matters even more — smooth pans, wing views, and cockpit glances can make MSFS 2024 look genuinely cinematic.

For everyday flying, the goal is simpler: useful views that help you operate the aircraft without breaking the spell.

17. Fly More Slowly and Stop Rushing

This might sound strange, but one of the best things you can do for immersion is slow down.

Many of us rush. We load the aircraft, get airborne quickly, skip the quieter moments, and focus mainly on the landing. But real flying isn’t just take-off and landing.

There’s preparation. Taxiing. Climbing. Trimming. Listening. Watching. Monitoring. Thinking. Adjusting. Waiting.

If you let the flight breathe, it feels more real. And that doesn’t mean every flight needs to be long — a focused 20-minute flight can be very immersive if you treat it properly.

18. Let Each Aircraft Feel Different

Different aircraft shouldn’t all feel the same.

A Cessna shouldn’t feel like an Airbus. A turboprop shouldn’t feel like a jet. A taildragger shouldn’t feel like a modern trainer.

Try flying different types and notice how they behave — how quickly they accelerate, how they climb, how they respond to rudder, how they approach and land, how much trim they need, how much workload they create.

This makes the simulator feel richer and more varied over time.

19. Use Checklists Without Becoming a Slave to Them

Checklists can add immersion, but they shouldn’t turn the flight into a chore — unless that’s what you enjoy.

For complex aircraft, checklists are genuinely useful. For casual scenic flying, a simple flow may be enough. The important thing is to create a rhythm that feels believable:

Pre-flight setup → Engine start → Taxi checks → Before take-off → Climb → Cruise → Descent → Approach → Landing → Shutdown

Even a simplified version makes the flight feel more complete.

20. Make the Approach Matter

For most flights, the approach is where immersion peaks.

You’ve flown the route, dealt with the weather, managed the aircraft, and now everything comes together. The runway appears. The aircraft slows. The lights line up. You manage speed, descent rate, configuration, wind, and alignment all at once.

This is where good sound, good visuals, good controls, and live weather all combine.

Don’t rush it. Set it up properly and enjoy it.

21. Real Pilot Tip: Keep Your Scan Alive

In real flying, your eyes are always moving. You’re not staring at one instrument or one part of the screen.

You’re scanning. Outside. Instruments. Attitude. Airspeed. Altitude. Engine. Weather. Runway. Back outside again.

This habit makes a big difference in the simulator. If you fly with a more active scan, the aircraft feels more real — because you’re behaving more like a pilot than a passenger watching a screen.

Commercial airplane flying above clouds in a flight simulation environment.

22. A Suggested Immersion Upgrade Path

If I were building immersion step by step, I wouldn’t start with the most expensive option. I’d build it gradually.

Step 1: Improve the flying environment

  • Dim the lights and reduce distractions
  • Improve seating position
  • Set up a clean, comfortable flying space

Step 2: Improve the sound

  • Use good headphones or speakers
  • Consider a subwoofer
  • Adjust engine and cockpit sound levels

Step 3: Improve the view

  • Adjust your field of view
  • Set up useful cockpit camera views
  • Consider head tracking
  • Consider an ultrawide monitor

Step 4: Improve the controls

  • Joystick or yoke
  • Throttle quadrant
  • Rudder pedals
  • Button box or Stream Deck if useful

Step 5: Add purpose

  • Use live weather
  • Plan real routes
  • Try passenger or mission-style add-ons
  • Use better ATC

This approach gives you noticeable improvements at every stage without feeling like you have to buy everything at once.

23. Add-ons Worth Considering

Rather than naming one “best” add-on, here’s a breakdown by category:

Flight planning: SimBrief, Navigraph — useful if you enjoy IFR flying, airliner operations, and real-world procedures.

ATC: BeyondATC and similar tools can make the airspace feel alive and give your flights more structure.

Passenger and airline immersion. Cabin announcement tools, passenger simulation, virtual airline, or career-style tools are useful if you want flights to feel purposeful.

Ground handling: Pushback tools, boarding and baggage simulation, ground services — especially good for airliner flying.

Camera and motion effects: Subtle touchdown, ground roll, turbulence, and cockpit vibration effects — great when kept subtle.

24. Common Mistakes That Break Immersion

A few things that can quietly pull you out of the experience:

  • Using too many add-ons at once
  • Leaving menus and toolbars open
  • Flying with poor or thin sound
  • Using unrealistic camera angles all the time
  • Ignoring weather completely
  • Rushing every flight
  • Using a field of view that feels unnatural
  • Flying only in perfect conditions
  • Turning every flight into a technical exercise

Immersion is about balance. Too little realism can make the sim feel shallow. Too much complexity can make it feel like work. The sweet spot is where the flight feels believable and enjoyable.

25. The Most Immersive Setup Is the One You Actually Use

It’s easy to look at expensive cockpit builds and think that’s the only way to enjoy flight simulation properly.

It isn’t.

A large monitor, good sound, decent controls, live weather, and thoughtful flying can create a wonderful experience. You don’t need to own everything — you need a setup that makes you want to fly.

That might be a simple joystick and headphones. It might be an ultrawide and rudder pedals. It might be a full yoke and throttle setup with a speaker system. Or it might be VR. The right answer is whatever keeps you interested.

Final Thoughts

Microsoft Flight Simulator 2024 can be a lot of different things. A serious aviation tool. A scenic world explorer. A relaxing evening escape. A way to recreate real flights, visit famous airports, or simply enjoy being airborne.

For me, immersion is where the magic lives.

It’s that moment when you stop thinking about the computer and start thinking about the aircraft. The runway ahead. The weather outside. The sound of the engine. The glow of the cockpit at night. The coastline beneath you. The descent into somewhere familiar.

You can improve that feeling with better hardware, better sound, better lighting, better add-ons, and better planning. But you can also improve it simply by slowing down, choosing flights that mean something to you, and letting yourself enjoy the journey.

And sometimes, that’s the most realistic thing of all.

Common Mistakes That Break Immersion

Trying to make every flight perfectly realistic can actually reduce immersion. Avoid overloading the simulator with add-ons, leaving menus open, rushing flights, or constantly changing aircraft. Focus on creating believable experiences rather than chasing maximum complexity.

Frequently Asked Questions

What’s the best way to make MSFS 2024 more immersive?

Start with your display, sound, and flying environment. A larger monitor, better speakers or headphones, dim room lighting, live weather, and a comfortable setup can make a huge difference without spending a lot.

Do I need VR for immersion in Microsoft Flight Simulator 2024?

No. VR can be incredibly immersive, but a good ultrawide monitor with head tracking and quality sound can create a very convincing experience too.

Are add-ons necessary for immersion?

Not at all — but the right ones help. ATC, passenger, ground service, camera, and flight planning add-ons can make flights feel more alive and purposeful.

What hardware should I upgrade first?

For most simmers, sound, head tracking, flight controls, and display upgrades are usually the most impactful starting points.

Is an ultrawide monitor good for flight simulation?

Yes, it’s a great fit. The wider field of view helps with situational awareness, cockpit presence, and scenery — and it generally looks fantastic.

Is OLED worth it for MSFS 2024?

OLED can be excellent, especially for night flying, cockpit lighting, and high-contrast scenes. Just weigh up price, screen size, brightness, and burn-in concerns before buying.

Can I make MSFS 2024 immersive on a budget?

Absolutely. Dim the lights, use live weather, adjust camera views, improve sound if you can, fly meaningful routes, and slow down. You don’t need an expensive setup to have an immersive flight.

ChasePlane In MSFS 2024

Why I Use ChasePlane In MSFS 2024 (And Why I Fly With It On Every Flight)

Last Updated: June 2026

Watch my ChasePlane video above to see the views I use most in Microsoft Flight Simulator 2024.

Quick Answer

If you’re wondering whether ChasePlane is worth it, my answer is yes. I use ChasePlane on every flight in MSFS 2024 because it makes flying more immersive, provides excellent wing views, improves camera control, and allows me to enjoy both the aircraft and scenery in ways the default camera system simply doesn’t.

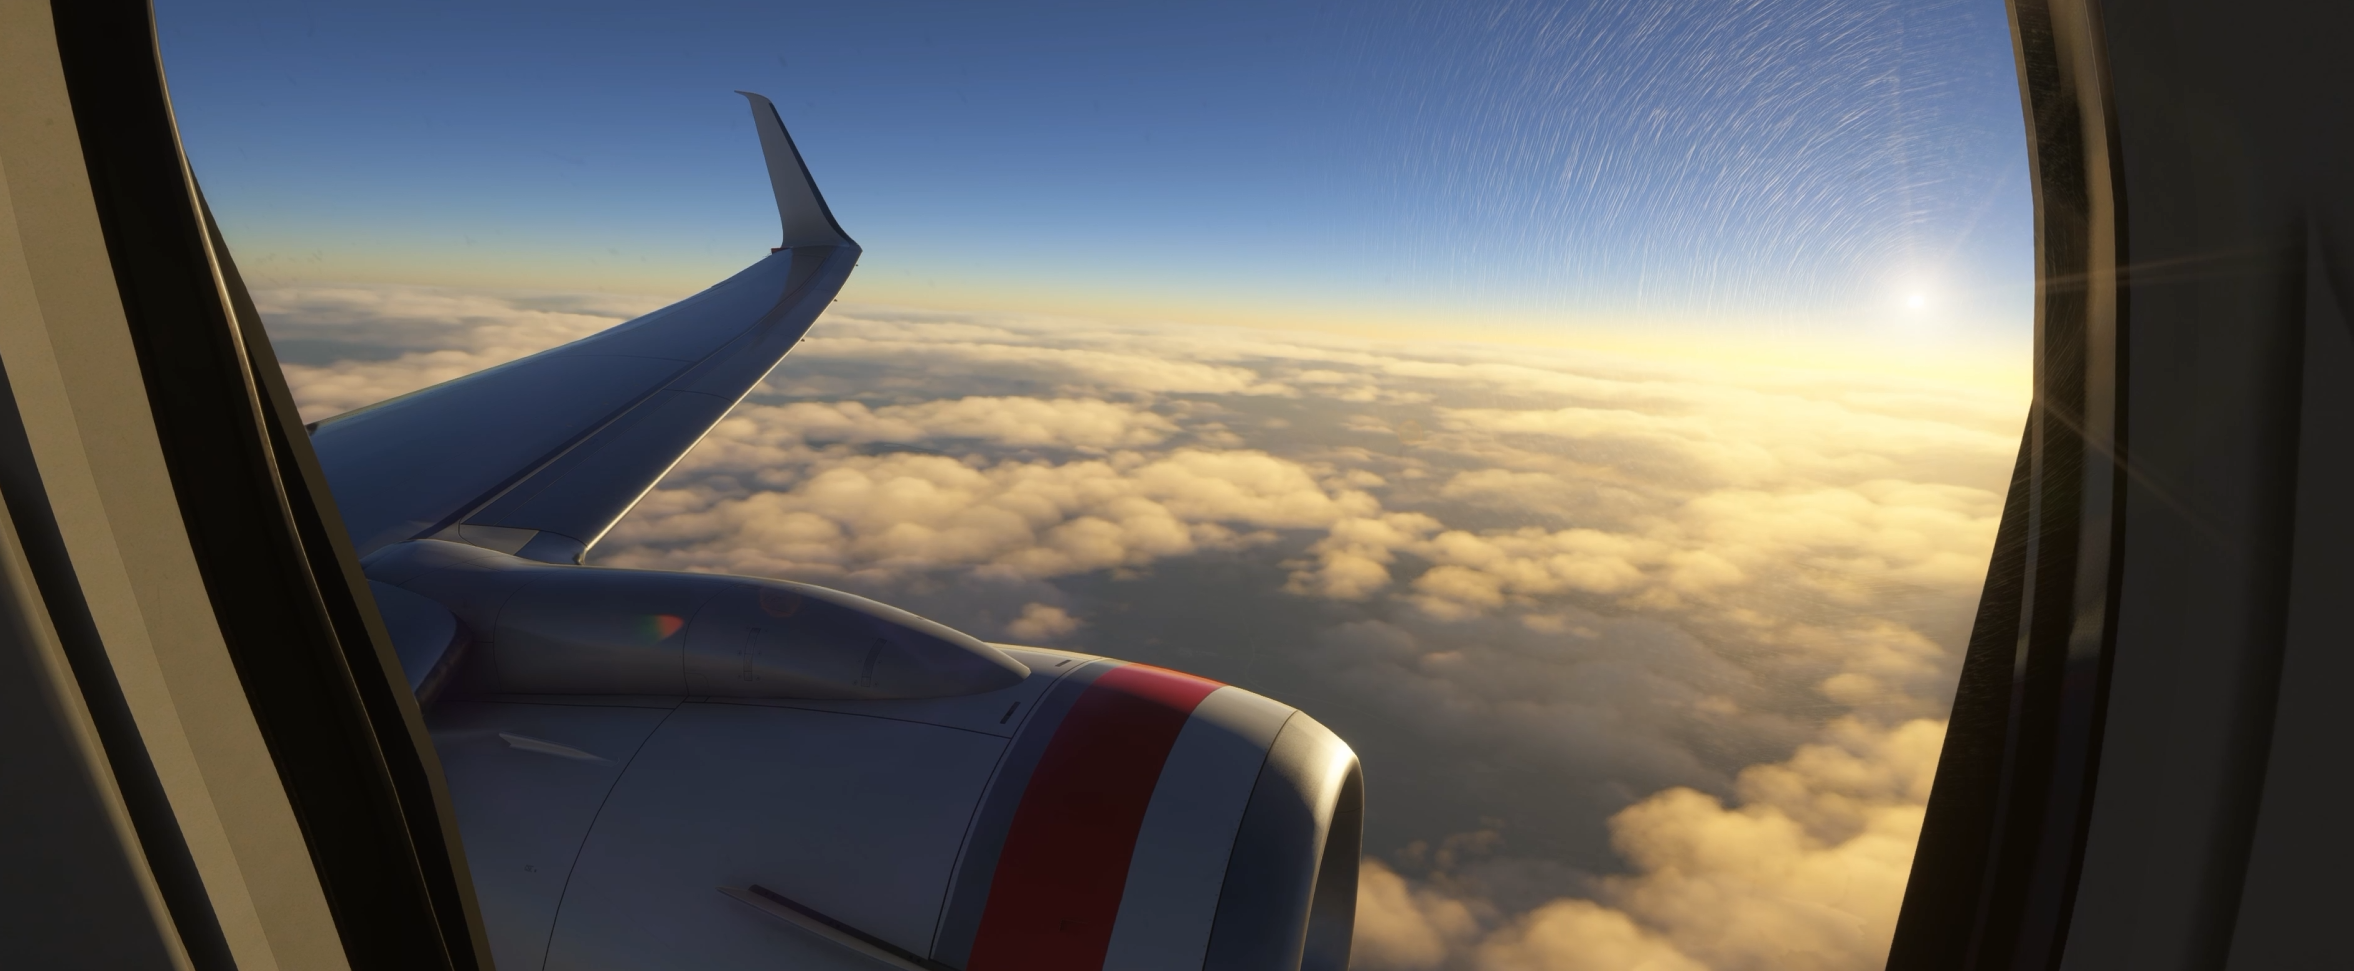
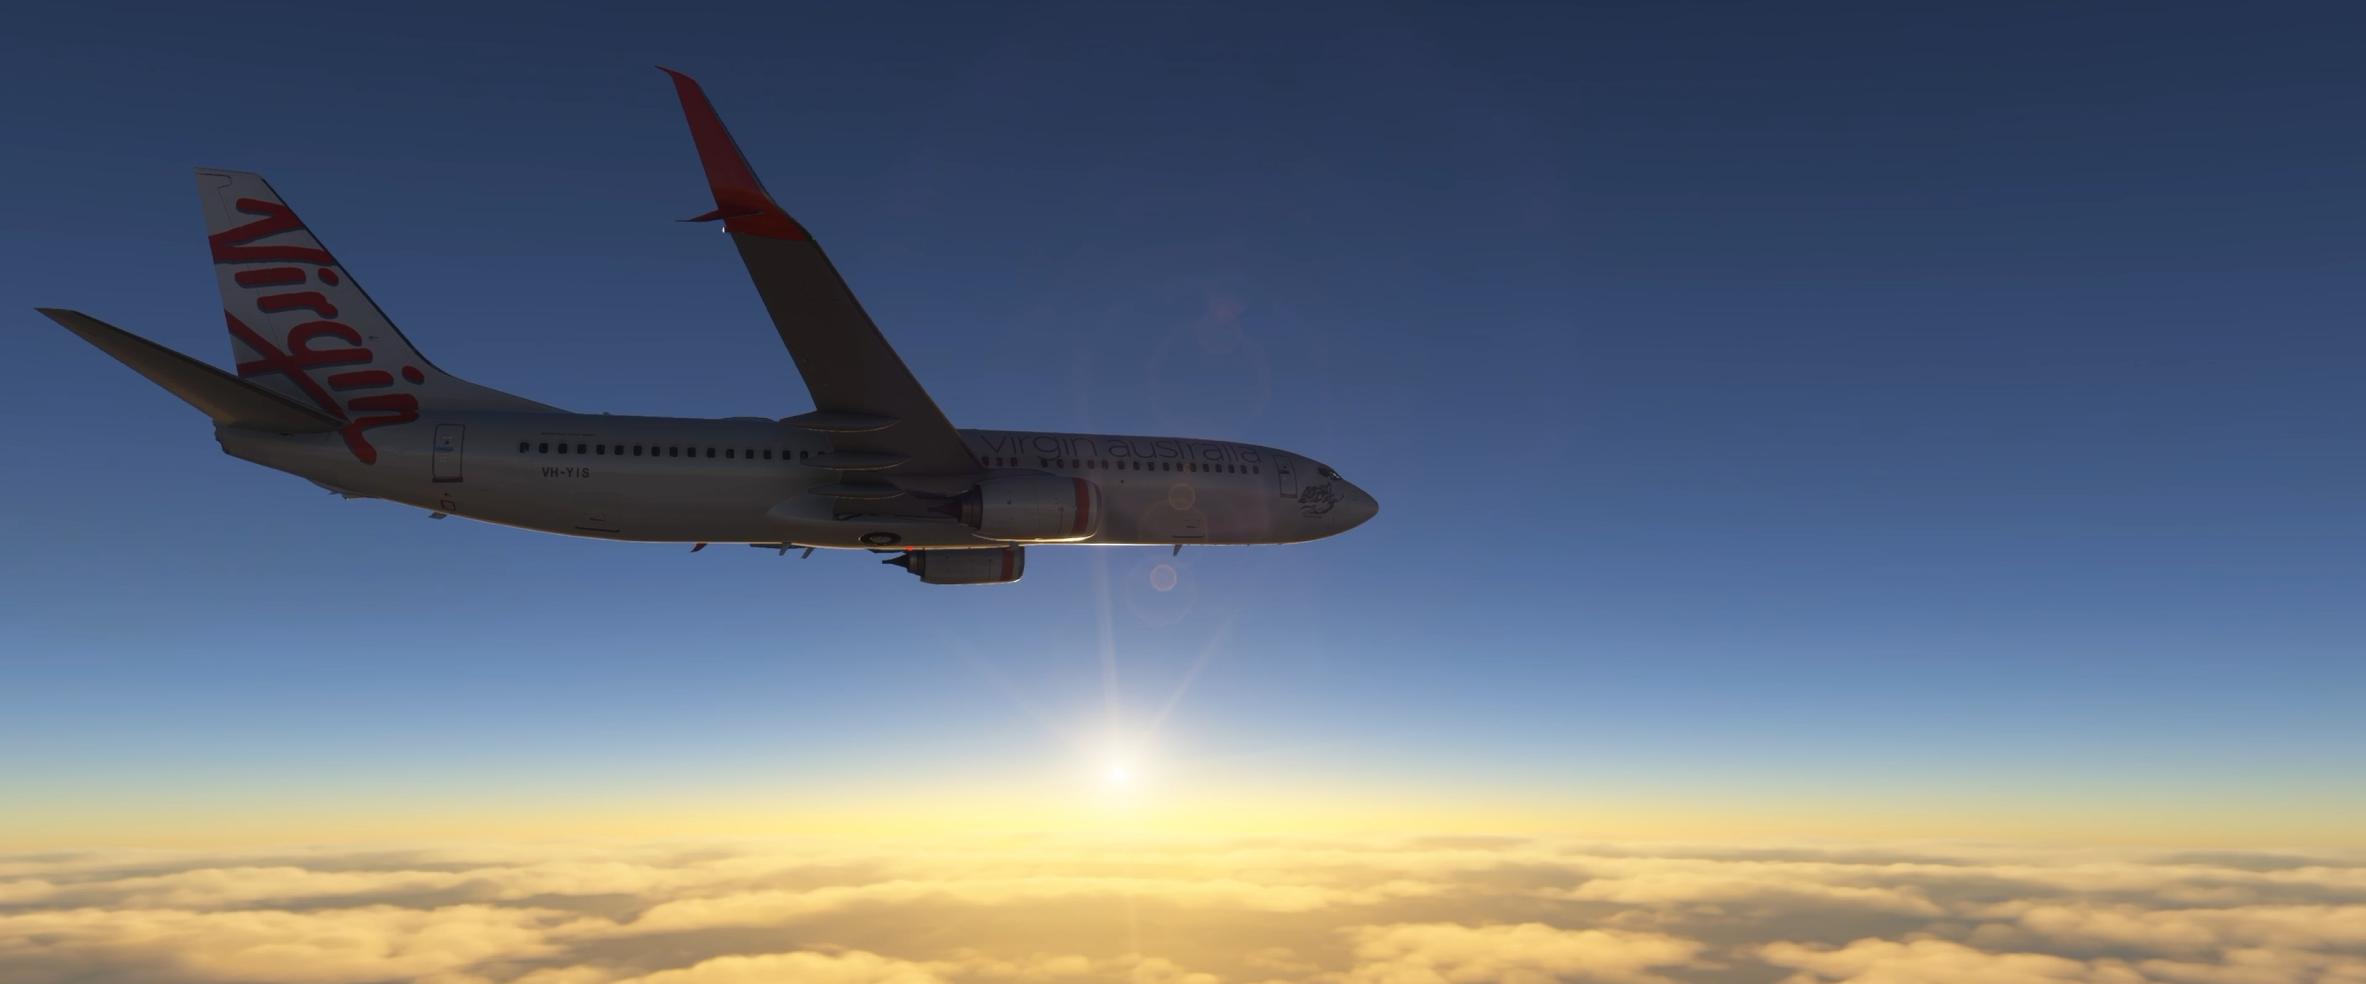
ChasePlane passenger wing view above clouds in Microsoft Flight Simulator 2024

There are plenty of flight simulator add-ons that I’ve purchased over the years. Some are excellent, some are average, and some end up sitting quietly on my hard drive after the initial excitement wears off.

ChasePlane is different.

It is one of the few add-ons that has become part of my normal flying routine. In fact, I use ChasePlane on every flight. Whether I’m flying a short domestic route, a long-haul airline flight, or simply exploring a scenic area in Microsoft Flight Simulator 2024, ChasePlane is always running.

That alone probably tells you how highly I rate it.

What makes ChasePlane special isn’t that it adds a new aircraft, airport, weather system, or mission. Instead, it changes something that we interact with constantly during every flight: the camera system.

At first glance, that might not sound particularly exciting. After all, MSFS already includes cameras. Why would anyone need another camera add-on?

That was exactly what I wondered before I started using it.

Now, after countless flights, I honestly wouldn’t want to go back.

What Is ChasePlane?

ChasePlane is an advanced camera system for Microsoft Flight Simulator that replaces and enhances many aspects of the default camera experience.

Instead of relying solely on the built-in camera controls, ChasePlane allows you to create, organise, save, and switch between custom camera views quickly and easily.

You can create views inside the cockpit, outside the aircraft, on the wings, in passenger positions, underneath the aircraft, or virtually anywhere else you can imagine.

More importantly, those views become easy to access during flight.

Rather than constantly moving cameras around manually, you can jump instantly to views that you’ve already configured.

That may sound like a small thing, but once you’ve experienced it, it becomes difficult to imagine flying without it.

Why I Bought ChasePlane

Like many simmers, I initially focused on aircraft, scenery, and weather add-ons. Camera systems weren’t really on my radar at first, but ChasePlane eventually caught my attention for a few very practical reasons.

  • I wanted more natural camera movement.
  • I wanted better ways to enjoy scenery during a flight.
  • I wanted easier access to left and right wing views.
  • I wanted smoother external aircraft views for videos.
  • I wanted the simulator to feel more immersive, not just more complicated.

Eventually I started seeing more and more videos where people were using ChasePlane, and I began to notice how natural and fluid their camera movements looked compared to the default simulator views.

I also wanted better ways to enjoy the scenery during flights.

Microsoft Flight Simulator 2024 is an incredibly beautiful simulator. Sometimes the scenery is every bit as impressive as the aircraft itself.

I found myself wanting to spend more time looking outside the aircraft rather than remaining fixed in the cockpit for entire flights.

That’s what eventually convinced me to give ChasePlane a try.

Once I did, I quickly realised that it wasn’t simply another camera utility. It genuinely changed how I experienced the simulator.

The Difference Between Flying And Experiencing A Flight

This might sound a little strange at first, but I think there’s a difference between flying a flight and experiencing a flight.

Flying is about procedures, navigation, aircraft systems, and getting safely from one airport to another.

Experiencing a flight is about everything else:

  • Watching the wing flex during turbulence.
  • Seeing the sun rise over the horizon.
  • Enjoying a beautiful approach into a scenic airport.
  • Sitting back during cruise and appreciating the aircraft you’ve spent good money on.
  • Looking around naturally instead of being locked into one fixed view.

ChasePlane helps me do exactly that.

Instead of being locked into a handful of standard views, I can move around the aircraft naturally and enjoy the flight from different perspectives.

That flexibility adds a surprising amount of immersion.

Real Pilot Tip

As a real pilot, one of the things I enjoy most about ChasePlane is being able to look around the aircraft naturally and appreciate the flight from different perspectives. Real flying isn’t just about staring at instruments, and neither is flight simulation. Looking out over the wing, watching weather build in the distance, or simply enjoying the view is all part of the experience.

The Views I Use Most

One of the reasons I use ChasePlane on every flight is because certain views have become part of my normal routine.

Every simmer is different, but these are the views I personally use the most.

Left Wing View

If I had to choose my favourite ChasePlane view, the left wing view would probably be near the top of the list.

There is just something about looking out over the wing during a climb or descent that instantly creates the feeling of being on a real flight.

I often use this view shortly after takeoff.

Watching the runway disappear behind the aircraft while the wing cuts through the clouds is one of those simple pleasures that never seems to get old.

It’s also fantastic for enjoying scenery.

Flying around Australia, New Zealand, Alaska, or Europe from a wing view can be incredibly relaxing.

Sometimes I’ll spend several minutes simply enjoying the view.

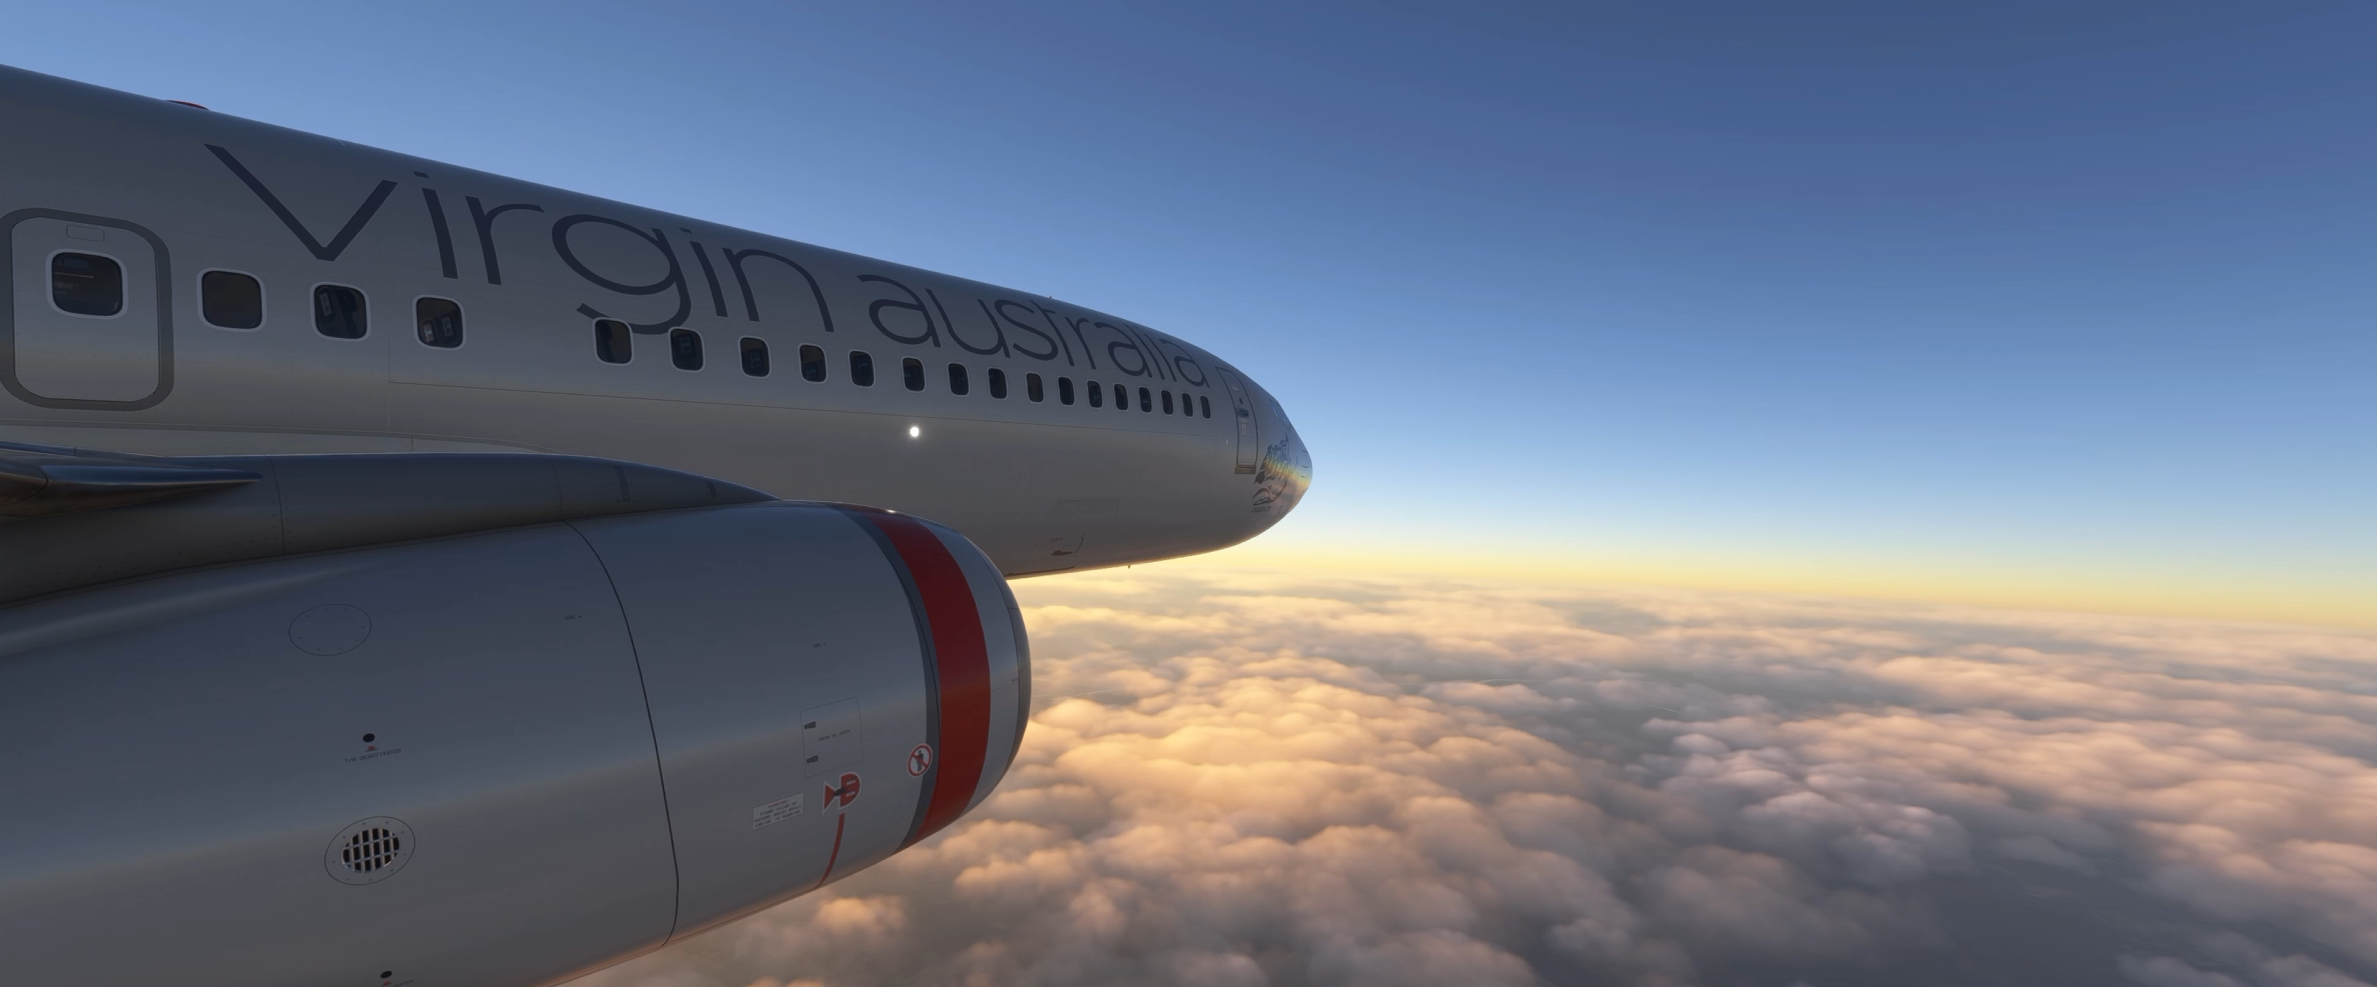
ChasePlane left side aircraft view above clouds in Flight Simulator 2024

Right Wing View

The right wing view gets just as much use.

Depending on the route, the lighting, and the direction of the aircraft’s turns, the right side often provides a completely different perspective.

I frequently switch between left and right wing views throughout a flight.

That ability to instantly change perspectives is one of the things that makes ChasePlane so enjoyable.

You’re no longer stuck looking through the same window for hours at a time.

Captain’s Seat View

Of course, I still spend most of my time flying from the cockpit.

ChasePlane allows me to position my captain’s seat view exactly where I want it.

That may not sound exciting, but having a comfortable, natural cockpit position makes a surprisingly large difference over the course of a long flight.

I like being able to quickly return to a view that feels right every time I load an aircraft.

Once you’ve dialled in your preferred cockpit position, it becomes second nature.

Cinematics™ Mode

This is probably the feature I enjoy most outside of the wing views.

One of the ChasePlane features I enjoy most is Cinematics™ Mode. It automatically presents the aircraft from a variety of camera angles and perspectives, allowing me to sit back and enjoy both the scenery and the aircraft during flight.

Sometimes I’ll simply sit back during cruise and watch the aircraft from various external perspectives while enjoying the scenery below.

Microsoft Flight Simulator 2024 can produce some truly spectacular visuals. The cloud formations, lighting effects, weather systems, coastlines, mountain ranges, cities and airports all look fantastic from outside the aircraft.

ChasePlane allows me to appreciate all of that.

Rather than staring at the same cockpit view for an entire flight, I can enjoy the aircraft itself as part of the experience.

There have been plenty of occasions where I’ve found myself simply watching the aircraft fly through beautiful weather while the camera slowly moves around it.

It’s difficult to explain until you’ve experienced it yourself, but it genuinely adds another dimension to flight simulation.

ChasePlane Cinematics Mode external aircraft view above clouds at sunrise

My Most-Used ChasePlane Views

  • Left wing view during climb and descent.
  • Right wing view when the scenery or light is better on that side.
  • Captain’s seat view for normal flying.
  • Cinematics™ Mode during cruise.
  • External views during pushback, taxi, and video recording.

Why ChasePlane Makes Videos Better

As someone who enjoys creating flight simulation content, ChasePlane has become one of my favourite tools.

Good camera work can completely transform a video.

You can have the most beautiful aircraft, the most detailed scenery, and the most realistic weather in the world, but if your camera work is poor, the final video will often feel flat.

ChasePlane gives you far greater control over how the aircraft is presented, especially for:

  • External fly-bys.
  • Wing views.
  • Passenger perspectives.
  • Taxi shots.
  • Departure sequences.
  • Arrival footage.
  • Cinematic cruise footage.

The result is a more professional-looking video that feels dynamic rather than static.

Even simple flights become more interesting when you can switch naturally between different camera angles.

For anyone creating YouTube content, I think ChasePlane is one of those add-ons that quickly proves its value.

It helps transform ordinary footage into something far more engaging.

It’s Not Just About Making Videos

One thing I should point out is that I use ChasePlane constantly even when I’m not recording.

That is probably the biggest compliment I can give it.

There are some tools that only get used when creating content.

ChasePlane isn’t one of them.

I use it because it makes flying more enjoyable.

Even if nobody was ever going to see the flight, I would still use it.

The ability to move naturally around the aircraft, enjoy the scenery, and appreciate the aircraft from different perspectives simply makes the simulator more immersive.

That benefit exists whether you’re recording a video or sitting quietly at home enjoying a flight.

Screenshots Become More Interesting

Although I primarily think of ChasePlane as a flying tool, it is also excellent for screenshots.

Flight simulation has become incredibly visual over the last few years.

Many aircraft look stunning. Many airports look stunning. The scenery itself can be breathtaking.

Having the ability to quickly position cameras exactly where you want them allows you to capture far better screenshots, especially during:

  • Sunrise departures.
  • Golden-hour arrivals.
  • Storm clouds in the distance.
  • Mountain ranges below.
  • Scenic coastal flights.
  • Aircraft showcase moments.

All of these situations become easier to capture when you have complete control over the camera system.

ChasePlane external aircraft screenshot above clouds in Microsoft Flight Simulator 2024

Useful Cockpit Views

Although many people focus on the external views, the cockpit views are equally important.

I like being able to create dedicated views for specific areas of the aircraft.

Depending on what I’m flying, that might include:

  • The overhead panel.
  • The autopilot controls.
  • The FMC or CDU.
  • The throttle quadrant.
  • The radio stack.
  • Engine instruments.

Being able to jump directly to these views saves time and feels far more efficient than manually repositioning the camera every time.

This becomes particularly useful when flying more complex aircraft.

Instead of fumbling around with camera controls, everything is exactly where you expect it to be.

How ChasePlane Improves Different Phases Of Flight

At The Gate

I often start using ChasePlane before the aircraft even moves.

It’s nice to be able to look around the aircraft while loading passengers, fuel, or cargo.

External views help create the feeling that you’re preparing for a real flight rather than simply loading into a simulator.

Pushback And Taxi

This is another phase where ChasePlane shines.

I enjoy watching the aircraft during pushback and taxi operations.

Being able to move outside the cockpit gives you a much better appreciation of the aircraft’s size and surroundings.

Large airports become far more interesting when viewed from different angles.

Takeoff

Takeoff remains one of my favourite parts of any flight.

Most of the time I’ll be in the cockpit during the takeoff roll itself.

However, once safely airborne, I often move to a wing view.

Watching the aircraft climb away from the airport from a wing perspective is one of the reasons I enjoy ChasePlane so much.

Cruise

This is where Cinematics™ Mode really comes into its own.

Instead of spending hours staring at instruments, I can occasionally sit back and enjoy the flight.

Watching the aircraft fly through the virtual world while scenery passes below adds a lot to the overall experience.

It’s relaxing, immersive, and simply enjoyable.

Approach And Landing

Approach is another phase where I use multiple views.

The cockpit remains important, of course, but wing views during descent can be spectacular.

Watching an airport slowly appear beneath the wing as you descend through cloud layers never seems to lose its appeal.

After landing, external views once again become useful during taxi back to the gate.

Comparing ChasePlane To The Default Camera System

This isn’t intended to be a criticism of the default MSFS camera system. Microsoft Flight Simulator already includes a reasonably capable camera setup, and you can certainly fly perfectly well without ChasePlane.

The question isn’t whether the default cameras work. The question is whether ChasePlane makes the experience better.

For me, the answer is unquestionably yes.

That alone adds significant value.

ChasePlane aircraft underside external view above clouds in Flight Simulator 2024

Does ChasePlane Affect Performance?

One question that often comes up is whether ChasePlane has any noticeable effect on simulator performance.

Speaking purely from my own experience, it has never been something I’ve worried about.

I use ChasePlane on every flight and have done so for a long time. If it was causing major performance issues, it would have been one of the first things I noticed.

Obviously every system is different, and simulator performance is influenced by many factors including aircraft complexity, scenery, weather, AI traffic, graphics settings and hardware.

However, ChasePlane has never been one of those add-ons that made me think twice about running it.

For me, the benefits far outweigh any concerns.

Good To Know

From my own experience, ChasePlane has never been an add-on that I worry about from a performance perspective. Every system is different, but I run it on every flight because the improvement to immersion far outweighs any concerns I might have had.

Who I Think ChasePlane Is Best Suited For

Not every add-on is for every simmer.

If you spend 100% of your time locked in the cockpit and never use external views, you may not appreciate ChasePlane as much as I do.

On the other hand, if you enjoy the overall experience of flight simulation, I think it becomes much more compelling.

I believe ChasePlane is particularly well suited to:

  • Simmers who enjoy wing views.
  • People who like creating videos.
  • Screenshot enthusiasts.
  • Airliner pilots.
  • General aviation pilots.
  • Scenic flight enthusiasts.
  • Virtual airline pilots.
  • Anyone who enjoys cinematic camera perspectives.

In short, if you enjoy looking at your aircraft as much as flying it, ChasePlane will probably appeal to you.

ChasePlane front aircraft external view above clouds in Microsoft Flight Simulator 2024

Common Mistakes New ChasePlane Users Make

One mistake I often see is people trying to create too many camera views immediately.

When you first install ChasePlane, it can be tempting to spend hours building dozens of custom views.

My advice is much simpler.

Start with the views you know you’ll actually use:

  • Captain’s seat.
  • Left wing view.
  • Right wing view.
  • One external aircraft view.
  • One useful cockpit panel view.
  • Cinematics™ Mode.

Once those become part of your normal workflow, you can gradually add more views over time.

That’s exactly how I approached it.

Frequently Asked Questions About ChasePlane

Do I need ChasePlane to enjoy MSFS 2024?

No. Microsoft Flight Simulator 2024 is already an excellent simulator without it. However, I personally find the experience more enjoyable with ChasePlane installed.

Can I use ChasePlane with airliners?

Absolutely. Many of my favourite ChasePlane moments have been in airliners, particularly using wing views during climb and descent.

Can I use ChasePlane with general aviation aircraft?

Yes. The flexibility of the camera system works equally well across a wide range of aircraft types.

Is ChasePlane only useful for content creators?

Not at all. Although it is excellent for videos and screenshots, I use it constantly when I’m simply flying for my own enjoyment.

Does ChasePlane take a long time to learn?

I don’t think so. Like any new tool, there is a short learning period, but once you’ve configured your favourite views it becomes very straightforward.

Why I Continue Using ChasePlane

After all this time, the simplest answer is probably the most accurate one.

I continue using ChasePlane because it makes my flights more enjoyable.

That’s really what it comes down to:

  • Every flight feels more immersive.
  • The aircraft feels more alive.
  • The scenery becomes more enjoyable.
  • The simulator becomes more cinematic.
  • I can appreciate the aircraft I’ve purchased from angles that simply aren’t as convenient with the default camera system.

Most importantly, it has become completely integrated into the way I fly.

I no longer think about whether I should start ChasePlane before a flight.

I simply start it because it’s part of my simulator setup.

My Favourite ChasePlane Moment

If I had to choose my favourite use of ChasePlane, it would probably be those moments shortly after takeoff when the aircraft is climbing away from the airport.

I’ll often switch to a wing view and simply enjoy the scene.

  • The runway slowly disappears behind the aircraft.
  • The city shrinks below.
  • The wing catches the sunlight.
  • The aircraft settles into its climb.

It’s a simple moment, but it captures exactly why I enjoy flight simulation.

ChasePlane helps me experience those moments more naturally.

Key Takeaways

  • I use ChasePlane on every flight.
  • My favourite views are the left wing, right wing, and ChasePlane’s Cinematics™ Mode.
  • It improves immersion throughout every phase of flight.
  • It’s excellent for videos and screenshots.
  • I find it easier and more enjoyable than relying solely on the default camera system.
  • It’s one of the few add-ons that has become a permanent part of my simulator setup.

Final Thoughts

There are plenty of add-ons that I enjoy using, but only a handful have become permanent parts of my simulator setup.

ChasePlane is one of them.

I use it on every flight.

I use it for videos.

I use it for screenshots.

I use it for wing views.

I use it for Cinematics™ Mode.

I use it because it makes Microsoft Flight Simulator 2024 more enjoyable.

Could I fly without it?

Of course.

Would I want to?

Probably not.

For me, ChasePlane has become one of those rare add-ons that quietly changes the way you experience the simulator. Once it becomes part of your flying routine, it’s difficult to imagine going back.

If you’re the type of simmer who enjoys immersing yourself in the flight rather than simply operating the aircraft, ChasePlane is well worth a look.

For my own flying, it’s an add-on I wouldn’t want to be without.

MSFS Addons Linker: The Easy Way To Keep Your Simulator Organised

MSFS addons linker on a flight simulation setup with aircraft and gaming equipment.

MSFS Addons Linker. If you have been using Microsoft Flight Simulator for a while, you probably know exactly how quickly the Community folder can get out of hand.

At first, it all seems simple enough. You install a few aircraft, maybe a couple of scenery add-ons, some liveries, a utility or two, and everything works nicely. Then one day you look at your simulator setup and realise you have add-ons everywhere. Aircraft, airports, scenery, GSX profiles, liveries, utilities, and all sorts of bits and pieces sitting in different folders.

That is where MSFS Addons Linker becomes incredibly useful.

This article is written for simmers who want a cleaner, more organised way to manage their Microsoft Flight Simulator add-ons, especially if you are using MSFS 2024 or still running MSFS 2020. It is not really about making the simulator magically faster, although it may help in some cases. For me, the big advantage is control. I like knowing what is active, what is not active, and where everything is stored.

Quick Answer:
MSFS Addons Linker lets you store your add-ons outside the Community folder and activate only the ones you want to use. It keeps your simulator cleaner, easier to manage, and much less confusing as your add-on collection grows.

What Is MSFS Addons Linker?

MSFS Addons Linker is a free utility that helps you manage your Microsoft Flight Simulator add-ons without having to keep everything permanently inside the Community folder.

Instead of dumping every aircraft, airport, scenery pack, livery, and utility directly into the Community folder, you store your add-ons somewhere else on your computer. Addons Linker then creates links to the add-ons you want active.

Microsoft Flight Simulator still treats those add-ons as if they were in the Community folder, but the actual files can be stored in a much neater folder structure elsewhere.

For example, you might have your add-ons stored like this:

  • D:\MSFS Addons\Aircraft
  • D:\MSFS Addons\Airports
  • D:\MSFS Addons\Scenery
  • D:\MSFS Addons\Liveries
  • D:\MSFS Addons\Utilities
  • D:\MSFS Addons\GSX Profiles

Then, when you want to fly, you simply tick the add-ons you want to use.

Why I Think Addons Linker Is Worth Using

The biggest reason I like Addons Linker is that it brings order to what can easily become a messy simulator setup.

Flight simulation add-ons are wonderful, but they can quickly become overwhelming. In one week, you will install a new aircraft. The next week, you add a scenery package. Then you add a few liveries. Then a few airports. Before long, you have no idea what is active, what is old, what is broken, or what might be causing a problem.

Addons Linker makes the whole thing easier to manage.

Practical Tip:
Do not wait until your Community folder is completely out of control. Addons Linker is much easier to set up while your add-on collection is still manageable.

Does Addons Linker Make MSFS 2024 Load Faster?

This is probably one of the most common questions, and the honest answer is: it depends.

If you have a lot of add-ons permanently active, reducing the number of add-ons loaded by the simulator may help with loading times. If your setup is already fairly clean, you may not notice much difference.

For me, the main reason to use Addons Linker is not just speed. It is an organisation.

I would rather have a clean setup where I know exactly what is being loaded than have hundreds of add-ons sitting in the Community folder all the time. Even if the loading time difference is small, the management benefit is still worth it.

How Addons Linker Works

Addons Linker works by using links between your add-on storage folders and the simulator’s Community folder.

That may sound a little technical, but in normal use, it is quite simple.

Your add-ons live in your organised storage folder. When you tick an add-on inside Addons Linker, the program creates a link inside the Community folder. When you untick it, the link is removed.

The original add-on remains safe in your storage location.

This means you are not constantly copying and deleting large files. You are simply activating and deactivating links.

[IMAGE 2 – SUPPORTING IMAGE]

How To Set Up MSFS Addons Linker

Step 1: Create A Main Add-ons Folder

The first thing I would do is create one main folder where all your add-ons will live.

For example:

D:\MSFS Addons

If you have a second SSD, that can be a very good place to store them. Add-ons can take up a lot of space, especially aircraft, scenery, and high-quality airports.

Step 2: Create Simple Categories

Inside your main add-ons folder, create a few simple categories.

Something like this works well:

  • Aircraft
  • Airports
  • Scenery
  • Liveries
  • Utilities
  • GSX Profiles
  • Test Add-ons

I would not overcomplicate it at the start. The goal is to make things easier, not create another system that becomes a job in itself.

Step 3: Move Your Add-ons Out Of The Community Folder

Once your storage folders are ready, move your add-ons from the Community folder into your new organised folders.

This is the part where you need to be a little careful.

Make sure you are moving the correct add-on folder, not an extra parent folder that contains the actual package folder inside it. If the folder structure is wrong, the add-on may not appear in the simulator.

Common Mistake:
One of the biggest mistakes is linking the wrong folder level. If an aircraft or airport does not appear in MSFS, check that the actual package folder is being linked, not a folder above it.

Step 4: Point Addons Linker To Your Add-ons Folder

Open Addons Linker and tell it where your add-ons are stored.

Once it scans the folder, you should see your add-ons appear in the program. From there, you can tick or untick the items you want active.

Step 5: Set Your Community Folder Location

Addons Linker also needs to know where your Microsoft Flight Simulator Community folder is located.

This location can vary depending on whether you installed MSFS through Microsoft Store, Xbox app, Steam, or a custom installation location.

Once Addons Linker knows where the Community folder is, it can create the links properly.

Using Profiles In Addons Linker

Profiles are one of the best parts of Addons Linker.

Instead of manually ticking individual add-ons every time, you can create different profiles for different types of flying.

For example, you could create:

This is very handy if you fly different types of aircraft and routes.

If I am flying the PMDG 737 between major airports, I do not need a pile of bush strips, small GA liveries, or scenery packages from the other side of the world loaded. I can just activate what suits that flight.

Using Addons Linker With MSFS 2024

MSFS 2024 has changed quite a few things compared with MSFS 2020, but add-on management is still very important.

Some users will have add-ons for both simulators, while others are slowly moving from MSFS 2020 to MSFS 2024. That can become confusing if you do not keep things organised.

My advice is to keep MSFS 2020 and MSFS 2024 add-ons clearly separated if you use both simulators.

For example:

  • D:\MSFS 2020 Addons
  • D:\MSFS 2024 Addons

This helps prevent accidentally linking the wrong add-ons to the wrong simulator.

Troubleshooting Addons Linker Problems

Add-on Not Showing In MSFS

If an add-on does not appear in the simulator, check the folder structure first.

Open the add-on folder and look for files such as:

  • manifest.json
  • layout.json

These files usually need to be inside the folder that is being linked.

Red Items In Addons Linker

If you see red entries inside Addons Linker, it usually means the program cannot find the folder it expects.

This can happen if:

  • The add-on folder was moved
  • The folder was renamed
  • The drive letter changed
  • The add-on was deleted
  • The original path is no longer valid

The fix is usually to check the folder location and correct the path.

PMDG Aircraft Not Appearing

PMDG aircraft can be a little different from simple scenery add-ons because some parts may be installed outside the normal Community folder.

If your PMDG aircraft does not appear, do not immediately blame Addons Linker. First, check that the aircraft is properly installed through the correct PMDG installer or operations centre, and then check whether any Community-folder components are properly linked.

Changes Not Taking Effect

If you tick or untick add-ons while MSFS is already running, you may need to close and restart the simulator before the change is properly recognised.

As a general rule, I prefer to set up my add-ons first, then launch the simulator.

Real Pilot Tip

Real Pilot Tip:
In real-world flying, the organisation reduces workload. The same applies in the simulator. If your setup is organised before the flight, you spend less time troubleshooting and more time actually flying.

Who Should Use Addons Linker?

I think Addons Linker is most useful for anyone who has moved beyond a very basic simulator setup.

You should seriously consider using it if you have:

  • Lots of aircraft add-ons
  • Several payware airports
  • Large scenery packs
  • Many liveries
  • GSX profiles
  • Both MSFS 2020 and MSFS 2024 were installed
  • A separate SSD for simulator add-ons

If you only have two or three add-ons, you may not need it yet. But once your collection starts growing, Addons Linker becomes one of those tools that makes everything feel more under control.

Buying Considerations

Addons Linker itself is free, but it may change how you think about storage.

If you have a growing simulator setup, a dedicated SSD can be very useful. Flight simulator add-ons can take up a surprising amount of space, especially detailed scenery and high-quality aircraft.

If I were setting things up from scratch, I would seriously consider having a dedicated drive just for simulator add-ons. It keeps the main Windows drive cleaner and makes backups easier.

Frequently Asked Questions

Is MSFS Addons Linker free?

Yes, Addons Linker is free and widely used by the Microsoft Flight Simulator community.

Does Addons Linker delete my add-ons?

No. It does not delete your add-ons. It simply creates links to them from the Community folder.

Can I use Addons Linker with MSFS 2024?

Yes, it can be used with MSFS 2024, provided you set the correct folders and paths.

Will Addons Linker fix broken add-ons?

No. If an add-on itself is broken or not compatible with your simulator version, Addons Linker will not fix that. It only helps manage the add-ons.

Can I still install add-ons normally?

Yes, but I prefer to keep things organised through Addons Linker once the system is set up.

Final Thoughts

MSFS Addons Linker is one of those utilities that may not sound exciting at first, but once you start using it, it becomes hard to imagine managing a large simulator setup without it.

For me, the real benefit is not just about loading times. It is about keeping control of the simulator.

I like knowing what is active. I like being able to switch profiles. I like keeping my Community folder clean. And I like being able to test add-ons without turning the whole simulator setup into a guessing game.

If you are serious about Microsoft Flight Simulator 2024, or even if you are still using MSFS 2020, Addons Linker is well worth learning.

Summary

MSFS Addons Linker helps keep your Microsoft Flight Simulator add-ons organised by storing them outside the Community folder and linking only the ones you want active. It is especially useful for simmers with large add-on collections, multiple aircraft, scenery packages, liveries, and MSFS 2024 setups. It may help reduce clutter, make troubleshooting easier, and give you much better control over your simulator.

Why I Haven’t Bought an OLED Monitor for Flight Simulator Yet

Flight simulator setup in home office

I’ve been thinking about upgrading my monitor for Microsoft Flight Simulator for quite some time now.

Like many simmers, I’ve watched countless YouTube videos, read forum discussions, and spent more time than I care to admit looking at OLED monitors online. Every time I see those deep blacks, vibrant colours, and incredible contrast, I find myself wondering whether now is finally the time to upgrade.

Yet here I am, still flying on my trusty 34-inch ultrawide monitor.

This isn’t a review of OLED monitors, and it certainly isn’t a buying guide. Instead, it’s simply my thoughts as a flight simmer who is genuinely considering an OLED upgrade but hasn’t quite convinced himself to spend the money yet.

Quick Answer

OLED monitors can look absolutely stunning in Microsoft Flight Simulator thanks to their deep blacks, outstanding contrast, and vibrant colours. However, they remain expensive, and concerns about burn-in, long-term reliability, and overall value mean they are not automatically the best choice for every simmer.

My Current Monitor Still Does a Good Job

Before talking about OLED, it’s only fair to talk about what I’m currently using.

My monitor is a Samsung 34-inch ultrawide display, and for Microsoft Flight Simulator, it does a surprisingly good job. The extra width helps with immersion, the image quality is perfectly respectable, and it gives me plenty of screen space for flight planning, charts, and simulator windows.

In truth, there is nothing wrong with it.

That’s one of the reasons I’ve delayed upgrading. It’s much easier to justify replacing something that is failing than replacing something that continues to perform well.

What Attracts Me to OLED?

The answer is simple.

OLED monitors look incredible.

Whenever I watch a good flight simulator video filmed on an OLED display, the image immediately catches my attention.

What stands out most is the contrast.

  • Blacker blacks
  • Brighter highlights
  • Richer colours
  • More depth in cloud scenes
  • Better sunrise and sunset visuals
  • Improved night flying atmosphere

Microsoft Flight Simulator is one of the most visually impressive games ever created, and OLED seems perfectly suited to showing off those visuals.

Pete’s Take

Every time I see a good OLED demonstration, I start reaching for my wallet. Then I see the price tag and quickly put my wallet away again.

The Problem Is the Price

This is where things start becoming difficult.

A decent OLED monitor isn’t cheap.

Depending on the model, many of the displays I’m interested in cost somewhere between $1,500 and 2,500 Australian dollars.

That’s a significant amount of money.

For that sort of investment, I need to be convinced that the improvement will be genuinely worthwhile.

It’s not enough for something to be better. It has to be enough better to justify spending the money.

Home flight simulator cockpit setup with triple monitors, flight controls, and dedicated PC

Burn-In Still Concerns Me

Even though OLED technology has improved considerably, burn-in remains one of the concerns that keeps appearing in discussions.

Flight simulators often display static information for long periods.

  • Instrument panels
  • Toolbar icons
  • Navigation displays
  • Menu systems
  • Windows taskbars

Manufacturers have introduced various protections to reduce the risk, but the concern still lingers in the back of my mind.

If I’m spending thousands of dollars on a monitor, I want confidence that it will still be performing well several years down the track.

Worth Knowing: Most modern OLED monitors include built-in protection systems designed to minimise burn-in risk, but many buyers still prefer to see several years of real-world usage before feeling completely comfortable.

What Other Simmers Are Saying

The opinions seem divided.

Some simmers claim OLED was the single biggest visual upgrade they have ever made.

Others acknowledge that it looks fantastic but feel the difference isn’t large enough to justify the price.

That makes the decision even harder.

When everyone agrees on something, buying decisions are easy. When opinions are split, it becomes much more difficult to know what to do.

Would OLED Improve My Flying?

No.

And that’s worth remembering.

An OLED monitor won’t make me a better pilot.

It won’t improve my landings.

It won’t help me manage an approach any better.

What it will do is improve the visual experience.

That might sound obvious, but it’s important because sometimes we can convince ourselves that a hardware upgrade will transform everything.

Often it simply makes an already enjoyable hobby look even better.

What Would Convince Me to Buy One?

There are several things.

Lower Prices

OLED prices have already started falling, and I expect that trend to continue.

Long-Term Reliability Data

The more years OLED monitors spend in the market, the more confidence buyers gain.

Better Warranties

A strong warranty helps remove some of the uncertainty.

Seeing One in Person

Videos are useful, but nothing beats seeing a monitor with your own eyes.

Real Pilot Tip

One thing I’ve learned from both real-world flying and flight simulation is that the most expensive equipment isn’t always the most important.

A good monitor is nice to have, but good flying, good planning, and enjoying the experience matter far more than having the latest hardware.

Sometimes it’s worth appreciating what you already have while waiting for technology to mature further.

Common Mistakes When Shopping for a Flight Simulator Monitor

  • Focusing only on screen size.
  • Ignoring warranty coverage.
  • Buying based solely on YouTube videos.
  • Assuming more expensive automatically means better.
  • Not considering desk space.
  • Forgetting about GPU requirements.

Frequently Asked Questions

Is OLED worth it for Microsoft Flight Simulator?

For many simmers, yes. The visual quality can be exceptional. Whether it’s worth the cost depends on your budget and expectations.

Is burn-in still a problem?

Modern OLED displays are much better than early generations, but it remains a concern for some buyers.

What size monitor is best for flight simulation?

That depends on your setup, but many simmers prefer ultrawide monitors between 34 and 49 inches.

Would I buy an OLED today?

At the moment, I’m still undecided.

My Thoughts Right Now

OLED is clearly an impressive technology.

Every time I look at one, I understand why so many people love them.

At the same time, I’m not convinced that rushing out and spending thousands of dollars is necessarily the right move for me right now.

My current monitor still performs well, and until I’m completely comfortable with the value proposition, I’ll probably keep flying with what I already have.

That may change tomorrow, next month, or next year.

For now, the research continues.

Summary

If you’re considering an OLED monitor for Microsoft Flight Simulator, you’re certainly not alone. I’ve been looking at them myself for quite some time.

They offer stunning image quality and can make the simulator look spectacular. However, they’re still expensive, and there are legitimate questions about long-term value, reliability, and whether the improvement justifies the cost.

For now, I’m still sitting on the fence. But if I eventually take the plunge and buy one, I’ll return to this article and share my real-world experience after living with it for a while.

Future Update

If I eventually purchase an OLED monitor, I’ll update this article with my impressions, what I liked, what I didn’t like, and whether I believe the upgrade was worth the money for Microsoft Flight Simulator. Stay tuned.

How to Set Up an Xbox Controller for Cinematic Camera Shots in MSFS 2024

Optimized Xbox controller setup for realistic flight simulation in MSFS 2024.

the base.

Last updated: June 2026

MSFS 2024 Xbox controller camera setup. If you’re after smoother cinematic camera shots in Microsoft Flight Simulator 2024, an Xbox controller is one of the best and easiest ways to go. You can still fly with your normal joystick, yoke, throttle, or pedals, but use the Xbox controller purely for camera movement, drone shots, slow pans, screenshots, and video recording.

I’ve been looking at getting back into making flight simulator videos again, and one thing that really stands out in good MSFS videos is the camera work. Smooth pans, gentle fly-bys, slow cockpit movements, and steady external shots can make a simple flight look far more professional.

The good news is that you don’t need a complicated setup to start. A standard wireless Xbox controller can work really well for cinematic camera control in MSFS 2024.

Important Update From My Own Testing

If you use ChasePlane, be aware that it can interfere with the normal MSFS camera controls. In my own testing, the Xbox controller kept acting like an aircraft controller instead of a camera controller, even though the drone camera settings looked correct.

Once I disabled ChasePlane, the controller started working properly with the MSFS camera system. So if your Xbox controller seems to be moving the aircraft instead of the camera, ChasePlane should be one of the first things you check.

Why Use an Xbox Controller for MSFS Camera Shots?

For normal flying, I still prefer proper flight controls. A joystick, yoke, throttle, and pedals feel much more natural for actually controlling the aircraft. But for camera work, an Xbox controller makes a lot of sense.

The thumbsticks are ideal for slow, smooth movement. Instead of stabbing at keyboard keys and getting sudden jumps, you can gently ease the camera around the aircraft or through the cockpit.

An Xbox controller is especially useful for:

  • Slow cinematic pans around the aircraft
  • Drone camera shots
  • Smooth external views
  • Cockpit detail shots
  • Take-off and landing fly-bys
  • Scenic route videos
  • YouTube showcase footage

For me, the idea is simple: fly the aircraft with my normal flight sim controls, then use the Xbox controller as a separate camera tool.

What You Need

You can use the Xbox controller wired with a USB cable if you prefer. In fact, if you have Bluetooth connection issues, using a cable is often the simplest option.

Step 1: Connect the Xbox Controller to Windows

Bluetooth Method

  1. Turn on the Xbox controller by pressing the Xbox button.
  2. Hold the small pairing button on the controller until the Xbox light starts flashing.
  3. On your PC, open Settings.
  4. Go to Bluetooth & devices.
  5. Select Add device.
  6. Choose Bluetooth.
  7. Select your Xbox controller when it appears.
  8. Wait until Windows says the controller is connected.

USB Cable Method

  1. Plug the Xbox controller into the PC using a USB cable.
  2. Wait for Windows to recognise it.
  3. Open MSFS 2024 once the controller is detected.

If you are setting this up for video work, I would probably use the most reliable connection possible. If Bluetooth behaves itself, that is fine. If it drops out or feels delayed, use a cable.

Step 2: Check the Controller in MSFS 2024

  1. Go to Options.
  2. Open Controls.
  3. Look for the Xbox controller in the list of connected devices.
  4. Select the controller.
  5. Check whether MSFS has assigned a default profile.

In many cases, MSFS will recognise the Xbox controller automatically. If it does, you can start by testing the default assignments before changing anything.

Xbox Controller Setup for FS2024 settings

Step 3: Create a Separate Camera Profile

This is very important. I do not recommend using the same Xbox controller profile for both flying and camera work if you already have proper flight controls.

Create a separate profile and name it something simple, such as:

  • Cinematic Camera
  • Video Camera
  • Drone Camera Xbox

The reason is simple. You do not want the Xbox controller moving your aircraft controls when you are trying to film a slow pan or drone shot.

Tip: Set Airplanes Controls to None

If your Xbox controller keeps moving the ailerons or elevators while you are trying to use the camera, check the controller profiles carefully.

In my case, the important fix was setting the Xbox controller’s Airplanes Controls profile to None. Once I did that, the aircraft controls stopped responding to the Xbox controller, and the camera controls started behaving properly.

Step 4: Decide How You Want to Use the Controller

I suggest using the Xbox controller only as a camera controller.

That means:

  • Your joystick, yoke, throttle, and pedals control the aircraft
  • The Xbox controller controls the camera
  • Your keyboard remains available for shortcuts
  • Your mouse is still useful for cockpit interaction

This keeps things simple and avoids accidentally moving flight controls while trying to film a video sequence.

Step 5: Setting Up the Drone Camera

The drone camera is one of the best tools for cinematic footage in MSFS 2024. It allows you to move the camera independently of the aircraft. That makes it perfect for dramatic angles, aircraft walk-arounds, runway shots, and smooth fly-bys.

To access the drone camera:

  1. Start a flight.
  2. Move your mouse to the top of the screen to open the toolbar.
  3. Open the camera menu.
  4. Choose the drone or showcase camera option.

You may also have a keyboard shortcut assigned for drone camera. On many systems this is Insert, but do not assume it is the same on every setup. If it does not work, search your keyboard controls for Drone Camera.

Step 6: Recommended Xbox Controller Camera Layout

This is the basic layout I would use for cinematic filming:

Controller Input Camera Function
Left Stick X Axis Drone X Translation Axis / Move left and right
Left Stick Y Axis Drone Y Translation Axis / Move forward and backward
Right Stick X Axis Drone Yaw Axis / Look left and right
Right Stick Y Axis Drone Pitch Axis / Look up and down
Left Trigger Move camera down
Right Trigger Move camera up
LB Decrease drone speed
RB Increase drone speed

The exact names may vary slightly depending on your MSFS 2024 control screen, but the principle is the same: left stick moves the camera, right stick aims the camera, and the bumpers adjust speed.

Step 7: My Suggested Sensitivity Settings

These are not magic numbers, but they are a good starting point for smoother video work.

Left Stick – Camera Movement

LX – Left Stick Left/Right

  • Sensitivity +: -70
  • Sensitivity -: -70
  • Dead Zone: 5
  • Reactivity: 25
  • Extremity Dead Zone: 10

LY – Left Stick Forward/Back

  • Sensitivity +: -70
  • Sensitivity -: -70
  • Dead Zone: 5
  • Reactivity: 25
  • Extremity Dead Zone: 10

Right Stick – Camera Look Around

RX – Right Stick Left/Right

  • Sensitivity +: -90
  • Sensitivity -: -90
  • Dead Zone: 5
  • Reactivity: 10
  • Extremity Dead Zone: 20

RY – Right Stick Up/Down

  • Sensitivity +: -90
  • Sensitivity -: -90
  • Dead Zone: 5
  • Reactivity: 10
  • Extremity Dead Zone: 20

If those settings still feel too fast, do not keep endlessly adjusting sensitivity. The bigger setting is often the actual Drone Speed, which is separate from stick sensitivity.

Step 8: Adjust Drone Camera Speed

This is where cinematic camera work really starts to improve.

If the drone camera moves too quickly, your footage will look jerky and rushed. For smooth video, slow is usually better.

Look for these commands in the camera controls:

  • Increase Drone Translation Speed
  • Decrease Drone Translation Speed
  • Increase Drone Rotation Speed
  • Decrease Drone Rotation Speed
  • Increase Drone Speed
  • Decrease Drone Speed

I strongly recommend assigning speed controls to easy buttons, such as:

  • LB: Decrease Drone Speed
  • RB: Increase Drone Speed

That way, when you are filming, you can quickly slow the drone right down for a gentle pan, then speed it up again when you need to reposition the camera.

The Big Tip

If your camera still feels too fast after changing sensitivity, reduce the Drone Translation Speed and Drone Rotation Speed. These settings often make a bigger difference than controller sensitivity.

Step 9: Turn Off Drone Follow Mode for Free Camera Movement

If the drone camera feels locked to the aircraft, look for an option called Drone Follow Mode or similar.

For many cinematic shots, you will want to turn follow mode off. This allows the camera to move more freely instead of being fixed to the aircraft.

This is especially useful for:

  • Aircraft fly-bys
  • Runway departure shots
  • Landing shots
  • Scenic shots where the aircraft passes through the frame
  • Static camera views beside the runway

Step 10: Toggle Plane Control

One important camera command in Microsoft Flight Simulator is Toggle Plane Control. This allows you to control the aircraft while you are in drone camera mode.

That can be useful, but it can also cause confusion. If your controller suddenly seems to be controlling the aircraft instead of the camera, this is one of the first things to check.

For smooth video recording, I prefer to keep things simple:

  • Set the aircraft up safely first
  • Use autopilot where suitable
  • Then work the camera
  • Avoid trying to hand-fly and film complex shots at the same time

Trying to fly and film at the same time can get messy very quickly, especially near the ground.

Real Pilot Tip

In the real world, you would never let camera work distract you from flying the aircraft. The same idea applies in the simulator if you want smooth and believable footage.

Set the aircraft up first. Trim it, stabilise it, use autopilot if appropriate, and make sure it is doing what you want. Then start working on the camera shot.

Good flying makes good footage easier.

Step 11: ChasePlane and MSFS Camera Controls

This was the biggest lesson from my own setup.

I use ChasePlane, and it is a very useful camera tool. But while setting up the Xbox controller for MSFS 2024 camera work, ChasePlane was clearly affecting the way the controller behaved.

The symptoms were:

  • The drone camera appeared to activate
  • The mouse could look around
  • The Xbox controller still affected aircraft controls
  • Keyboard drone movement did not behave as expected
  • Camera commands seemed confusing or inconsistent

Once I disabled ChasePlane, the Xbox controller started behaving properly with the native MSFS camera system.

ChasePlane Troubleshooting Tip

If your Xbox controller refuses to work properly with the MSFS Drone Camera, temporarily disable ChasePlane and test again.

You do not have to uninstall it. Just disable it or stop it from controlling the camera, then check whether the native MSFS drone camera starts working properly.

Step 12: Practise Slow Pans

The biggest mistake with cinematic camera movement is going too fast.

For a slow pan:

  1. Put the aircraft in a stable flight condition.
  2. Enter drone camera mode.
  3. Move the right thumbstick very gently.
  4. Hold the movement steady.
  5. Avoid sudden corrections.
  6. Let the aircraft move through the shot naturally.

If the camera movement feels too twitchy, lower the drone camera speed first, then fine-tune sensitivity later.

Step 13: Use the Controller for Scenic Flight Videos

For scenic videos, the Xbox controller is especially useful. You can set up simple shots that make the flight look much more polished.

Good shots to practise

  • Slow pan around the parked aircraft before take-off
  • Low side view during taxi
  • Runway edge view during take-off
  • External rear view during climb-out
  • Wing view during cruise
  • Gentle orbit around the aircraft near the scenery
  • A static camera near the runway for landing

These shots are simple, but they can make a video feel much more professional.

Xbox Controller Setup for FS2024 views

Common Mistakes

Moving the camera too quickly

This is the big one. Fast camera moves can make a video look rushed. Slow it down and let the aircraft do most of the work.

Changing views too often

Constantly jumping between views can be distracting. Hold a shot for a few seconds so the viewer can enjoy it.

Trying to fly and film manually at the same time

This can be done, but it is not the easiest way to start. Use autopilot where it makes sense.

Leaving the camera too close to the aircraft

Sometimes pulling the camera back gives a much better sense of scale, especially around mountains, clouds, coastlines, and city scenery.

Ignoring the light

Golden hour lighting can make a massive difference in MSFS. Early morning and late afternoon often look much better than harsh midday light.

Troubleshooting

The Xbox controller is not showing in MSFS 2024

  • Check that Windows sees the controller first.
  • Try turning Bluetooth off and on again.
  • Reconnect the controller.
  • Try a USB cable.
  • Restart MSFS after connecting the controller.

The Xbox controller moves the aircraft instead of the camera

  • Check whether the Xbox controller still has an active Airplanes Controls profile.
  • Set Airplanes Controls to None if you only want the controller for camera work.
  • Check for aileron, elevator, throttle, and rudder conflicts.
  • Temporarily disable ChasePlane and test again.

The drone camera activates but will not move

  • Confirm that you are actually in Drone Camera mode.
  • Check Drone X Translation Axis and Drone Y Translation Axis assignments.
  • Check Drone Follow Mode.
  • Check Toggle Plane Control.
  • Disable ChasePlane temporarily if you use it.

The camera moves too fast

  • Lower Drone Translation Speed.
  • Lower Drone Rotation Speed.
  • Reduce controller sensitivity.
  • Lower reactivity.
  • Use smaller thumbstick movements.
  • Avoid pushing the stick fully unless you want fast movement.

The camera feels locked to the aircraft

  • Check whether Drone Follow Mode is turned on.
  • Turn follow mode off for free camera movement.
  • Try switching between drone, showcase, and external camera modes.

The aircraft stops responding in drone view

  • Use the Toggle Plane Control command if needed.
  • Check your key bindings.
  • Use autopilot before entering drone mode.

My Simple Cinematic Setup

For my own videos, I like to keep the setup fairly simple:

  • Use normal flight controls for flying
  • Use the Xbox controller for camera movement
  • Use the keyboard for important shortcuts
  • Use the mouse for cockpit switches and menus
  • Use autopilot for stable shots where appropriate
  • Disable ChasePlane if it interferes with the native MSFS camera system

That gives you a nice balance. You are not trying to force one controller to do everything.

Best Type of Flight to Practise With

I would not start with a busy airliner approach into a major airport. That is too much going on at once.

A better way to practise is to choose a simple scenic flight. Pick good weather, use daylight or golden hour, and choose an aircraft that is easy to manage.

For practising camera shots, slower aircraft are often better than fast jets. A Cessna, Daher TBM, Cirrus, or smaller twin gives you more time to set up the shot.

Suggested First Practice Session

  1. Start on the runway in a small aircraft.
  2. Set clear weather.
  3. Choose late afternoon light.
  4. Take off normally.
  5. Climb to a safe height.
  6. Engage autopilot if the aircraft has it.
  7. Open the drone camera.
  8. Practise slow pans around the aircraft.
  9. Try one wing view, one rear view, and one wide scenic shot.
  10. Record a short test clip and watch it back.

Watching the footage back is important. Sometimes a movement feels slow while you are doing it, but it looks too quick in the final video.

FAQ

Why does my Xbox controller move the aircraft instead of the camera?

Usually because the controller is still assigned to aircraft controls. Check the Xbox controller profile and look for an active Airplanes Controls profile. If you only want the Xbox controller for camera work, set the Airplanes Controls profile to None.

Can ChasePlane interfere with MSFS camera controls?

Yes, it can. In my own testing, ChasePlane was one of the main reasons the Xbox controller did not behave as expected with the native MSFS camera system. Disabling ChasePlane allowed the controller to work properly again.

Do I need ChasePlane for cinematic camera shots?

No. ChasePlane can be useful, but MSFS 2024 already has a powerful camera system. For many simmers, the built-in drone and external camera tools are enough once the Xbox controller is set up properly.

Why does the camera still move too quickly after changing sensitivity?

Because camera speed and stick sensitivity are not always the same thing. If sensitivity changes do not make much difference, reduce Drone Translation Speed and Drone Rotation Speed instead.

Should I use the Xbox controller for flying as well?

You can, but I do not recommend it if you already have a joystick, yoke, throttle, and rudder pedals. I prefer using the Xbox controller purely as a camera tool.

What is the best camera setup for YouTube videos?

Keep it simple. Use your normal flight controls for flying, use the Xbox controller for camera movement, slow the drone speed down, and use autopilot where appropriate. Smooth footage usually comes from stable flying and slow camera movement, not complicated controls.

Final Thoughts

An Xbox controller is a very handy tool for cinematic camera work in Microsoft Flight Simulator 2024. You do not need to use it for flying the aircraft. In fact, I think it makes more sense to use it as a dedicated camera controller.

The key is to slow everything down. Slow pans, gentle camera movements, good lighting, and stable aircraft control will make a bigger difference than complicated editing.

The biggest lesson from my own setup was this: if the controller keeps acting like an aircraft controller, do not keep endlessly changing drone camera settings. Check the aircraft control profile, check for conflicts, and if you use ChasePlane, disable it temporarily and test again.

If you are planning to make MSFS videos for YouTube, setting up an Xbox controller for camera control is well worth doing. It is one of the simplest ways to make your footage look smoother, more polished, and more enjoyable to watch.

Why FS2Crew Can Transform Your Flight Simulator Experience

If you’ve been involved in flight simulation for any length of time, you’ve probably done exactly what I have.

Each purchase improves the simulator in some way. But now and then, you come across an add-on that doesn’t necessarily make the simulator look better. Instead, it changes how the simulator feels.

FS2Crew is one of those products. I’ve noticed that when simmers discuss realism, they often focus on aircraft systems, graphics, weather, or scenery. Those things absolutely matter, but realism isn’t only about what you see. It’s also about what you experience. And that’s where FS2Crew comes in.

Quick Takeaway: FS2Crew won’t improve graphics or frame rates, but it can dramatically improve immersion by making the cockpit feel like part of a real airline operation.

So, What Exactly Is FS2Crew?

The easiest way to explain FS2Crew is like this:

  • It helps transform a quiet, empty cockpit into a more working airline environment.
  • One of the biggest differences between real-world airline operations and home flight simulation is that airline pilots don’t operate in isolation.

They’re constantly interacting with:

  • Other crew members.
  • Checklists.
  • Procedures.
  • Cabin staff.
  • Air traffic control.
  • Standard operating procedures.

In Microsoft Flight Simulator, we’re usually sitting alone in front of a screen doing everything ourselves. That’s perfectly fine. In fact, many simmers enjoy it that way. But after a while, some people start looking for a deeper level of immersion. That’s where FS2Crew begins to make sense.

The Problem Many Airline Simmers Eventually Notice

I remember when I first started flying more complex airliners in flight simulation.

  • The aircraft looked fantastic.
  • The systems worked beautifully.
  • The procedures were realistic.
  • But something felt slightly off.
  • The cockpit was too quiet.
  • There was no sense of crew coordination.
  • No feeling that anyone else existed within the operation.
  • I could fly a perfect flight from gate to gate and still feel like I was operating inside a bubble.
  • Many airline simmers eventually notice the same thing.
  • The simulator accurately models the aircraft.
  • But it doesn’t necessarily recreate the atmosphere of flying on an airline.

FS2Crew attempts to fill that gap.

PILOT’S LOG

One thing that always stands out in real aviation is how much communication takes place. Flying isn’t simply about operating an aircraft. Procedures, callouts, checklists and teamwork are part of everyday operations. That’s one of the reasons products like FS2Crew appeal to many airline simmers.

Why People Buy FS2Crew

What’s interesting is that many people don’t buy FS2Crew because they need it. They buy it because they want the simulator to feel more alive.

The reasons people typically buy it include: More realistic airline atmosphere

  • More realistic airline atmosphere.
  • Interactive checklist procedures.
  • Greater immersion.
  • Enhanced airline role-play.
  • Better crew workflow.
  • More engaging long-haul flights.
  • Additional realism during all phases of flight.

Notice that none of those reasons involve graphics.

  • None involves frame rates.
  • None involves visual effects.
  • They’re all about immersion.
  • That’s what makes FS2Crew different from most add-ons.

The Human Side Of Aviation

This is where FS2Crew really shines. Most simulator products focus on machines.

  • Aircraft.
  • Airports.
  • Weather.
  • Scenery.
  • Navigation systems.

FS2Crew focuses on people. And that’s surprisingly rare.

  • Think about a real airline flight.
  • The aircraft itself is only part of the experience.

There’s also:

  • Crew interaction.
  • Checklists.
  • Standard operating procedures.
  • Passenger announcements.
  • Workflow management.
  • Shared responsibilities.

These things may seem small individually. But together they create the atmosphere of professional aviation.

FS2Crew introduces many of those elements into the simulator. The result is often far more immersive than people expect.

Why It Works So Well With Aircraft Like The PMDG 737

I think FS2Crew makes the most sense when paired with aircraft such as:

  • PMDG 737.
  • Fenix A320.
  • Other highly detailed airliners.

The reason is simple.

These aircraft already simulate airline procedures in great detail. FS2Crew adds another layer to that realism. Instead of simply operating switches and systems, you begin to feel like you’re participating in an airline operation. For many people, that’s the missing piece. It’s not unusual to hear simmers say:

“I didn’t realise how much I would enjoy it until I started using it.”

That’s because the benefit is difficult to understand until you’ve experienced it.

It’s Not Really About Automation

One common misconception is that FS2Crew exists to automate cockpit tasks. While it can certainly assist with procedures, that’s not why most people love it. Most users appreciate it because it improves immersion.

The goal isn’t to make flying easier. The goal is to make flying feel more authentic. That’s a very important distinction. Many add-ons make the simulator more complicated. FS2Crew makes the simulator feel more realistic. Those aren’t necessarily the same thing.

Real Pilot Tip: The more realistic an aircraft becomes, the more important workflow becomes. In real aviation, standard operating procedures reduce workload and improve consistency. FS2Crew helps bring some of that structure into the simulator.

The Atmosphere Factor

This may actually be FS2Crew’s greatest strength. The atmosphere is difficult to measure.

  • You can’t benchmark it.
  • You can’t take a screenshot of it.
  • You can’t compare it using frame rates.

Yet atmosphere often determines whether a flight feels memorable. Consider the difference between:

  • Spawning on a runway and taking off immediately.

And:

  • Starting at a gate.
  • Preparing the aircraft.
  • Following procedures.
  • Hearing announcements.
  • Working through checklists.
  • Operating within a crew environment.

Both flights may reach the same destination. But they feel completely different. That’s the value FS2Crew provides.

Who Will Benefit Most From FS2Crew?

In my opinion, FS2Crew is ideal for simmers who:

  • Enjoy flying on an airline.
  • Fly the PMDG 737 regularly.
  • Fly the Fenix A320 regularly.
  • Like realistic procedures.
  • Enjoy role-playing airline operations.
  • Prefer immersion over shortcuts.
  • Enjoy long flights.

If that sounds like you, there’s a good chance you’ll appreciate what FS2Crew brings to the simulator. On the other hand, if most of your flying involves:

  • Bush flying.
  • General aviation.
  • Sightseeing flights.
  • Casual sessions.

Then you may find that other add-ons provide better value.

Is It Worth The Money?

This is the question everybody asks. And the answer depends entirely on what you’re looking for.

If your goal is:

  • Better graphics.
  • More scenery.
  • Better aircraft systems.

Then there are probably other products that should come first.

However, if your goal is:

Then FS2Crew becomes much easier to justify. For many airline enthusiasts, it becomes one of those products they simply don’t want to fly without.

Recommendation: If you regularly fly aircraft such as the PMDG 737 or Fenix A320 and enjoy realistic airline procedures, FS2Crew is one of the easiest ways to increase immersion without learning an entirely new aircraft.

Frequently Asked Questions

In some ways, yes. The virtual first officer can handle certain cockpit tasks and checklist items, allowing you to focus more on flying the aircraft. However, FS2Crew is primarily designed to increase realism rather than simplify the simulation.

Which aircraft work best with FS2Crew?

FS2Crew is particularly popular among airliner pilots flying aircraft such as the Boeing 737 and Airbus A320 family. Support varies depending on the version of FS2Crew you purchase.

Is FS2Crew worth it?

If you enjoy realistic airline operations, cockpit procedures, and the feeling of flying with a crew, FS2Crew can add a tremendous amount of immersion. It is one of the few add-ons that can genuinely make a flight feel more alive and authentic.

Best Australian Flights to Fly in MSFS 2024

Airport aircraft and terminal at Flight Simulation Showcase.

Last Updated: May 2026
By: Peter

Australia is one of the best places in the world for flight simulation.

As an Aussie, I honestly think the sheer variety of flying available here makes Australia one of the most underrated regions in Microsoft Flight Simulator 2024. You can depart a major international city, fly above endless coastline, cross massive desert landscapes, or land on a tiny tropical island all within the same simulator.

What makes Australian flying especially enjoyable in MSFS 2024 is the sense of scale. Flights often feel genuinely adventurous because distances are huge, weather conditions constantly change, and the scenery varies dramatically between regions.

Whether you enjoy realistic airline operations, low-level VFR flying, bush adventures, or cinematic coastal routes, Australia has something spectacular to offer.

In this guide, I’ll cover some of the best Australian flights you can experience in MSFS 2024, ranging from short scenic hops to full airline journeys.

Sydney to Melbourne

One of the World’s Great Airline Routes

The Sydney to Melbourne route is one of Australia’s busiest airline corridors and easily one of the best realistic airline flights in MSFS 2024.

This route works beautifully with:

  • PMDG 737-800
  • Fenix A320
  • FBW A320
  • Virgin Australia liveries
  • Qantas liveries

The flight usually takes around 1 hour and 20 minutes, making it ideal for an evening session.

Highlights include:

  • Spectacular Sydney departures
  • Busy airline traffic
  • Realistic airline operations
  • Excellent GSX immersion
  • Beautiful Melbourne approaches

I’ve always enjoyed this route because it feels alive from start to finish. There’s usually plenty happening at both airports, and the combination of live weather, GSX, and realistic airline traffic can make the entire experience feel incredibly immersive.

Brisbane to Hamilton Island

One of Australia’s Most Beautiful Airline Flights

This is personally one of my favourite Australian airline routes in MSFS 2024.

The combination of tropical scenery, ocean flying, island approaches, and realistic airline operations makes this route incredibly immersive.

Virgin Australia and Qantas both operate flights to Hamilton Island, making it perfect for a realistic airline simulation.

The approach to Hamilton Island is absolutely stunning, especially at sunrise or sunset.

This route works brilliantly for:

  • YouTube cinematic videos
  • Passenger2 immersion
  • GSX turnaround operations
  • Real airline procedures
  • Live weather flying

I honestly never seem to get tired of this flight. As the islands begin appearing below the aircraft during descent, the scenery can look spectacular in MSFS 2024.

Cairns to Sydney

A Fantastic Long Domestic Airline Flight

If you want a longer, realistic airline experience, Cairns to Sydney is superb.

The route combines:

  • Tropical Queensland scenery
  • Long cruise segments
  • Changing weather systems
  • Busy airline operations
  • Spectacular Sydney arrivals

This route feels especially immersive during live weather because conditions can vary dramatically between northern Queensland and Sydney.

Storm systems around Cairns can create some incredible departures.

One thing I really enjoy about Australian flying is how different the atmosphere becomes between regions. Northern Queensland can feel completely tropical, while Sydney often delivers a very different weather experience entirely.

Adelaide to Uluru

Classic Australian Outback Flying

If you want to experience the scale of the Australian outback, Adelaide to Uluru is an unforgettable flight.

This route showcases:

  • Massive desert landscapes
  • Remote terrain
  • Australian red earth scenery
  • Beautiful sunrise lighting
  • True outback atmosphere

Uluru itself looks spectacular in MSFS 2024, especially during golden-hour lighting conditions.

This is one of those flights where Australia’s enormous scale becomes very apparent.

There’s something uniquely Australian about flying across huge, empty outback landscapes in the simulator. The sense of isolation can actually become surprisingly immersive.

Perth to Broome

Remote Western Australia Adventure

Western Australia offers some of the most underrated flying in the simulator.

The Perth to Broome route combines:

  • Massive remote distances
  • Coastal flying
  • Desert scenery
  • Changing terrain colours
  • Remote airport operations

Broome itself has a unique atmosphere that feels very different from Australia’s eastern cities.

This flight works particularly well in the Boeing 737.

I think Western Australia is often overlooked in flight simulation discussions, but some of the scenery there can look absolutely incredible in MSFS 2024.

Gold Coast to Sydney

Beautiful Coastal Airline Flying

This is another excellent short-to-medium airline route.

The coastal scenery between the Gold Coast and Sydney can look spectacular in good weather.

The approach to Sydney often becomes the highlight of the flight.

This route is excellent for:

  • Quick evening flights
  • Airline immersion
  • Live weather operations
  • Passenger2 experiences
  • GSX turnaround operations

I’ve always enjoyed Australian coastal flying in the simulator. There’s something very relaxing about watching the coastline unfold beneath the aircraft during a late afternoon flight.

Darwin to Alice Springs

Australia’s Harsh Interior

This flight feels completely different from coastal Australia.

Instead of ocean scenery and large cities, you experience:

  • Remote inland terrain
  • Extreme isolation
  • Desert environments
  • Long empty landscapes
  • Harsh Australian beauty

It’s one of the best routes for appreciating just how vast Australia really is.

Flights like this really showcase the incredible scale of the country. Australia can feel enormous in the simulator, especially during long inland routes.

Tasmania Scenic Flights

Perfect for VFR Flying

Tasmania is one of the best VFR regions in Australia for MSFS 2024.

The island offers:

  • Mountain scenery
  • Forests
  • Coastlines
  • Rapidly changing weather
  • Beautiful small airports

Some excellent Tasmania routes include:

  • Hobart to Launceston
  • Hobart coastal flights
  • West Coast bush flying
  • Mountain VFR exploration

Tasmania can look absolutely stunning during cloudy weather conditions.

I personally think Tasmania is one of the most underrated VFR regions in the entire simulator. The lighting, weather, mountains, and coastline can all look spectacular.

Lord Howe Island

One of Australia’s Most Challenging Island Approaches

Lord Howe Island is one of the most interesting destinations in Australia for flight simulation.

The island features:

  • A remote ocean location
  • A relatively short runway
  • Beautiful island scenery
  • Ocean approaches
  • Challenging weather conditions

Approaching the island through live weather can become incredibly immersive.

The surrounding scenery is spectacular.

The Kimberley Region

Australia’s Ultimate Bush Flying Playground

The Kimberley region in northern Western Australia offers some extraordinary bush flying opportunities.

This area is perfect for:

  • Low-level VFR flying
  • Helicopter operations
  • Remote airstrip exploration
  • Scenic adventure flying
  • Outback immersion

The terrain colours and remote landscapes are unlike almost anywhere else in the world.

As someone who enjoys scenic exploration flights, I think the Kimberley region delivers some of the most visually unique flying available anywhere in MSFS 2024.

Final Thoughts

Australia is one of the most rewarding countries to explore in Microsoft Flight Simulator 2024.

The combination of massive landscapes, realistic airline routes, tropical islands, harsh outback terrain, coastline flying, and constantly changing weather creates endless opportunities for immersive flying.

Whether you enjoy realistic airline simulation, scenic VFR exploration, or cinematic adventure flights, Australia offers some of the best experiences available anywhere in MSFS 2024.

And honestly, as an Aussie, there’s something very special about flying across Australia in the simulator. MSFS 2024 captures the country’s atmosphere surprisingly well, especially during sunrise and sunset.

The sheer scale of the landscape can make every journey feel like a genuine adventure.