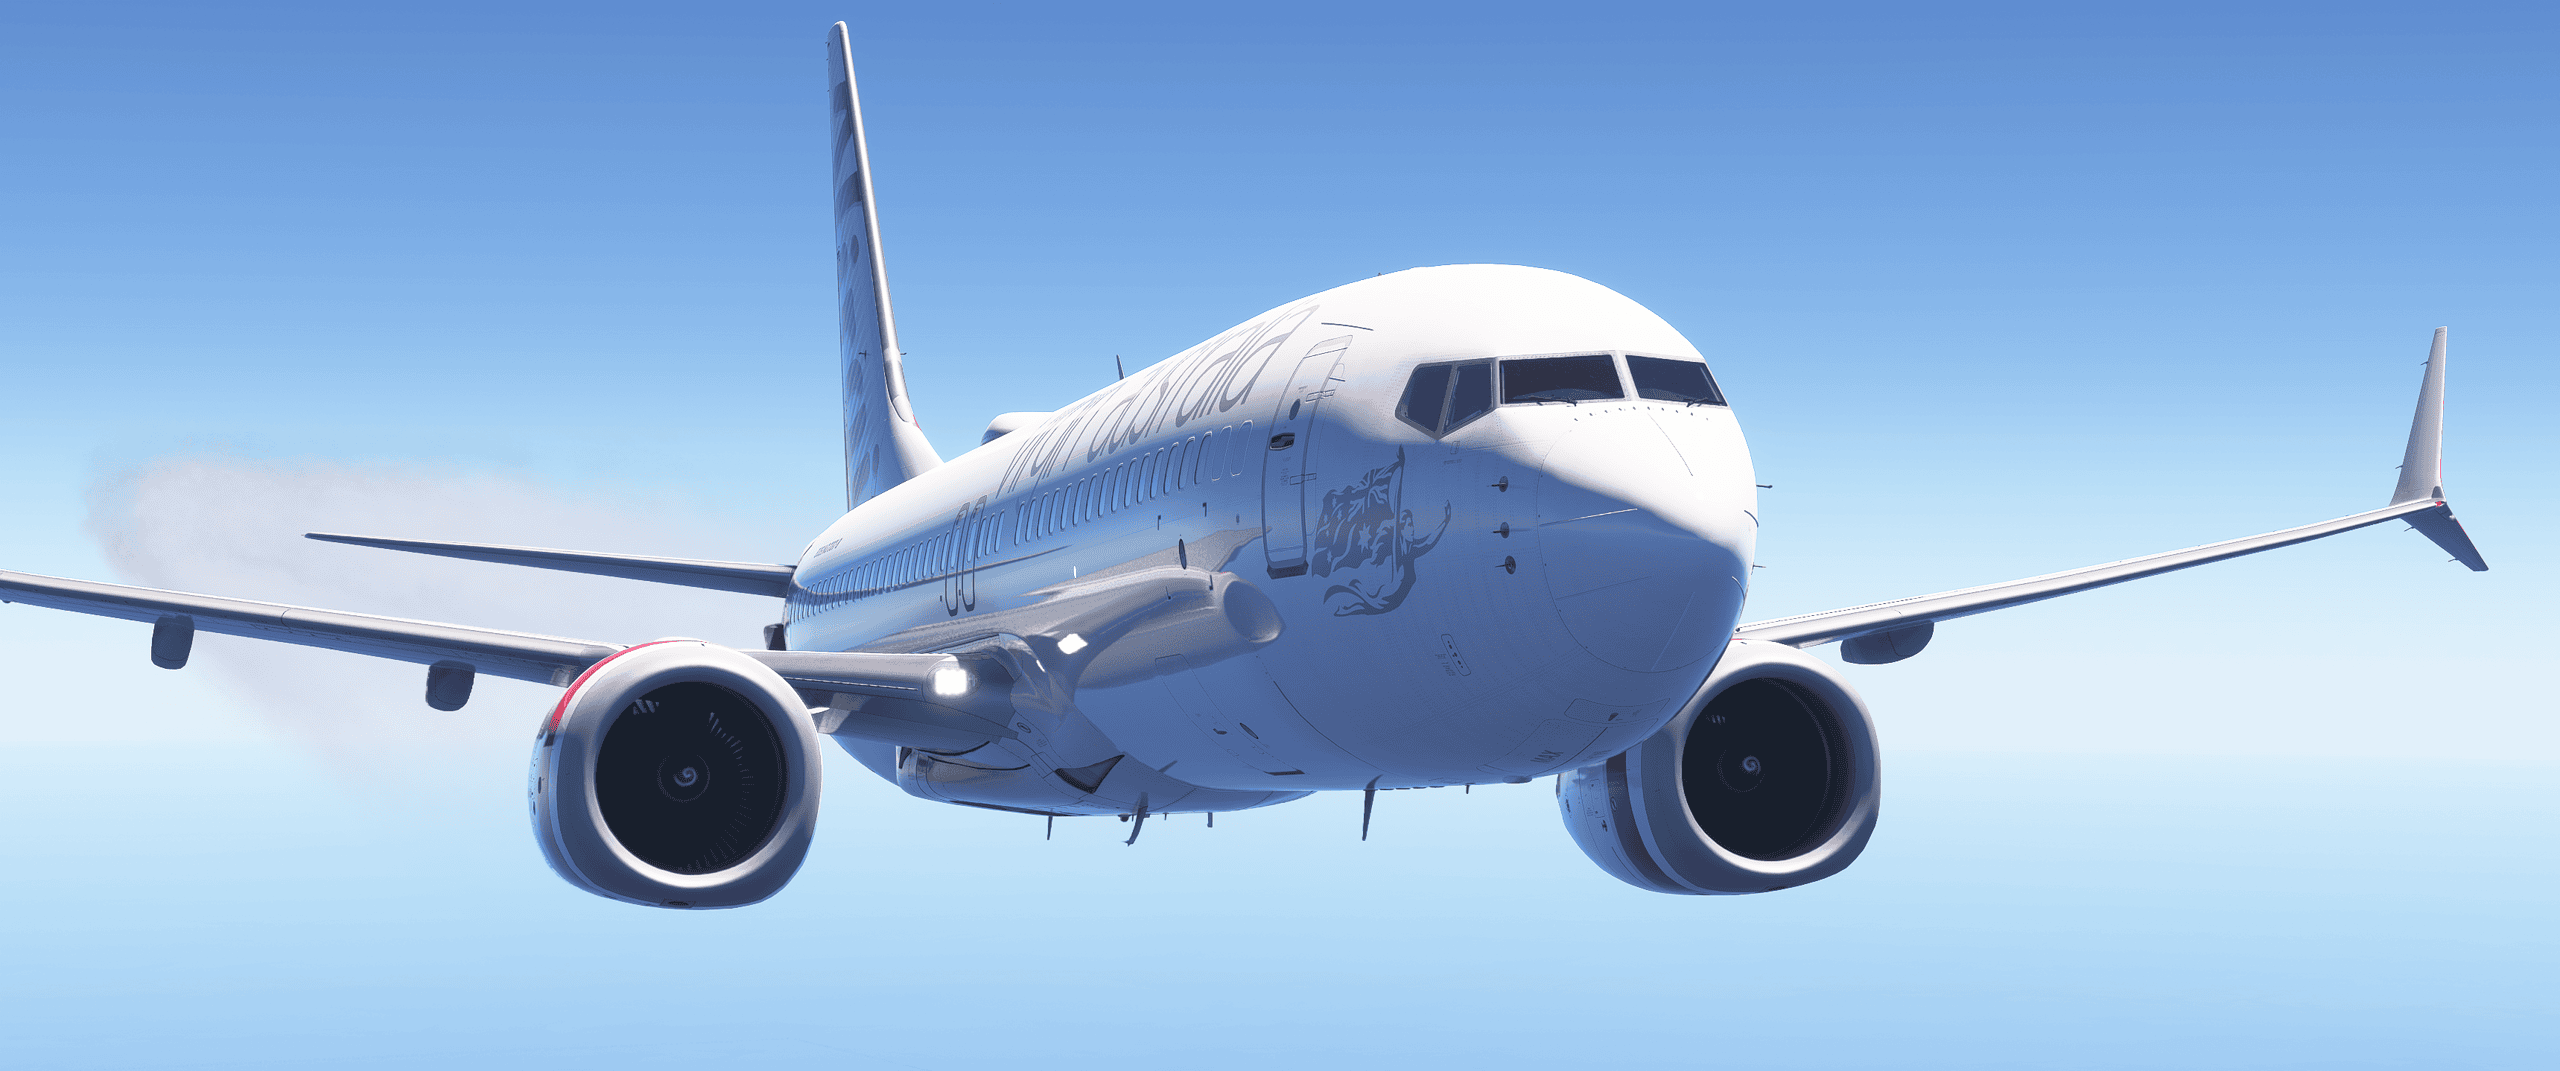
How to Build a Realistic Airline Experience in MSFS 2024

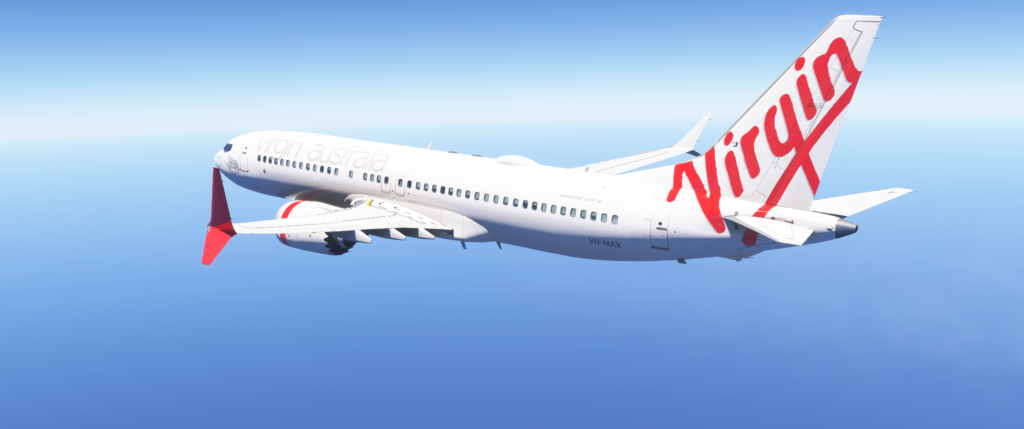
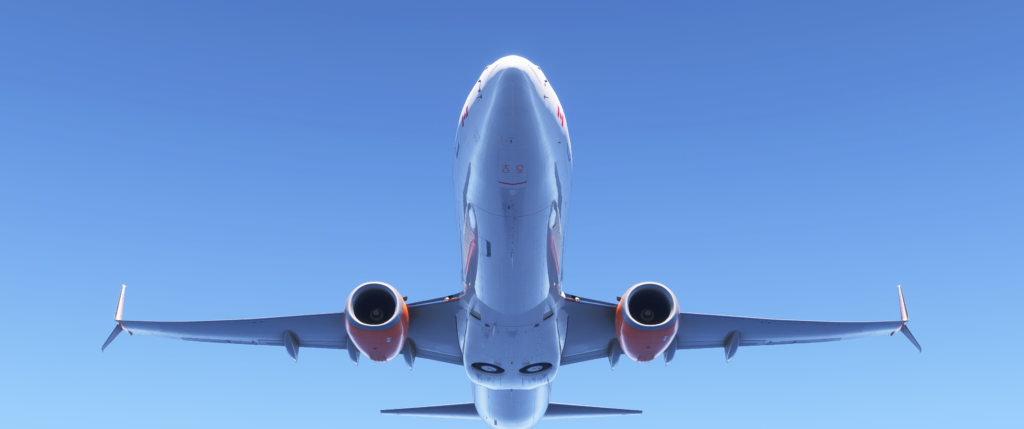
Boeing-737-MAX

Last Updated: May 2026
By: Peter

Microsoft Flight Simulator 2024 already delivers one of the most visually impressive flight simulation experiences ever created, but if you really want to take immersion to another level, you need to go beyond simply flying from one airport to another.

The real magic happens when you combine realistic airline procedures, proper flight planning, ground services, passenger simulation, real-world weather, and believable aircraft operations into one complete experience.

Once you start doing this properly, MSFS 2024 begins feeling far less like a game and much more like operating a real airline flight.

In this guide, I’ll walk you through the exact setup and techniques I personally recommend for creating an incredibly immersive and realistic airline environment in Microsoft Flight Simulator 2024.

Why Airline Realism Changes Everything

One of the biggest reasons airline simulation becomes so addictive is because every small detail starts contributing to the overall atmosphere.

Suddenly it’s not just about taking off and landing anymore.

You begin operating an entire airline experience.

  • Passengers board the aircraft realistically
  • Ground crews load baggage
  • Cabin announcements play during taxi
  • Weather changes dynamically
  • Fuel planning becomes important
  • Turnaround timing matters
  • Real airline liveries create authenticity
  • Airport gates feel alive

When everything starts working together, the simulator becomes remarkably immersive.

The Core Add-Ons You Need

GSX Pro

If you want realistic airline operations, GSX is one of the most important add-ons available.

GSX transforms airports from static environments into busy, believable airline operations.

It adds:

  • Passenger boarding
  • Baggage loading
  • Catering vehicles
  • Fuel trucks
  • Animated pushback
  • Marshaller guidance
  • Ground service sequencing
  • Airport turnaround immersion

Without GSX, airports can still look beautiful, but they often feel lifeless.

With GSX installed, airports suddenly feel active and operational.

Passenger2

Passenger2 works beautifully alongside GSX because it adds the human side of airline operations.

Instead of simply sitting in an empty cockpit, you begin hearing:

  • Boarding announcements
  • Safety demonstrations
  • Cabin ambience
  • Passenger reactions
  • Crew announcements
  • Arrival briefings

Personally, I think Passenger2 works best when you use it mainly for immersion rather than hardcore airline management.

That balance keeps flights relaxing while still feeling realistic.

Use Real Airline Routes

One of the easiest ways to instantly improve realism is by flying actual airline routes.

Examples include:

  • Virgin Australia Brisbane → Hamilton Island
  • Qantas Sydney → Melbourne
  • United Airlines Los Angeles → Denver
  • British Airways Heathrow → Edinburgh
  • Singapore Airlines Singapore → Sydney

Using real-world routes improves immersion because:

  • Flight durations feel realistic
  • Aircraft types match the route
  • Airline liveries make sense
  • Airport gate usage becomes believable
  • Live traffic feels more authentic

Choose Proper Airline Aircraft

The aircraft itself plays a massive role in realism.

Highly detailed airliners dramatically improve immersion because they simulate real airline systems and procedures.

Some of the best choices currently include:

These aircraft support realistic startup procedures, flight management systems, autopilot behavior, failures, performance calculations, and proper airline workflows.

Use Realistic Airline Liveries

Liveries may sound like a minor detail, but they have a huge impact on immersion.

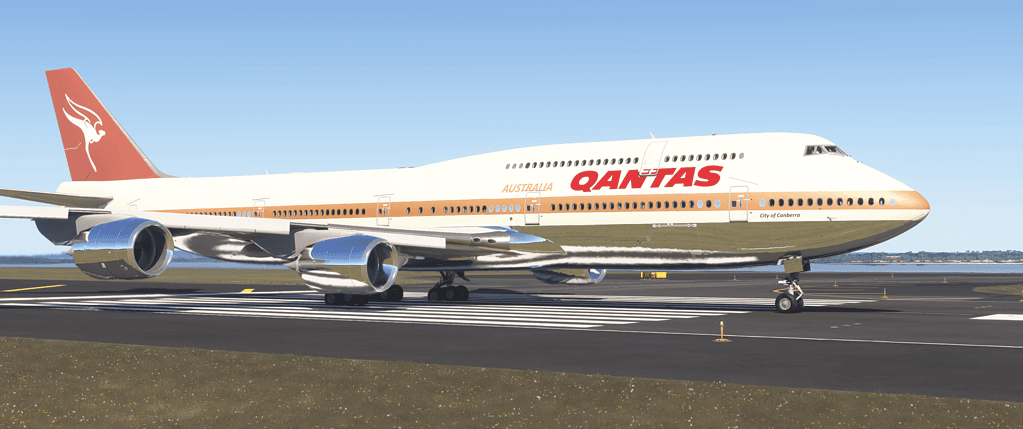
A realistic Qantas, Virgin Australia, Delta, Emirates, or Lufthansa livery instantly transforms the atmosphere of a flight.

Everything suddenly feels connected:

  • The aircraft
  • The airport gates
  • The route
  • The passengers
  • The cabin announcements

Real liveries create visual authenticity that helps the simulator feel believable.

Create a Proper Turnaround

This is where GSX and Passenger2 become incredibly powerful together.

A realistic turnaround process might look something like this:

  1. Aircraft arrives at gate
  2. Seatbelt sign switched off
  3. Passengers begin deboarding
  4. Baggage unloading starts
  5. Catering trucks arrive
  6. Fuel truck connects
  7. Cleaning and servicing begins
  8. Boarding process starts
  9. Passenger announcements begin
  10. Doors close
  11. Pushback clearance requested

Taking your time during these phases massively improves immersion.

Ironically, slowing down often makes the simulator more enjoyable.

Use Realistic Flight Planning

One of the biggest realism upgrades you can make is using proper airline flight planning.

Instead of simply selecting airports in the world map, use professional-style planning tools.

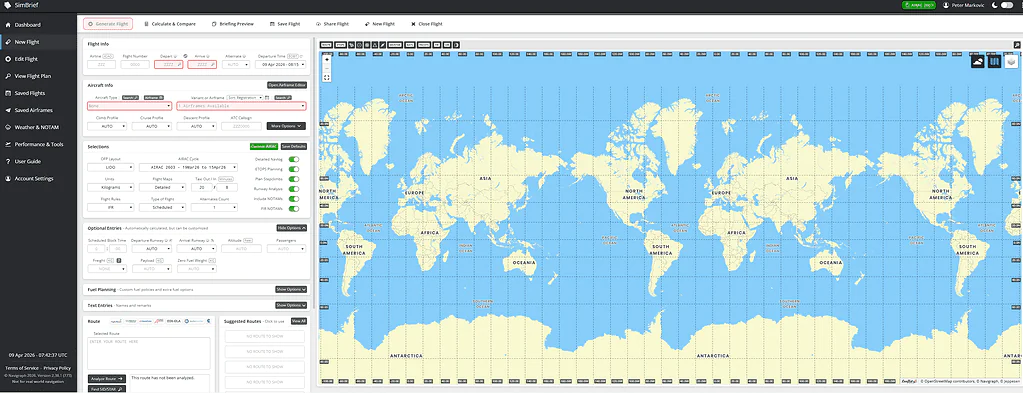
  • SimBrief
  • Navigraph Charts
  • Little Navmap
  • Volanta

SimBrief is particularly valuable because it creates realistic dispatch-style flight plans including:

  • Airline routes
  • Fuel calculations
  • Cruise altitudes
  • Passenger loads
  • Weather data
  • Runway recommendations
  • Performance planning

Using SimBrief instantly makes flights feel far more authentic.

Use Live Weather

Weather realism changes everything in flight simulation.

Live weather introduces:

  • Real turbulence
  • Crosswinds
  • Storm systems
  • Changing cloud layers
  • Visibility changes
  • Real-world flying conditions

Flying through actual weather systems adds enormous realism to airline operations.

Landing during poor visibility or dealing with crosswinds can completely transform the atmosphere of a flight.

When Manual Weather Works Better

There are still times where manual weather can work beautifully.

This is especially true for:

  • Cinematic YouTube videos
  • Sunset flights
  • Storm approaches
  • Golden-hour departures
  • Dramatic cloud scenes

Sometimes visual atmosphere is just as important as strict realism.

Add Cabin Announcements

Cabin announcements massively improve immersion.

Hearing:

  • Boarding announcements
  • Safety briefings
  • Cruise announcements
  • Descent preparation calls
  • Arrival messages

makes the aircraft feel alive.

This is one of the reasons Passenger2 works so well for airline simulation.

Follow Real Airline Procedures

One of the biggest realism mistakes many simmers make is rushing everything.

Real airline flying is methodical and procedural.

For example:

  • Taxi slowly and carefully
  • Respect speed restrictions
  • Use proper flap schedules
  • Follow SID and STAR procedures
  • Perform realistic checklist flows
  • Use stabilized approaches

Even small procedural details dramatically improve immersion.

Use Realistic Failures Carefully

Failures can add realism, but they should be used intelligently.

I personally think subtle realism works best.

Good examples include:

  • Weather diversions
  • Strong turbulence
  • Hydraulic warnings
  • Brake temperature issues
  • Crosswind challenges
  • Unexpected ATC changes

Too many dramatic emergencies can quickly become unrealistic and repetitive.

Enhance Airport Realism

Detailed airports make a huge difference to immersion.

Good airport add-ons improve:

  • Gate layouts
  • Taxiway accuracy
  • Lighting
  • Ground clutter
  • Terminal realism
  • Signage

When combined with GSX, airports can become astonishingly realistic.

Create Your Own Airline Routine

The biggest secret to realism is consistency.

Many experienced simmers develop a routine for every flight:

  • Weather review
  • Flight planning
  • Aircraft setup
  • Boarding operations
  • Checklist procedures
  • Taxi procedures
  • Cruise monitoring
  • Approach briefing
  • Gate shutdown

Once this becomes habit, the simulator starts feeling incredibly immersive.

One thing I’ve learned over time is that maximum realism is not always maximum enjoyment.

The best experience usually comes from balancing:

  • Realism
  • Immersion
  • Visual atmosphere
  • Workload
  • Relaxation

You want enough realism to feel believable, but not so much that the simulator starts feeling stressful.

That balance is where MSFS 2024 becomes truly special.

Final Thoughts

Building a realistic airline experience in MSFS 2024 is really about combining lots of smaller details into one believable operation.

GSX, Passenger2, realistic flight planning, live weather, proper airline procedures, detailed aircraft, and immersive airport environments all work together to transform the simulator into something remarkable.

Once everything starts syncing together, flights become far more than simply traveling between airports.

They begin feeling like real airline operations.

Frequently Asked Questions

Do I need GSX for realistic airline simulation?

No, but GSX dramatically improves realism through boarding, baggage handling, fueling, pushback, and ground operations.

Is Passenger2 worth buying?

Yes. Passenger2 adds excellent immersion through cabin ambience, announcements, and passenger simulation without becoming overly complicated.

What is the best aircraft for realistic airline simulation?

The PMDG 737-800 and Fenix A320 are among the best choices currently available for highly realistic airline operations.

Should I use live weather?

For realism, absolutely. Live weather greatly improves immersion through realistic turbulence, visibility, cloud systems, and wind conditions.

The FSReborn Phenom 300E

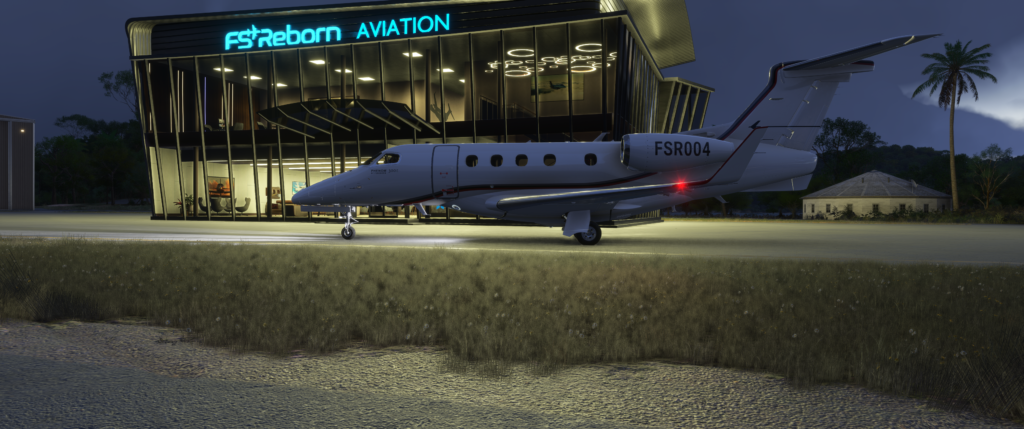
A flight simulator jet parked outside a modern aviation building at dusk.

Last Updated: May 2026

The FSReborn Phenom 300E has quickly become one of the most talked-about aircraft in Microsoft Flight Simulator 2024, and after spending time with it, it becomes very easy to understand why.

This is not just another aircraft add-on with a fancy FMC and some nice textures. FSReborn has approached this aircraft from a very different angle. Instead of simply simulating the act of flying from A to B, the Phenom 300E tries to recreate the complete experience of owning and operating a modern executive business jet.

And that changes everything.

There are already plenty of technically impressive aircraft in MSFS 2024, but very few of them create genuine atmosphere and personality the way this one does. The FSReborn Phenom 300E feels less like selecting an aircraft from a menu and more like stepping into your own little aviation world with your own jet, your own hangar, your own routines, and your own style of flying.

For simmers who enjoy cinematic flying, luxury destinations, tropical routes, executive aviation, and immersive experiences, this aircraft immediately feels different from most of what is currently available in the simulator.

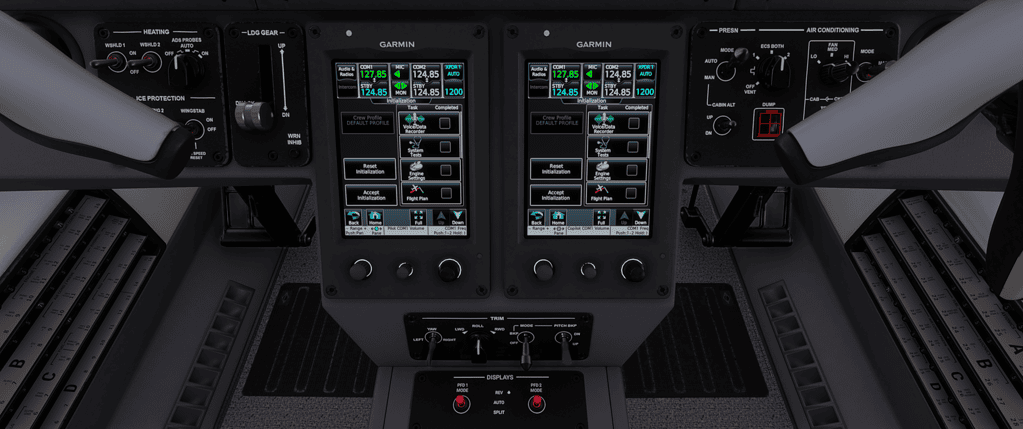
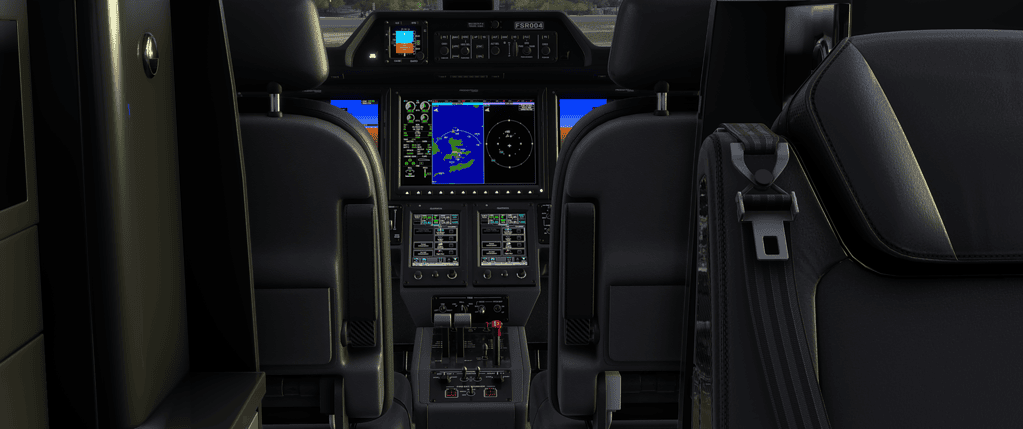
Realistic flight simulator cockpit with advanced avionics and controls for immersive flight training.

About FSReborn

FSReborn has quickly built a very strong reputation in the Microsoft Flight Simulator community, mainly because they clearly care about immersion and atmosphere just as much as technical realism.

Some developers focus almost entirely on system depth and checklists. FSReborn seems to approach flight simulation from a wider perspective. Their aircraft are designed to feel alive.

The developer became especially well known through the FSR500, which many simmers praised for its atmosphere, sound design, ownership immersion, and personality. Even people who normally fly large airliners started noticing that FSReborn was trying to create something a little different.

The Phenom 300E takes that philosophy much further.

What stands out very quickly is how much attention has been given to the overall experience surrounding the aircraft, not just the cockpit itself. The aircraft encourages routines, operational habits, environmental interaction, and emotional attachment in a way that very few aircraft currently do.

That may be the biggest reason why the aircraft has generated so much attention.

The Real Embraer Phenom 300E

The real-world Embraer Phenom 300E is one of the most successful light business jets ever built. Manufactured by Brazilian aerospace company Embraer, the aircraft has become extremely popular in executive aviation because it combines speed, comfort, luxury, modern avionics, and excellent operating flexibility.

The aircraft is certified for single-pilot operation and is used by private owners, executive charter companies, corporate operators, and luxury tourism operators.

One reason the aircraft works so well in Microsoft Flight Simulator is that it feels equally comfortable almost anywhere. It can operate from large international airports one day and tropical island destinations the next.

That flexibility naturally creates interesting flying.

The Phenom 300E feels perfectly suited to Hamilton Island charters, coastal Australian flying, luxury Caribbean routes, short executive hops, sunset business flights, and tropical island operations.

In many ways, it sits beautifully between airline operations and traditional general aviation.

First Impressions

One of the first things most simmers will notice is simply how polished the aircraft feels visually.

The external modelling is beautifully done. Reflections, metallic finishes, textures, lighting, and panel detailing all combine to create a genuinely premium feel.

The cockpit atmosphere is especially impressive during night operations, sunrise departures, sunset arrivals, and rainy weather.

The avionics, lighting, and subtle cockpit ambience create a very modern executive aviation feel.

One thing many people will notice immediately, however, is the fairly prominent left windshield pillar.

At first, it can feel slightly intrusive, especially for simmers accustomed to aircraft with wider cockpit visibility like the Boeing 737 or Airbus A320. However, this is actually quite realistic to the real aircraft itself rather than a flaw in the simulation.

Fortunately, adjusting the pilot camera position helps enormously. Raising the eye point slightly and tweaking the field of view changes the experience quite dramatically.

Once adjusted, the cockpit becomes a very enjoyable environment in which to fly.

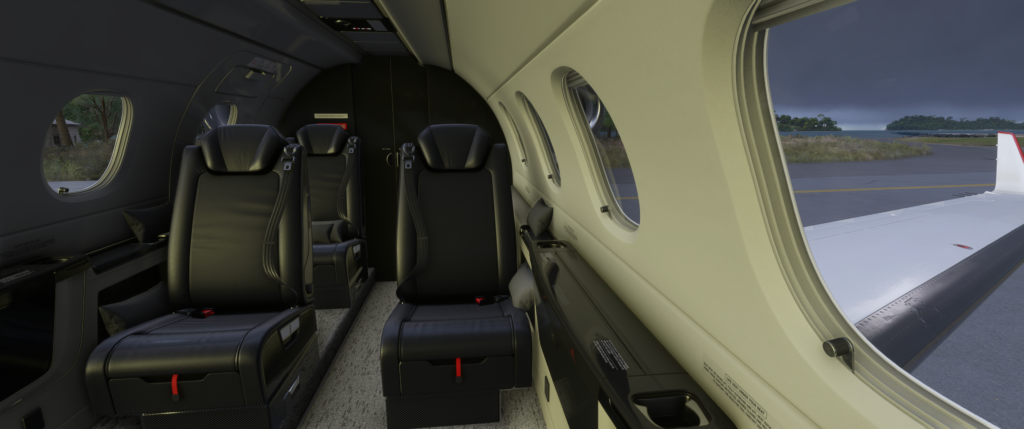
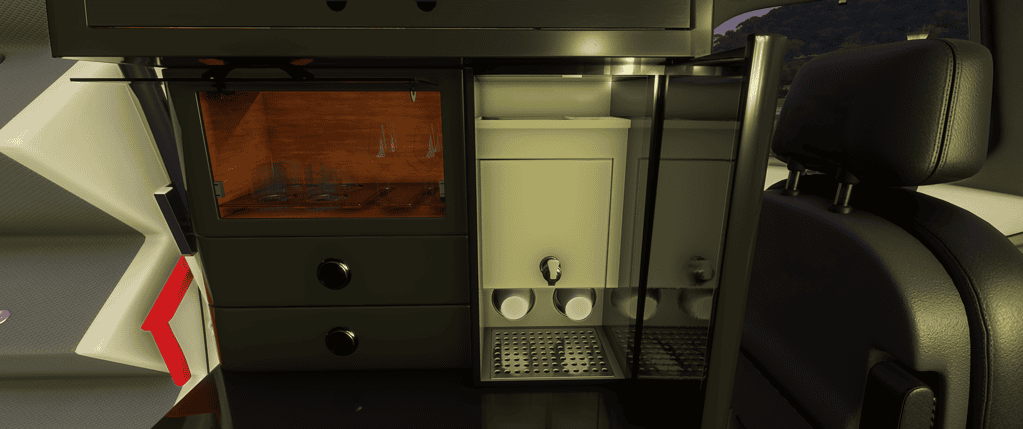
Realistic aircraft cockpit interior with passenger seats and view of runway from window.

The Ownership Experience

This is where the FSReborn Phenom 300E really starts separating itself from most aircraft currently available in Microsoft Flight Simulator 2024.

Most aircraft simply place you directly into the cockpit, ready for departure.

The Phenom 300E feels more like stepping into an ongoing aviation lifestyle.

Instead of simply selecting a flight and taking off, the aircraft encourages routines and operational habits. Preparing the aircraft, interacting with systems, operating from your own facilities, and slowly building familiarity with the jet create a surprising sense of attachment.

After a while, the aircraft genuinely starts to feel like your aircraft rather than just another menu selection.

That might sound exaggerated, but once the immersion systems start coming together, the experience becomes very different from traditional flight simulation aircraft.

Custom Hangars and FBO Systems

This is one of the headline features of the aircraft, and it is one of the most interesting things currently available in MSFS 2024.

The ability to place custom executive hangars and FBO environments around the world changes the entire atmosphere of the simulator.

Rather than simply spawning at random parking spots, you can build a persistent executive aviation environment with luxury terminals, private hangars, and personalised branding.

The hangars themselves are beautifully presented and genuinely add to the immersion factor.

Walking through your own executive facility before a flight creates a completely different feeling compared with traditional aircraft add-ons. The lighting, ambience, and overall presentation make the experience feel surprisingly believable.

It also encourages a lot of creativity from the user.

Many simmers will likely create their own fictional charter companies and recurring route networks around the aircraft. For content creators, especially, this opens enormous possibilities for immersive storytelling and cinematic flying.

Instead of producing random disconnected flights, creators can build a complete aviation identity around the aircraft.

A pilot's view of a modern flight simulator cockpit with advanced avionics and navigation screens.

The FBO System Changes the Entire Feel of MSFS 2024

After spending more time exploring the FSReborn FBO Utility system, it becomes very clear that this is far more than a simple scenery placement tool.

In many ways, it completely changes the atmosphere of Microsoft Flight Simulator 2024 itself.

The system allows users to place fully custom executive FBO buildings, luxury terminals, and hangars almost anywhere in the simulator world. Once placed, these facilities persist permanently across flights and simulator restarts, creating the feeling of owning a genuine executive aviation network rather than simply flying random routes.

That persistence is incredibly important.

Instead of every airport feeling temporary and disconnected, destinations begin to develop familiarity and identity. Returning to an airport where your own executive facility already exists creates a surprisingly strong sense of attachment.

The system itself is extremely flexible.

Users can place multiple types of facilities, including:

  • Executive small FBOs with attached hangars
  • Medium executive bases
  • Large luxury FBO complexes
  • Standalone Aerolith hangars

Placement is handled through an interactive MSFS toolbar utility with map integration, allowing buildings to be positioned around the airport environment.

What makes the system especially impressive is the amount of fine control available after placement.

The FBO Control panel allows users to adjust:

  • Building position
  • Rotation
  • Height above ground
  • Bank and pitch angles
  • Lighting states
  • Door positions
  • Hangar animations
  • Window blinds
  • Logo visibility

This level of customisation is where the immersion really starts becoming addictive.

You are not simply placing scenery objects. You are creating your own aviation environment.

The ability to customise logos is another particularly interesting feature. Users can replace the default FSReborn branding with their own fictional aviation company logos using the included development tools.

This opens enormous possibilities for:

  • Virtual airlines
  • Executive charter companies
  • YouTube content branding
  • Immersive roleplay operations
  • Shared virtual aviation groups

Even more impressively, custom logo packages can be shared with friends or virtual airline members, allowing entire groups to operate from the same branded executive facilities.

That transforms the system from a simple personal immersion tool into something much larger and more community-driven.

Another surprisingly immersive detail is the ability to physically walk around the facilities using Avatar Mode while still controlling building features live from the MSFS toolbar panels.

Doors can be opened, hangar lighting adjusted, blinds raised or lowered, and structures visually customised while standing directly beside the aircraft.

It sounds like a small thing at first, but in practice, it contributes enormously to the feeling that the aircraft exists inside a living aviation world rather than simply inside a simulator menu.

The fact that changes save automatically also helps reinforce the persistence system. Once facilities are customised, they remain exactly as configured for future flights.

Over time, this creates a genuine feeling of ownership and continuity that very few aircraft add-ons currently provide.

That may ultimately become one of the defining features of the FSReborn Phenom 300E experience itself.

FAQ

Is the FSReborn Phenom 300E worth buying for MSFS 2024?

For simmers who enjoy business jets, immersion, cinematic flying, and aircraft that feel like more than just cockpit simulations, yes, it is very easy to see the appeal. It is especially strong if you enjoy operating from custom hangars, flying luxury routes, and creating a sense of ownership around an aircraft.

Is the Phenom 300E difficult to fly?

It is not a basic aircraft, but it is also not intimidating in the way some highly complex airliners can be. The aircraft feels modern, capable, and approachable once you spend time learning its systems and routines.

Does the cockpit pillar affect visibility?

Yes, the left cockpit pillar is noticeable. However, that is part of the real aircraft’s cockpit design. Adjusting the pilot camera position in MSFS 2024 can make a big difference and helps create a more comfortable view.

What makes the FSReborn Phenom 300E different?

The biggest difference is the ownership and immersion factor. The aircraft is not just about flying. It includes hangars, FBO-style operations, atmosphere, passenger and operational features, and a strong sense of executive aviation identity.

What routes suit the Phenom 300E best?

The aircraft is perfect for scenic executive routes such as Brisbane to Hamilton Island, Sydney to Hamilton Island, tropical Queensland flights, Caribbean island hopping, and luxury arrivals into places like TNCM Princess Juliana.

A pilot's view of a professional flight simulator cockpit with advanced controls and instrumentation.

Final Thoughts

The FSReborn Phenom 300E really does feel like something a little different in Microsoft Flight Simulator 2024.

Rather than focusing exclusively on procedural depth and checklist realism, the aircraft prioritises immersion, atmosphere, ownership, and emotional connection to the flying experience itself.

For simmers who enjoy cinematic flying, tropical destinations, executive aviation, coastal routes, sunset operations, and modern business jets, the aircraft offers one of the most immersive experiences currently available in MSFS 2024.

It is visually beautiful, atmospherically rich, operationally immersive, and clearly developed with enormous passion.

Most importantly, it makes you want to keep flying.

And honestly, that may be the strongest compliment any flight simulation aircraft can receive.

Quick Summary

  • One of the most immersive executive aircraft currently available for MSFS 2024.
  • Strong focus on ownership and operational atmosphere.
  • Excellent visual quality and sound design.
  • Custom hangars and FBO systems are genuinely innovative.
  • Perfect for cinematic and tropical flying experiences.
  • The business aviation atmosphere feels believable and engaging.
  • Especially suited to scenic executive charter operations.

MSFS descent guide – What Happens During a Real Airline Descent

Tutorials

Last updated: May 2026

What Happens During a Real Airline Descent (And How to Do It Properly in MSFS)

If there’s one part of a flight that catches people out in Microsoft Flight Simulator, it’s the descent. Everything feels fine at cruise, but then suddenly you’re too high, too fast, and scrambling to get down in time.

In real airline operations, descent isn’t something you “figure out on the way down.” It’s planned, controlled, and follows a very logical sequence. Once you understand what’s actually happening, everything starts to click — both in the real world and in the sim.

Let’s walk through what really happens during a typical airline descent, and how you can apply it in MSFS.

The Big Picture: Descent Is Planned Early

In real flying, descent starts long before the aircraft actually begins to descend.

Pilots calculate:

This is usually done through the flight management system (FMS), often with tools like SimBrief feeding in the data.

Why This Matters

If you leave descent too late:

  • You’ll be too high
  • You’ll need aggressive descents
  • You’ll end up unstable on approach

That’s exactly what happens to many sim pilots.

Top of Descent (TOD)

The Top of Descent is the point where the aircraft should begin descending from cruise.

A simple rule of thumb used in real aviation:

  • Take your altitude to lose
  • Multiply by 3

Example:

  • Cruise at FL360
  • Need to be at 3,000 ft

Altitude to lose ≈ 33,000 ft

33 × 3 = 99 nautical miles

Start descent about 100 NM from your target.

In Modern Airliners

The FMS calculates this automatically and shows TOD on the navigation display.

Descent Phase Begins

Once you reach TOD:

  • Autopilot remains engaged
  • Thrust is reduced
  • The aircraft begins a controlled descent

In aircraft like the 737:

In Airbus:

  • Managed descent mode is used

Speed Management During Descent

Speed control is critical.

Typical descent profile:

  • High altitude: Mach speed (e.g., Mach 0.78)
  • Transition altitude: switch to IAS
  • Lower altitude: around 250 knots below 10,000 ft

Why This Matters

Too fast:

  • Difficult to descend
  • Risk of overspeed

Too slow:

  • Inefficient
  • May not stay on profile

Following the Vertical Profile

 Boeing-737-MAX-

Modern airliners aim to follow a smooth descent path, often called:

Continuous Descent Approach (CDA)

This means:

  • Minimal level-offs
  • Steady descent
  • Reduced thrust changes

The aircraft follows altitude constraints from the STAR.

Example Constraints

  • Cross waypoint at 12,000 ft
  • Reduce speed to 220 knots
  • Continue descent

The FMS handles this if set up correctly.

Air Traffic Control Interaction

In real life, ATC plays a big role.

They may instruct:

  • “Descend to FL240”
  • “Reduce speed to 250 knots”
  • “Expect ILS runway…”

This can interrupt a perfectly planned descent.

In MSFS

ATC is often simplified, so:

  • You may need to manage descent yourself
  • Or ignore ATC if it conflicts with your plan

Transition to Approach

As you get closer to the airport:

Key milestones:

  • Below 10,000 ft → 250 knots
  • Around 210–220 knots → initial approach
  • Final approach → landing configuration

Common Mistakes in MSFS

This is where most problems happen.

Starting Descent Too Late

  • The aircraft ends up too high
  • Requires a steep descent

Not Using VNAV Properly

  • Ignoring TOD
  • Manual corrections too late

Poor Speed Management

  • Staying too fast
  • Not meeting constraints

Ignoring STAR Constraints

  • Arriving too high at key waypoints

How to Do It Properly in MSFS

Here’s a simple, reliable method:

Before Descent

  • Load the flight plan correctly
  • Check STAR and approach
  • Confirm TOD

At TOD

  • Engage VNAV (or managed descent)
  • Reduce thrust
  • Monitor speed

During Descent

  • Watch altitude constraints
  • Adjust speed if needed
  • Avoid large corrections

Final Phase

  • Reduce to 250 knots below 10,000 ft
  • Begin approach configuration
  • Aim for a stable approach

Final Thoughts

In summary, a good descent is smooth, predictable, and planned well in advance.

In real airline flying, it’s one of the most structured parts of the flight. There’s no guesswork — just following the profile.

Once you start treating descent as something you plan, rather than react to, your flights in MSFS become far more realistic and much easier to manage.

Understanding STARs and SIDs (Simple Explanation)

Tutorials

Last updated: May 2026

If you’ve ever loaded a flight plan in MSFS 2024 and seen things like “SID” and “STAR” pop up, you’re not alone in wondering what they actually do.

The good news is — they’re not complicated once you understand the basics. In fact, they’re one of the biggest things that make your flights feel like real-world airline operations.

Let’s break it down in plain English.

SimBrief Page view

What is a SID?

A SID (Standard Instrument Departure) is simply a planned route that takes you from the runway up into your cruise phase.

Instead of just taking off and turning wherever you want, a SID:

  • Keeps aircraft safely separated
  • Reduces pilot workload
  • Follows noise and terrain restrictions
  • Matches real-world procedures

Think of it like a guided path out of the airport.

What a SID Usually Includes

  • Initial climb instructions
  • Waypoints to follow
  • Speed and altitude restrictions
  • Turns after takeoff

Once you reach the final waypoint of the SID, you transition into your main en route flight.

What is a STAR?

A STAR (Standard Terminal Arrival Route) is the opposite of a SID.

It takes you from your cruise phase down toward your destination airport in a structured way.

Instead of randomly descending, a STAR:

  • Brings you in from a specific direction
  • Manages traffic flow into busy airports
  • Prepares you for the approach

What a STAR Usually Includes

  • Step-down altitude restrictions
  • Speed limits
  • Arrival routing into the terminal area
  • Transition to the runway approach

Why This Matters in MSFS 2024

If you’re flying aircraft like the 737 or A320, the FMC relies heavily on SIDs and STARs.

Without them:

  • VNAV won’t behave properly
  • Descents can become messy
  • You’ll end up too high or too fast

With them:

  • The aircraft flies a smooth, realistic profile
  • You get proper descent planning
  • Everything feels far more “real airline.”

The Simple Way to Think About It

  • SID = How you leave the airport
  • STAR = How you arrive at the airport

That’s it.

Do You Always Need Them?

Not always, but in most cases:

  • Yes for airliners
  • Optional for small GA flying

If you want realism, always include them in your flight plan.

Final Tip

Don’t overthink it.

Just pick a SID and STAR that matches your runway and direction — the aircraft will handle the rest.

SIDs and STARs are structured departure and arrival routes that make your flights smoother, more realistic, and far easier to manage — especially in airliners.

How to Fly a Perfect Approach Every Time

Tutorials

Last updated: May 2026

If there’s one part of the flight that separates beginners from confident sim pilots, it’s the approach.

Get this right, and everything else feels easy.

Here’s how to consistently fly a smooth, controlled, professional-looking approach in MSFS 2024.

PMDG 737 on approach in Microsoft Flight Simulator

Start Earlier Than You Think

Most problems happen because things start too late.

You should already be:

  • Slowing down
  • Descending
  • Configuring the aircraft

Well before you reach the airport.

A good rule is to start thinking about your approach at least 80–100 nautical miles out.

Be at the Right Altitude

This is the big one.

If you’re too high, everything falls apart.

A simple rule of thumb:

Example:

  • 30 miles out = 10,000 feet
  • 15 miles out = 5,000 feet

Manage Your Speed Early

Don’t wait until the last minute to slow down.

Start reducing speed gradually:

  • Cruise → 280 knots
  • Then → 250 knots
  • Then → 210 knots
  • Then approach speeds

This gives you full control instead of fighting the aircraft.

Use Flaps Properly

Flaps aren’t just for landing — they help control speed and lift.

Typical flow:

  • Flaps 1: initial slowdown
  • Flaps 5–10: further reduction
  • Gear down: around 180 knots
  • Final flaps: on final approach

Stay Stable

A stable approach means:

  • Correct speed
  • Correct descent rate
  • Correct alignment with the runway

If any of these are off, fix them early — not at the last second.

Use Autopilot Wisely

There’s no shame in using autopilot.

In fact, real pilots do it all the time.

Use:

  • LNAV for lateral guidance
  • VNAV or VS for descent
  • APP mode for ILS approaches

Then disconnect when you’re comfortable.

Final 1,000 Feet Rule

By 1,000 feet above the runway, you should be:

  • Fully configured
  • On speed
  • On the glide path

If not, go around.

That’s real-world procedure.

Final Tip

A perfect landing starts with a perfect approach — not the flare.

A perfect approach comes down to planning early, managing speed, staying on profile, and being fully stable well before reaching the runway.

What Happens During a Real Airline Descent

Tutorials

Last updated: May 2026

Ever wondered what’s actually happening behind the scenes when an airliner starts descending in MSFS 2024?

It’s not just “point the nose down and hope for the best.”

A real airline descent is a carefully planned process involving speed control, altitude management, and structured arrival procedures.

PMDG 737 descent in Microsoft Flight Simulator

The Descent Is Planned Early

In modern airliners, descent planning is handled by the FMC.

It calculates a Top of Descent (TOD) point based on:

When you reach TOD, the aircraft begins a controlled descent automatically if using VNAV.

Step-Down Descent Profile

A real descent isn’t one continuous drop.

Instead, it follows:

  • Controlled descent segments
  • Level-offs when required
  • Speed adjustments

This is often dictated by the STAR.

Speed Management

Speed is just as important as altitude.

Typical descent flow:

  • Cruise descent at high Mach speed
  • Transition to around 280 knots
  • Then 250 knots below 10,000 feet

Speed brakes may be used if needed.

ATC Involvement

In real life, Air Traffic Control plays a huge role.

They may:

  • Delay descent
  • Give shortcuts
  • Assign holding patterns
  • Change speeds or altitudes

In MSFS, you can simulate this with built-in ATC or online networks.

Transition to Approach

As you get closer:

  • The aircraft slows down
  • Flaps begin extending
  • Descent rate reduces
  • You intercept the approach path

Everything becomes more precise.

Why Descents Go Wrong in MSFS

Common issues include:

Sound familiar? It happens to everyone at first.

Final Tip

If you’re always too high, you’re starting too late.

Simple as that.

A real airline descent is a carefully planned, step-by-step process involving speed control, altitude management, and structured arrival procedures.

How to Manage Speed in a 737 (Simple Guide)

Tutorials

Last updated: May 2026

Speed management is one of the biggest challenges when flying the 737 in MSFS — and it’s also one of the most important.

Get this right, and everything becomes easier.

Get it wrong, and you’ll constantly feel behind the aircraft.

PMDG 737 parked at airport in Microsoft Flight Simulator

Why Speed Matters So Much

In the 737:

You’re always balancing speed with aircraft configuration.

Basic Speed Flow

Here’s a simple version that works almost every time.

Cruise

  • Mach .78–.80

Descent

Approach

Using Flaps to Control Speed

Flaps are your best friend.

Typical flow:

  • Flaps 1: slow to around 230 knots
  • Flaps 5: around 210 knots
  • Flaps 10–15: further reduction
  • Gear down: adds drag quickly

Use Speed Brakes When Needed

If you’re too fast or too high:

  • Deploy speed brakes
  • Don’t rely on them constantly
  • Retract before landing

Autopilot Speed Modes

The 737 gives you:

  • VNAV: manages speed automatically
  • MCP speed: manual control
  • Speed intervention: override VNAV

Learn to use all three.

Common Mistakes

Final Tip

Always think one step ahead of the aircraft.

If you wait until you “need” to slow down, you’re already late.

Managing speed in the 737 is about planning, using flaps correctly, and keeping the aircraft under control at every stage of flight.

MSFS Beginner Mistakes New MSFS Pilots Make

Tutorials

Last updated: May 2026

MSFS beginner mistakes: If you’re new to MSFS 2024, you’re going to make mistakes.

That’s part of the process.

But knowing the most common ones can save you a lot of frustration — and fast-track your progress.

PMDG 737 in Microsoft Flight Simulator

Starting Descent Too Late

This is probably the biggest beginner mistake.

Result:

Fix:

Start earlier. Always earlier.

Flying Too Fast

Speed is everything.

Beginners often:

Fix:

Use a structured speed plan.

Ignoring Procedures

Skipping SIDs, STARs, or approach setup leads to:

  • Poor navigation
  • Unrealistic flights
  • FMC issues

Fix:

Use proper procedures wherever possible.

Over-Controlling the Aircraft

Constant inputs usually lead to unstable flight.

Fix:

Make small, smooth adjustments.

Let the aircraft settle.

Not Using Autopilot Properly

Autopilot is a tool — not cheating.

Fix:

Learn:

  • LNAV
  • VNAV
  • Approach mode

Poor Planning

Jumping into a flight without preparation usually leads to chaos.

Fix:

Know:

Chasing Perfection Too Early

Trying to be perfect straight away causes frustration.

Fix:

Focus on consistency first.

Perfection comes later.

MSFS Beginner Mistakes, Final Tip

Every experienced sim pilot made these exact mistakes.

The difference is — they kept going.

New MSFS pilots often struggle with descent timing, speed control, and planning, but fixing these common mistakes leads to rapid improvement.

Flight Simulator Descent Planning

Tutorials

Last updated: May 2026

One of the biggest differences between a rushed, unrealistic flight and a smooth, professional one comes down to a single skill: descent planning.

If you’ve ever found yourself too high on approach, diving toward the runway, or wondering why VNAV isn’t behaving properly, you’re not alone. This is one of the most common challenges in flight simulation, from beginners right through to experienced sim pilots.

In this guide, we’ll walk through why descent planning matters, and more importantly, how to do it properly using simple, reliable techniques.

Microsoft Flight Simulator descent planning

Why Descent Planning Matters

In real aviation, the descent phase is planned well in advance — often over 100 nautical miles before reaching the airport. The goal is simple: arrive at the correct altitude, at the correct speed, fully configured for a stable approach.

What Good Descent Planning Gives You

  • Stable approaches — no last-minute corrections
  • Realism — matching real-world airline procedures
  • Smooth automation — VNAV works as intended
  • Reduced workload — everything feels calm and controlled

What Happens Without It

  • You end up too high near the airport
  • You need to dive aggressively
  • You miss the glide slope capture
  • The entire approach becomes unstable

This is exactly what most sim pilots experience at some point — and it’s completely fixable.

The Foundation: The 3:1 Rule

This is the most important concept in descent planning, and once you understand it, everything starts to click.

The Rule

For every 1,000 feet you need to lose, allow 3 nautical miles.

Example

  • Cruising at 30,000 ft
  • Target altitude: sea level
  • Altitude to lose: 30,000 ft
  • 30 × 3 = 90 nautical miles

Result: Start your descent around 90 NM from the airport.

What a Proper Descent Profile Looks Like

A correct descent is not steep or rushed. It’s a long, shallow, controlled path that gradually brings the aircraft down to the approach phase.

The Key Phases

  • Cruise: Level flight at altitude
  • Top of Descent (TOD): Where descent begins
  • Managed descent: Smooth, continuous descent
  • Approach setup: Slowing down and configuring the aircraft
  • Glide slope: Final descent to the runway

This is exactly what you should be aiming to replicate in your simulator.

Step-by-Step: How to Plan Your Descent

Step 1 – Determine Your Target Altitude

This is typically:

  • The initial approach altitude from charts, or
  • Approximately 3,000 ft above airport elevation

Step 2 – Calculate Altitude to Lose

  • Cruise altitude minus target altitude

Example:

  • 35,000 ft → 3,000 ft = 32,000 ft to lose

Step 3 – Apply the 3:1 Rule

  • 32 × 3 = 96 NM

This gives you your Top of Descent (TOD).

Step 4 – Set Your Descent Rate

A simple and very effective rule:

  • Groundspeed × 5 = descent rate (ft/min)

Example:

  • 400 knots → 400 × 5 = 2,000 ft/min

Step 5 – Monitor Your Path

  • Stay slightly ahead of the aircraft
  • Adjust early if needed — not late
  • Avoid large corrections near the airport

Using VNAV (737 and Airliners)

Modern aircraft like the Boeing 737 can manage descent automatically using VNAV — but only if everything is set up correctly.

What VNAV Does

  • Calculates the descent path
  • Maintains an efficient vertical profile
  • Follows altitude and speed constraints

Common Issues

Even with VNAV, understanding descent planning is essential. It allows you to verify that the aircraft is doing the right thing.

General Aviation Descent (Cessna, etc.)

In smaller aircraft, descent is simpler but still requires planning.

  • Typical descent rate: 500–800 ft/min
  • Shorter descent distance
  • More visual judgment

The same principles apply — just scaled down.

Advanced Tips for Better Descents

  • Think ahead: Start planning 150–200 NM out
  • Use STARs: Follow published altitude constraints
  • Watch speed: Avoid overspeeding during descent
  • Use speed brakes sparingly: They are not a primary solution
  • Stay ahead of the aircraft: Anticipation is key

Summary

  • The 3:1 rule is your foundation
  • A proper descent is long, smooth, and controlled
  • VNAV is helpful — but not a substitute for understanding
  • Good planning results in stable, professional approaches

Once you master descent planning, your flights will feel completely different — smoother, more realistic, and far more enjoyable.