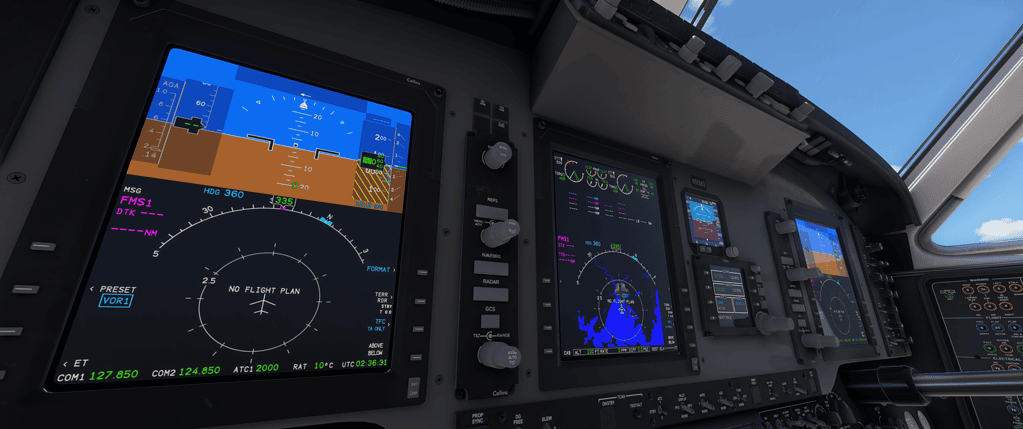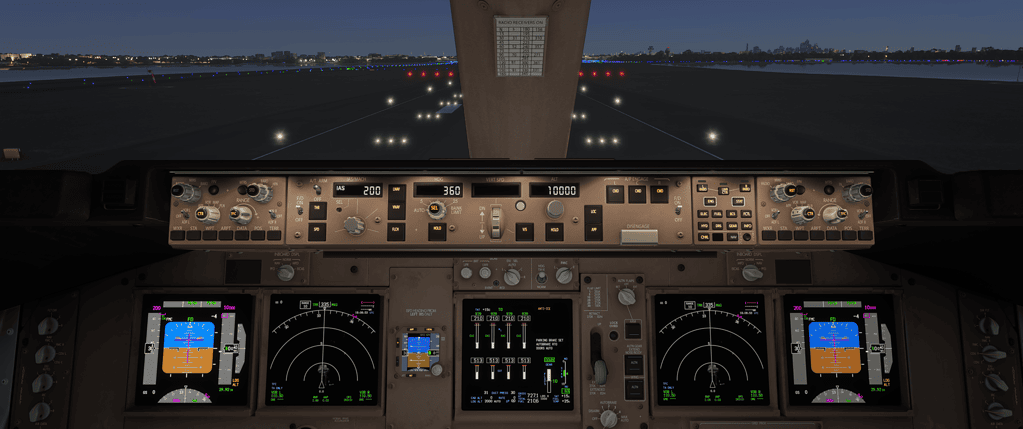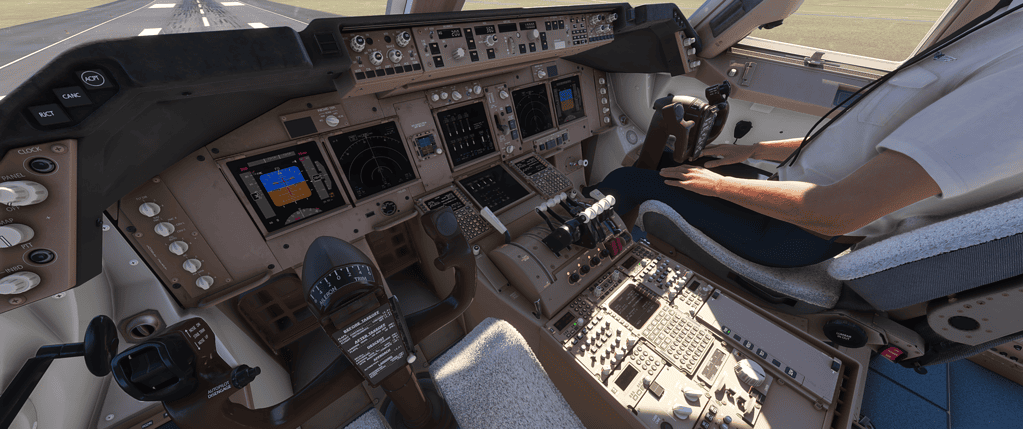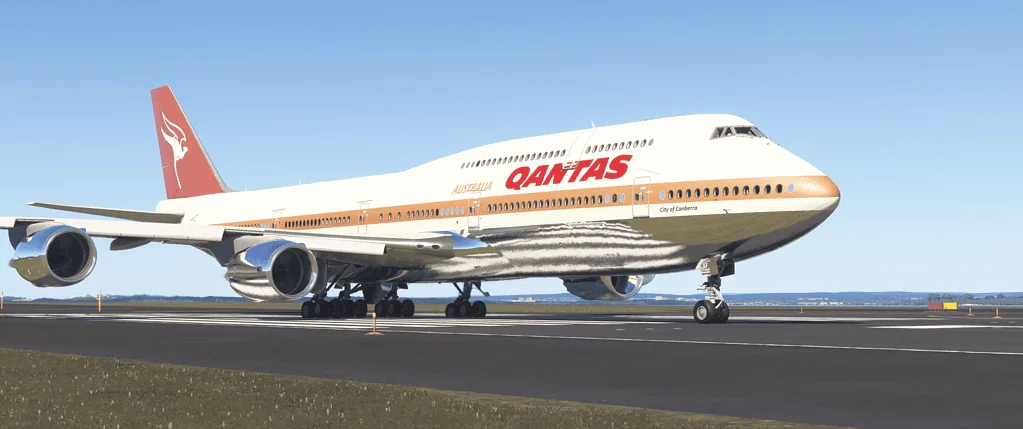
Flying the A320 in MSFS 2024

Tutorials

Flying the A320 in MSFS 2024. The Airbus A320 is one of the most popular airliners in Microsoft Flight Simulator 2024. Whether you’re flying the default A320neo or a more advanced study-level version, the aircraft offers a highly automated, fly-by-wire experience that feels modern, smooth, and precise.

Unlike older Boeing aircraft, the A320 relies heavily on automation, flight management systems, and protections built into its fly-by-wire logic. Understanding how the systems work — rather than simply pressing buttons — is the key to flying it confidently.

This guide walks through the essentials of operating the aircraft, including startup, autopilot use, flight management, takeoff, cruise, and landing.

Quick Summary

Flying the A320 in MSFS 2024, Understanding the Airbus Philosophy

The A320 is designed around automation and flight envelope protection.

Key concepts include:

  • Fly-by-wire control laws
  • Managed vs Selected autopilot modes
  • Autothrust system
  • Flight envelope protections
  • Thrust detents

When properly configured, the aircraft manages much of the flight automatically while keeping the aircraft within safe limits.

Cold and Dark to Ready for Departure

A typical startup flow includes the following steps.

Battery and External Power

  • Turn on BAT 1 and BAT 2
  • Connect external power if available

ADIRS Alignment

  • Set IR selectors to NAV
  • Wait for alignment to complete

Fuel Pumps

  • Turn on fuel pumps

APU

  • Start the APU
  • Wait for the AVAIL light
  • Turn on APU bleed

Engines

  • Set beacon light ON
  • Set engine mode selector to IGN/START
  • Move the ENG 2 master switch to ON
  • Move the ENG 1 master switch to ON

Once engines stabilise, set the engine mode selector back to NORM.

Programming the MCDU

The MCDU acts as the aircraft’s central flight computer.

Basic setup includes:

INIT Page

  • Enter departure and arrival airports

Flight Plan Page

PERF Page

  • Enter takeoff weight
  • Set V1, VR and V2 speeds
  • Set thrust reduction and acceleration altitude

Always verify:

  • Flight plan continuity
  • Correct runway selection
  • Correct departure routing

Takeoff Procedure

Before departure:

  • Set flaps (usually Flaps 1 or 2)
  • Arm spoilers
  • Set autobrake to MAX
  • Set transponder to TA/RA

Line up on the runway and advance thrust levers to:

  • FLEX/MCT for reduced thrust takeoff
  • TOGA if full power is required

The Airbus uses thrust detents, not fine throttle adjustments.

Rotate at VR.

Climb out at V2 + 10 to 20 knots.

At thrust reduction altitude:

  • Thrust reduces automatically
  • Autopilot can be engaged

Climb and Managed Mode

Airbus aircraft use two autopilot modes:

Managed Mode

The aircraft follows the programmed flight plan automatically.

Selected Mode

The pilot manually sets speed, heading, or altitude.

To activate managed climb:

  • Push the altitude knob for managed climb
  • Pull the knob for the selected climb

The aircraft will then follow the programmed vertical profile.

During the climb monitor:

  • Speed
  • Climb rate
  • Engine performance

Cruise Phase

During cruise flight:

  • Monitor fuel flow
  • Confirm managed speed is active
  • Cross-check navigation

Typical cruise altitude for the A320:

  • FL330 to FL390

Autothrust manages speed automatically when the thrust levers remain in the CL detent.

Descent Planning

The A320 calculates the Top of Descent automatically.

Before descent:

Push the altitude knob to activate managed descent.

The aircraft will:

  • Follow the vertical navigation path
  • Respect altitude restrictions

If necessary, deploy speed brakes to increase descent rate.

Approach Setup

Before beginning the approach:

Configure flaps gradually:

  • Flaps 1
  • Flaps 2
  • Flaps 3
  • Flaps FULL

Lower landing gear below 250 knots.

Final Approach and Landing

For an ILS approach:

  • Ensure LOC and G/S capture
  • Autopilot may remain engaged until minimums

At minimums:

During flare:

  • Reduce thrust smoothly
  • Begin flare at approximately 20–30 feet

Airbus flare technique requires small, gentle pitch adjustments.

After touchdown:

  • Deploy reverse thrust
  • Monitor deceleration
  • Disarm spoilers as required

Understanding Autothrust

In Airbus aircraft:

  • Thrust levers remain in the CL detent during flight
  • Autothrust manages engine power automatically

Moving thrust levers out of their detent disables the automation.

Always monitor thrust mode annunciations on the FMA (Flight Mode Annunciator).

Common Beginner Mistakes

Confusing Managed and Selected Modes

Misusing push and pull knobs often leads to unexpected autopilot behaviour.

Incorrect MCDU Programming

Route discontinuities can cause navigation errors.

Forgetting to Arm Approach Mode

ILS guidance may not be captured properly.

Using Manual Throttle Too Often

Airbus systems are designed to work with detents and autothrust logic.

The Airbus A320 remains one of the most popular aircraft in flight simulation because it is:

  • Stable
  • Efficient
  • Highly automated
  • Relatively beginner-friendly compared to older airliners

It rewards pilots who understand the aircraft’s systems and automation rather than relying on aggressive manual control.

Conclusion

Flying the A320 in MSFS 2024 is primarily about understanding Airbus automation, managed autopilot modes, and fly-by-wire protections. Once properly programmed in the MCDU and configured correctly, the aircraft manages much of its climb, cruise, and descent automatically. Mastering the relationship between thrust detents, autopilot modes, and vertical navigation is the key to smooth and realistic Airbus operations.

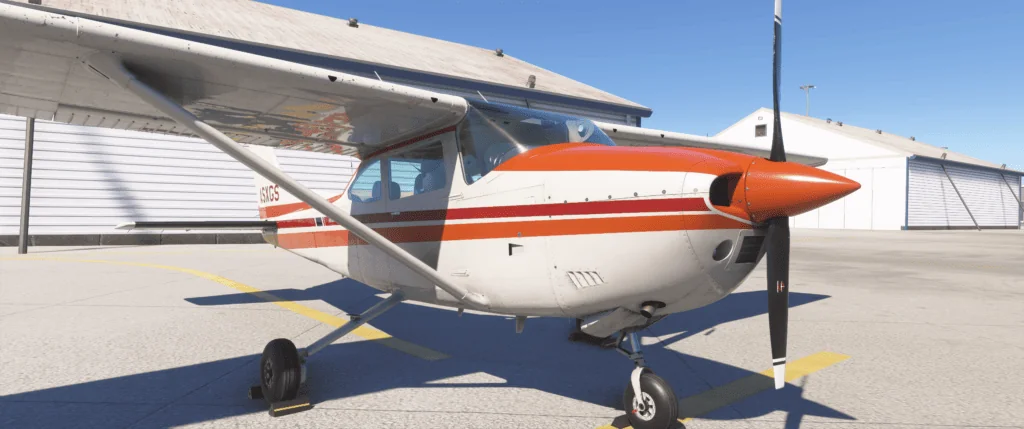
Flying the Cessna 172 in MSFS 2024

Beginner Guides

The Cessna 172 is one of the most popular training aircraft in the world and one of the best aircraft to learn in Microsoft Flight Simulator 2024. Stable, predictable, and forgiving, it is ideal for beginners while still rewarding precise flying.

Whether you are flying the steam gauge version or the G1000 glass cockpit model, the C172 teaches core flying skills that apply to every aircraft in the simulator.

This guide walks through startup, taxi, takeoff, cruise, navigation, and landing in a practical, beginner-friendly way.

Quick Summary

  • The Cessna 172 is one of the best aircraft for beginners in MSFS 2024
  • Cruise speed is typically around 110–120 knots
  • Takeoff rotation occurs around 55 knots
  • Normal climb speed is 70–80 knots
  • Typical landing approach speed is 65–70 knots
  • Proper trim and smooth control inputs are essential for stable flight

Understanding the Cessna 172

The C172 is a high-wing, single-engine piston aircraft.

Key characteristics:

  • Cruise speed around 110–120 knots
  • Fixed landing gear
  • Simple systems
  • Very stable handling
  • Excellent visibility

Unlike airliners, you are flying the aircraft directly. There is no complex automation doing the work for you.

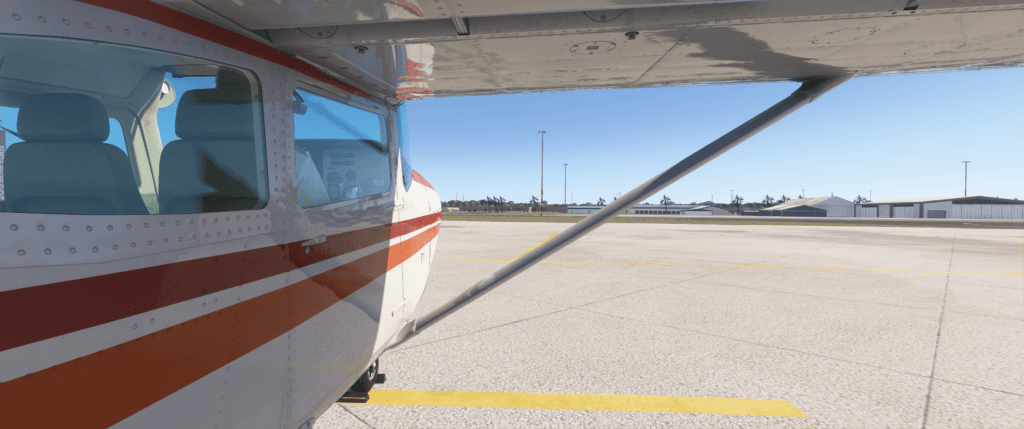
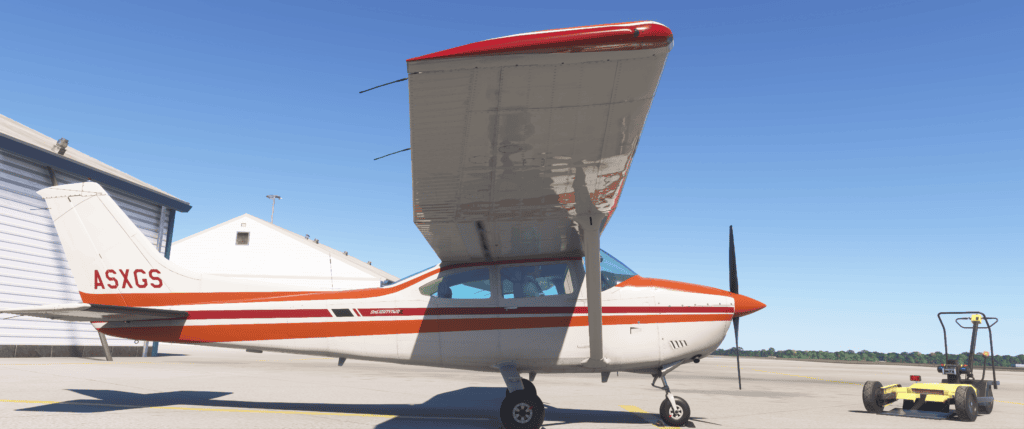
Cessna 182 RHS front close

Pre-Flight and Startup

Basic cold and dark startup procedure:

Battery and Avionics

  • Master switch ON
  • Avionics ON (normally after engine start in real life)

Fuel

  • Fuel selector BOTH
  • Mixture RICH

Throttle

  • Slightly open

Engine Start

  • Turn ignition to START
  • Release when the engine fires

Oil pressure should rise within a few seconds.

Then set:

  • Alternator ON
  • Check fuel gauges
  • Set altimeter
  • Tune radios
Cessna 182 RHS close

Taxiing the Cessna 172

The C172 uses differential braking and rudder for steering.

To taxi smoothly:

Avoid overusing throttle. The aircraft moves easily at low power.

Takeoff Procedure

Cessna 182 RHS front close

Before takeoff:

  • Flaps UP (normal takeoff)
  • Trim set for takeoff
  • Mixture RICH
  • Lights ON

Line up on the runway and advance the throttle smoothly to full power.

Maintain directional control with the rudder.

Rotate around 55 knots.

Climb out at:

  • 70–80 knots for normal climb

Avoid pulling back too aggressively. Let the aircraft lift off naturally.

Climb and Cruise

During climb:

  • Monitor engine RPM
  • Keep the mixture RICH at low altitude
  • Maintain steady climb speed

Level off at cruise altitude.

Set:

  • Throttle around 2200–2400 RPM
  • Trim for hands-off flight

Cruise speed typically settles around 110 knots.

If flying at a higher altitude:

  • Lean the mixture slightly
  • Watch engine performance

Basic Navigation

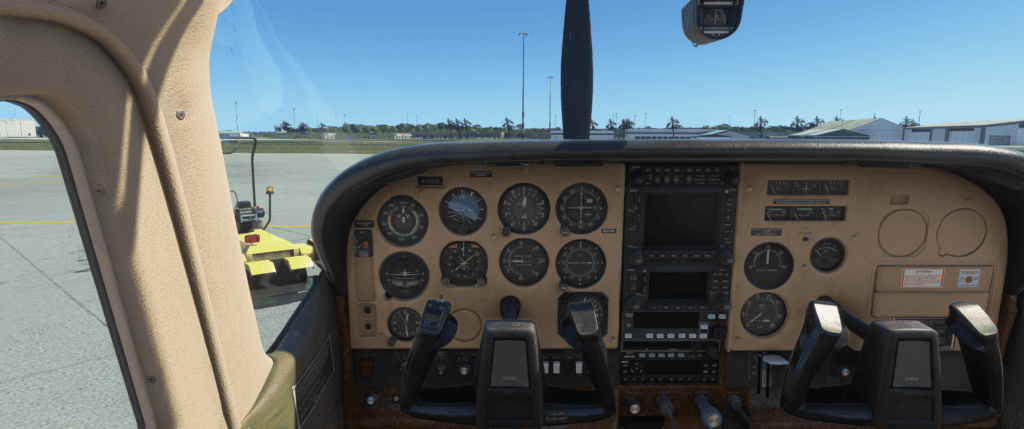
Cessna 182 Cockpit

With steam gauges:

  • Use VOR navigation
  • Follow visual landmarks
  • Use the heading indicator

With the G1000:

  • Program a simple Direct-To route
  • Follow the magenta line
  • Monitor altitude and speed

The C172 is excellent for:

Descent Planning

Start descent early.

Reduce power gradually.

Aim for:

  • 500–700 feet per minute descent
  • Maintain 80–90 knots

Avoid steep dives. Plan ahead.

Landing the Cessna 172

Cessna 182 Cockpit 3

Approach checklist:

  • Mixture RICH
  • Carb heat ON (if model supports it)
  • Reduce power
  • Extend flaps gradually

Typical approach speed:

  • 65–70 knots with flaps

On final:

  • Maintain a stable speed
  • Small pitch corrections
  • Gentle power adjustments

During flare:

Do not force it onto the runway.

After touchdown:

  • Keep back pressure on the yoke
  • Apply the brakes gently

Common Beginner Mistakes

Pulling Back Too Hard on Takeoff

This can cause ballooning or a stall.

Approaching Too Fast

Excess speed causes the aircraft to float long down the runway.

Forgetting Rudder

The rudder is essential during takeoff and landing.

Not Trimming Properly

Trim reduces workload and improves aircraft control.

Flying the Pattern

The C172 is perfect for practicing traffic patterns:

  • Takeoff
  • Crosswind
  • Downwind
  • Base
  • Final

Practicing consistent speeds and altitude control builds strong flying skills quickly.

Steam Gauge vs G1000 Version

Steam Gauge Version

  • Teaches traditional instrument scanning
  • Encourages manual navigation
  • Excellent for learning basic flying skills

G1000 Version

  • Modern glass cockpit
  • GPS-based navigation
  • Easier route management

Both are excellent training platforms.

Why the Cessna 172 Is Important

Mastering the C172 teaches fundamental aviation skills, including:

  • Energy management
  • Proper landing technique
  • Visual navigation
  • Basic instrument flying

These skills transfer to every aircraft in Microsoft Flight Simulator.

Conclusion

Flying the Cessna 172 in MSFS 2024 is one of the best ways to build real flying skills inside the simulator. The aircraft is stable, forgiving, and ideal for learning core techniques like smooth takeoffs, controlled approaches, and proper landing flare.

By mastering trim, speed control, and planning, you will build a strong foundation that carries into larger and more complex aircraft later in your flight simulation journey.

Common Beginner Mistakes in MSFS 2024

Beginner Guides

Microsoft Flight Simulator 2024 can feel overwhelming when you first start. Aircraft systems can appear complex, avionics displays look intimidating, and there are many settings to configure before you even leave the runway.

The important thing to understand is that almost every new pilot makes the same early mistakes. These mistakes are not usually caused by lack of skill, but by simple misunderstandings about speed control, aircraft setup, navigation modes, and energy management.

Once you recognise these common issues, your learning curve becomes far smoother, and the simulator becomes much more enjoyable.

Flying Too Fast on Approach

This is easily the most common beginner mistake.

Symptoms

  • Floating halfway down the runway
  • Long touchdowns
  • Hard landings
  • Ballooning during the flare

Cause

Approach speed is too high.

Fix

Stabilise airspeed early and manage power carefully.

Helpful tips include:

  • Use the recommended approach speeds for the aircraft
  • Reduce power gradually rather than suddenly closing the throttle
  • Configure flaps in stages

In many general aviation aircraft, a difference of just 10–15 knots can dramatically affect landing quality.

Cessna 182 RHS front close

Ignoring Trim

Another common issue is constantly fighting the aircraft controls.

Symptoms

  • Constant pitch corrections
  • Over-controlling the aircraft
  • Fatigue during cruise flight

Cause

Failure to use trim correctly.

Fix

Whenever you change power or pitch attitude, adjust trim so the aircraft can maintain its attitude without constant control input.

A properly trimmed aircraft should be able to maintain its pitch attitude almost hands-off.

Trim is not optional — it is essential for smooth flying.

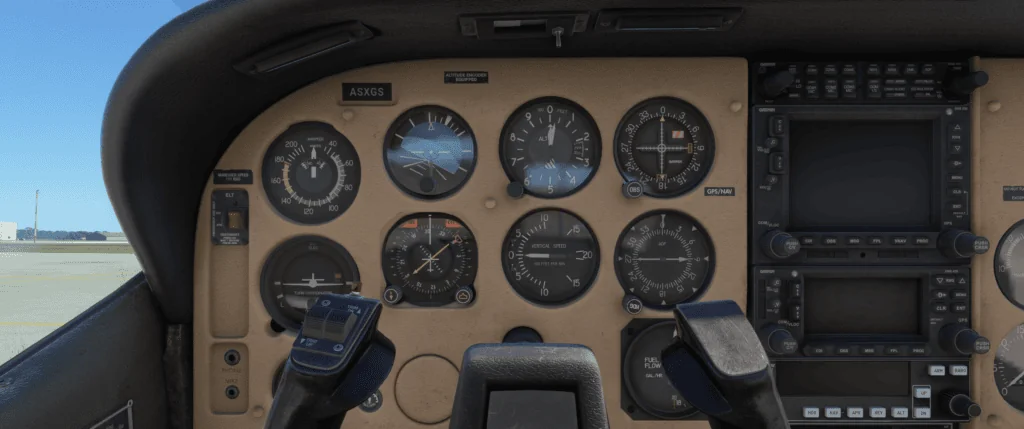
Cessna 182 Cockpit 2

Overusing Autopilot Without Understanding It

Autopilot systems are extremely powerful, but beginners often press buttons without understanding what each mode does.

Symptoms

Cause

Confusion between autopilot modes, such as:

  • Heading (HDG) mode
  • Navigation (NAV) mode
  • Altitude hold (ALT)
  • Vertical speed (VS)
  • Approach mode (APR)

Fix

Always check which autopilot modes are currently active on the Primary Flight Display.

Autopilot reduces workload, but you must monitor it carefully and understand what each mode is commanding the aircraft to do.

Chasing the Instruments

Many beginners react too quickly to small changes in altitude or airspeed.

Symptoms

  • Oscillating altitude
  • Constant pitch adjustments
  • Unstable glide path

Cause

Overreacting to minor instrument deviations.

Fix

Make small, smooth control inputs and allow time for the aircraft to respond.

Large or aggressive corrections often create instability. Smooth flying almost always results from small, deliberate adjustments.

Cessna 182 RHS under wing RHS

Not Setting Up the Aircraft Early

A rushed approach often begins several miles before reaching the runway.

Symptoms

  • Forgetting flap settings
  • Excessive descent rates
  • Speed too high near the airport
  • Last-minute configuration changes

Cause

Preparing for landing too late.

Fix

Begin slowing down and configuring the aircraft well before reaching the airport.

A stable approach usually includes:

  • Reducing speed early
  • Extending flaps progressively
  • Planning descent well before reaching the runway

Stable approaches begin miles before the final approach, not at the runway threshold.

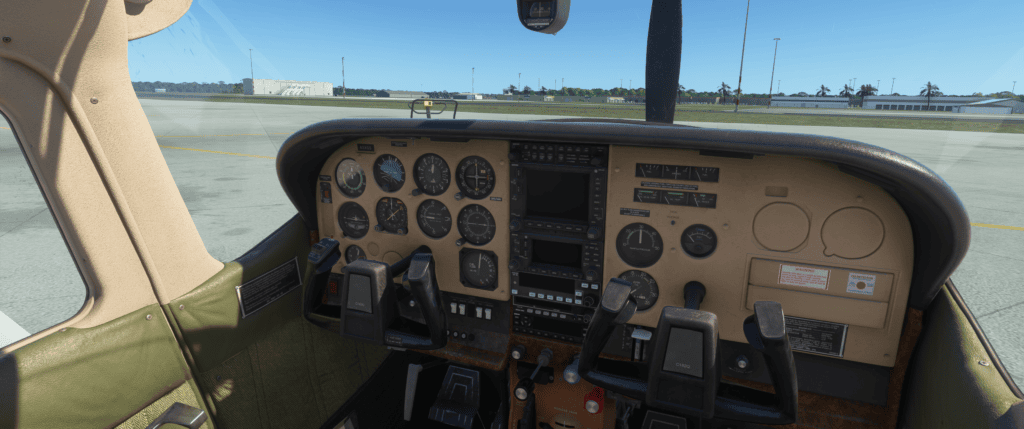
Cessna 182 Cockpit 3

Ignoring Fuel Planning

Beginners often accept default fuel loads without thinking about range or fuel burn.

Common issues include:

  • Running low on fuel unexpectedly
  • Carrying unrealistic fuel loads
  • Not planning reserves

Using planning tools such as SimBrief — or even simple manual calculations — helps you understand:

  • Flight endurance
  • Fuel burn rate
  • Estimated flight time

Fuel awareness adds realism and improves planning habits.

Leaving All Assists On (or Turning Them All Off)

New pilots often choose one of two extremes.

Some fly with all assistance enabled, including auto-rudder and auto-trim.

Others disable everything immediately and attempt complex aircraft.

Better approach

Gradually reduce assistance as your skill improves.

Start with simpler aircraft and slowly increase realism as you gain confidence.

Learning in stages is far more effective.

Choosing Aircraft That Are Too Complex

Many beginners jump straight into advanced airliners or high-performance jets.

However, these aircraft require knowledge of:

  • Flight management systems
  • Autopilot modes
  • Energy management
  • Navigation procedures

A better path is to begin with simple general aviation aircraft and practice:

Once these skills are solid, moving into more complex aircraft becomes much easier.

Fixating on Graphics Instead of Flying

MSFS 2024 is visually stunning, but some new pilots spend more time adjusting graphics settings than actually flying.

Symptoms

While visuals are important, flying skills matter far more.

Develop strong flying fundamentals first, then refine graphics settings later.

Not Practicing Go-Arounds

Many beginners feel reluctant to abandon a landing attempt.

In reality, real-world pilots perform go-arounds regularly.

If the approach becomes unstable because you are:

  • Too fast
  • Too high
  • Not properly configured

Then performing a go-around is the correct and professional decision.

Practicing go-arounds builds confidence and improves realism.

Simple Improvements That Help You Progress Quickly

You can improve rapidly in MSFS 2024 by focusing on a few key habits.

Try to:

Progress in flight simulation does not come from perfection. It comes from consistent improvement over time.

Conclusion

Most beginner mistakes in Microsoft Flight Simulator 2024 involve speed control, poor aircraft setup, misunderstanding autopilot modes, and over-controlling the aircraft. By slowing down mentally, planning, and making small, smooth control inputs, your flying will improve dramatically. The simulator rewards patience, preparation, and practice. Once you master the fundamentals, every flight becomes more enjoyable and far more realistic.

Learn how to fly an ILS approach in MSFS 2024

Tutorials

MSFS 2024 ILS approach. An ILS approach is one of the most satisfying procedures you can fly in Microsoft Flight Simulator 2024. When everything is set up correctly, the aircraft smoothly aligns with the runway centreline and descends along a precise glide path all the way to decision height.

When it does not work properly, however, the approach can feel confusing and unpredictable.

The key thing to understand is that ILS procedures are very logical. If you set them up correctly and intercept the signals from the proper position, they are extremely reliable. Most problems occur because of incorrect setup or trying to capture the signals from the wrong location.

This guide walks through a clear and simple workflow that works for both general aviation aircraft and airliners.

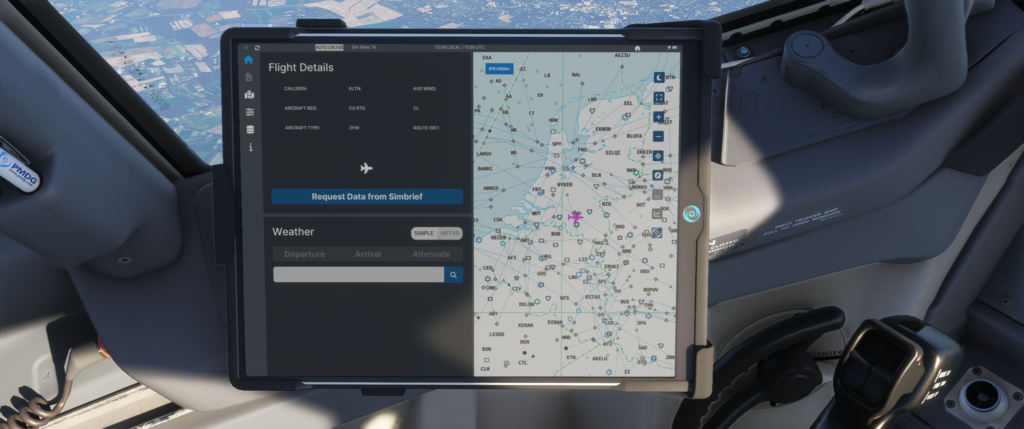
PMDG Boeing 737-800  tablet

What Is an ILS

ILS stands for Instrument Landing System.

It provides two key guidance signals that help you align with the runway and descend at the correct angle.

Localiser

The localiser provides lateral guidance, keeping the aircraft aligned with the runway centreline.

Glideslope

The glideslope provides vertical guidance, guiding the aircraft down a steady descent path, usually around three degrees.

On your Primary Flight Display, you will normally see:

  • A vertical needle showing localiser deviation
  • A horizontal needle showing glideslope deviation

When both needles are centred, the aircraft is perfectly aligned with the approach path.

Preparing for the Approach

Before beginning the approach, a few setup steps are essential.

Load the Correct Approach

Use the World Map planner or the aircraft’s avionics to load the ILS approach.

Confirm:

  • The correct runway
  • The correct ILS approach type
  • Any transition if required

Check the ILS Frequency

Even if the frequency is automatically loaded, always verify that:

  • The NAV1 frequency matches the published ILS frequency
  • The correct course is set (this is often automatic in modern glass cockpits)
PMDG Boeing 737-800 tablet

Confirm Navigation Source

For an ILS approach, the CDI source must be NAV1, not GPS.

This is one of the most common beginner mistakes. If the navigation source remains set to GPS, the aircraft will not capture the localiser correctly.

Positioning for Intercept

Correct positioning is critical for successful ILS capture.

Altitude

You must be below the glideslope before attempting to capture it.

Typical setup:

  • Intercept the localiser first
  • Level off at the published intercept altitude
  • Allow the glideslope to descend toward the aircraft

If you approach from above the glideslope, it will not capture properly.

Intercept Angle

Approach the localiser with a shallow intercept angle of about 20 to 30 degrees.

If the angle is too steep, the aircraft may overshoot the localiser.

Speed

Stabilise your airspeed before reaching the approach.

For general aviation aircraft:

  • Set the approach speed before glideslope capture

For airliners:

  • Begin configuring the aircraft for landing before the final descent

Step-by-Step ILS Workflow

Establish on the Localiser

Use heading mode (HDG) to intercept the localiser.

Watch the localiser needle move toward the centre of the display.

Engage Approach Mode

Once the localiser signal becomes active and you are near intercept, press APR (Approach Mode).

The autopilot will first capture the localiser.

Localiser Capture

When captured:

  • The aircraft gently turns to align with the runway
  • The vertical needle centres

Glideslope Capture

As the glideslope needle moves down and reaches the centre:

  • The aircraft begins descending automatically
  • The autopilot follows the glideslope path

Configure for Landing

During the descent:

  • Gradually reduce power
  • Extend flaps as required
  • Lower the landing gear at the appropriate point

Continue monitoring the aircraft carefully.

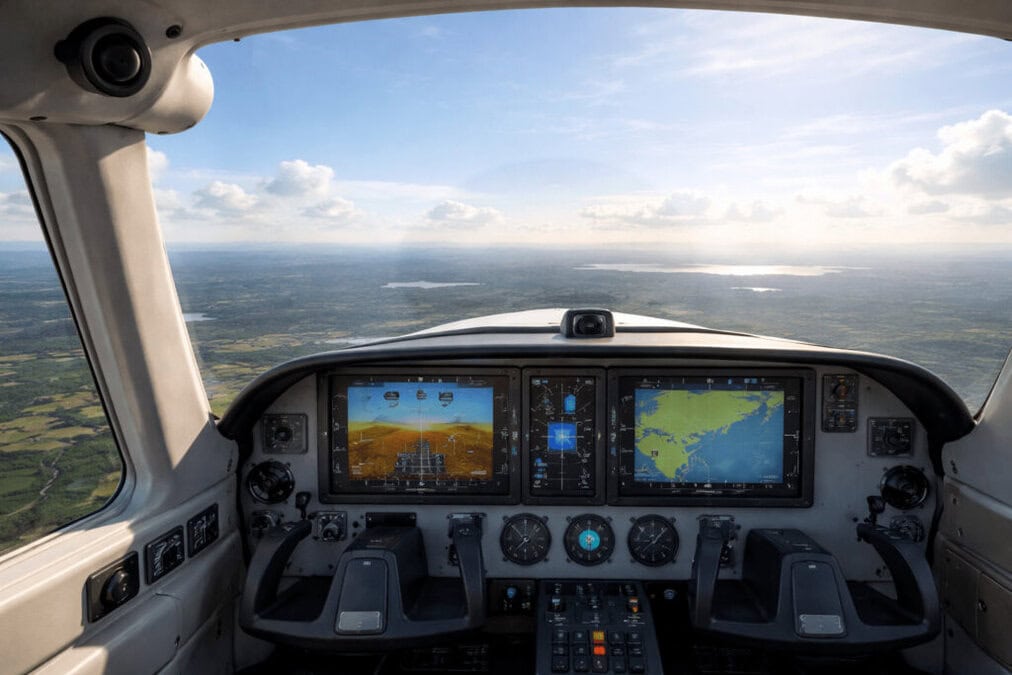
Realistic flight simulation cockpit with advanced controls and multiple screens for immersive flying.

Monitor the Approach

Even when the autopilot is flying the approach, the pilot must still monitor the aircraft.

Scan the instruments and confirm:

  • Airspeed remains stable
  • Descent rate is reasonable
  • The aircraft remains centred on the localiser and glideslope

Autopilot reduces workload, but it does not remove responsibility.

When to Disconnect the Autopilot

A common technique is to disconnect the autopilot when reaching minimums or when the runway becomes visible.

Many pilots then hand-fly the final seconds of the approach and perform the flare manually.

In good weather, you can also disconnect earlier to practice manual ILS tracking.

Common ILS Problems and Fixes

Aircraft Will Not Capture the Localiser

Possible causes include:

  • Incorrect ILS frequency
  • CDI is still set to GPS
  • The intercept angle is too steep

Fixes:

  • Confirm the NAV1 frequency
  • Switch navigation source to NAV1
  • Reposition using heading mode and try again

Aircraft Will Not Capture the Glideslope

Possible causes include:

  • Approaching from above the glideslope
  • The aircraft’s speed is too high
  • APR mode was not armed early enough

Fix:

Level off below the glideslope and allow it to descend to you before capture.

Aircraft Oscillates During Approach

Possible causes include:

  • Excessive speed
  • Turbulence
  • Large control inputs when hand-flying

Fix:

Stabilise the aircraft early and make small, smooth corrections.

Unstable Approach

If by 1000 feet above ground level the aircraft is:

  • Too fast
  • Too high
  • Not fully configured

A go-around is usually the best decision.

There is no penalty for a go-around in MSFS, and practicing them improves realism and confidence.

Tips for Better ILS Landings

A few simple habits make ILS approaches much smoother.

  • Slow down earlier than you expect
  • Make small, gradual power adjustments
  • Monitor vertical speed during descent
  • Trim the aircraft before disconnecting the autopilot
  • Practice repeatedly at the same airport

On a typical three-degree glideslope, the descent rate will often be around 700–800 feet per minute, depending on groundspeed.

Conclusion

Flying an ILS approach in Microsoft Flight Simulator 2024 becomes straightforward once you follow a clear sequence. Load the correct approach, verify the NAV1 frequency, intercept the localiser at a reasonable angle, remain below the glideslope and engage approach mode at the right time. Most problems are caused by setup errors rather than simulator behaviour. Once you master this process, instrument approaches become one of the most rewarding parts of flying in MSFS.

How to Read the PFD and Navigation Display in Microsoft Flight Simulator 2024

Tutorials

MSFS 2024 PFD and ND. Modern aircraft in Microsoft Flight Simulator 2024 use glass-cockpit displays, such as the Primary Flight Display (PFD) and the Navigation Display (ND). For new sim pilots, these screens can look complicated at first. Numbers, tapes, colours, lines, and symbols are constantly moving.

The good news is that these displays are actually designed to simplify flying, not make it harder. Once you understand what each section shows, you only need to scan a few key areas to stay fully aware of how your aircraft is flying.

This beginner guide explains how to read the PFD and ND in MSFS 2024, so you can fly modern glass-cockpit aircraft with confidence.

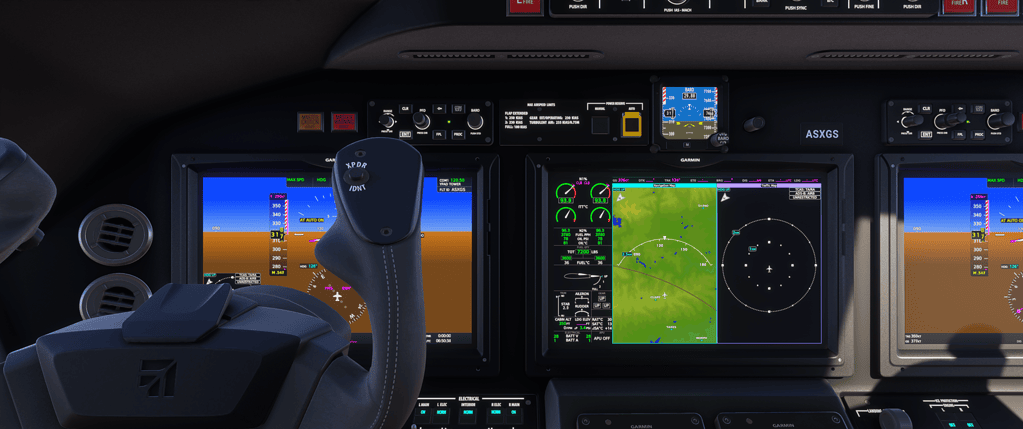
Microsoft Flight Simulator Longitude Businees Jet Nav panel

Quick Reference: What the PFD and ND Show

Before we go deeper, here is a simple overview.

PFD (Primary Flight Display)

Shows how the aircraft is flying right now.

Key information includes:

  • Aircraft attitude (pitch and bank)
  • Airspeed
  • Altitude
  • Vertical speed
  • Heading

ND (Navigation Display)

Shows where the aircraft is going.

Key information includes:

  • Flight plan route
  • Waypoints
  • Distance to destination
  • Wind information
  • Navigation tracking

Think of it this way:

PFD = How the aircraft is flying
ND = Where the aircraft is going

What Is the PFD?

The Primary Flight Display shows the aircraft’s current flight condition.

It answers the core questions every pilot needs to know:

  • Am I climbing or descending?
  • Am I turning?
  • Am I too fast or too slow?
  • Am I at the correct altitude?
  • Am I level?

Once you learn to read the PFD, you can instantly understand what the aircraft is doing.

The Attitude Indicator (Centre of the PFD)

This is the most important instrument on the PFD.

It shows:

  • Aircraft pitch (nose up or nose down)
  • Aircraft bank (left or right roll)
  • Artificial horizon line

If you could only look at one instrument in poor visibility, this would be the one.

What to watch

  • Keep the wings level unless intentionally turning
  • Avoid excessive nose-up pitch that could lead to a stall
  • Avoid excessive nose-down pitch that can cause overspeed

The attitude indicator is the foundation of aircraft control.

The Airspeed Tape (Left Side)

This vertical tape shows your current indicated airspeed.

Important features include:

  • Green arc – normal operating range
  • Yellow arc – caution range
  • Red line – never exceed speed
  • White arc – flap operating range (GA aircraft)

Common beginner mistake

Many pilots focus heavily on altitude and forget to monitor airspeed.

This often leads to unstable approaches, in which the aircraft accelerates too quickly during descent.

The Altitude Tape (Right Side)

This vertical tape displays your current altitude.

It also shows:

  • Selected altitude (when using autopilot)
  • Altitude trend indicator (a small arrow showing climb or descent)

What to watch

  • Make small pitch adjustments to maintain altitude
  • Avoid aggressively chasing altitude changes
  • Always monitor the selected altitude when using the autopilot

Smooth corrections produce smoother flying.

The Vertical Speed Indicator

The vertical speed indicator (VSI) shows how quickly the aircraft is climbing or descending.

It is displayed in feet per minute (fpm).

  • Positive numbers indicate climbing
  • Negative numbers indicate descending

Typical climb and descent rates for light aircraft are around 300–700 fpm.

Excessive vertical speed close to the ground often results in unstable landings.

The Heading Indicator (Bottom of the PFD)

The heading indicator shows the direction the aircraft is pointing.

When using the autopilot, you will also see:

  • The heading bug
  • Target heading settings

When flying in NAV mode, the heading display helps confirm your general direction of travel.

The Flight Director (If Enabled)

When enabled, the flight director displays command bars on the PFD.

These bars indicate the pitch and roll attitude needed to follow the selected flight mode.

If you keep the aircraft symbol aligned with the command bars, you are flying the correct attitude for the current autopilot mode.

A common misunderstanding:

The flight director does not control the aircraft. It only provides guidance.

The autopilot must be engaged for the aircraft to follow those commands automatically.

What Is the ND?

The Navigation Display (ND) focuses on navigation and route awareness.

It answers important questions such as:

  • Where am I?
  • What route am I following?
  • What waypoint is next?
  • How far is my destination?
  • What is the wind doing?

While the PFD shows how the aircraft is flying, the ND shows where the aircraft is going.

The Route Line (Magenta Line)

The magenta line represents your programmed flight plan.

If your aircraft drifts away from this line, you are off course.

When using NAV mode, the autopilot should automatically follow this route.

Monitoring this line helps ensure you remain on track.

Waypoints

Waypoints appear as small symbols with names on the navigation display.

These represent:

  • Turning points
  • Navigation fixes
  • Intersections
  • Departure and arrival points

Watching waypoint sequencing helps you anticipate upcoming turns and route changes.

Range and Zoom

Most navigation displays allow you to adjust the map range.

Typical usage:

  • Short range – useful during approach
  • Medium range – useful during departure
  • Wide range – useful during the cruise

Changing the range helps you maintain situational awareness.

Wind Information

Wind information is often displayed on either the ND or PFD.

It typically shows:

  • Wind direction
  • Wind speed

This information helps pilots understand:

  • Crosswind conditions
  • Aircraft drift relative to the ground

Common Beginner Mistakes with PFD and ND

Fixating on One Instrument

Instead of staring at one gauge, pilots use a scan pattern.

Example scan:

Attitude → Airspeed → Altitude → Heading → Back to Attitude

This keeps you aware of the aircraft’s overall condition.

Ignoring Airspeed During Descent

One of the most common mistakes in flight simulation is allowing airspeed to creep up during descent.

Regularly monitoring speed helps maintain a stable approach.

Not Confirming the Navigation Source

If the ND does not match your expectations, check:

  • GPS vs NAV source
  • Active waypoint
  • Flight plan sequencing

Navigation confusion often comes from incorrect source selection.

Chasing the Flight Director Too Aggressively

The flight director should be followed with smooth, gentle inputs.

Large or abrupt corrections will quickly lead to unstable flying.

Simple Scan Technique for Beginners

During Climb

Scan:

  • Attitude
  • Airspeed
  • Vertical speed
  • Altitude
  • Heading

At Cruise

Scan:

  • Attitude
  • Altitude
  • Heading
  • ND route tracking

During Approach

Scan:

  • Airspeed
  • Attitude
  • Glideslope/localiser (if using ILS)
  • Altitude

Frequently Asked Questions

What is the PFD in Microsoft Flight Simulator 2024?

The Primary Flight Display (PFD) shows the aircraft’s current flight condition. It displays attitude, airspeed, altitude, vertical speed, and heading. By scanning these instruments regularly, pilots can quickly understand how the aircraft is flying.

What does the Navigation Display (ND) show?

The Navigation Display (ND) shows where the aircraft is going. It displays the programmed flight route, waypoints, navigation tracking, and sometimes wind information. This helps pilots maintain situational awareness during the flight.

What is the most important instrument on the PFD?

The attitude indicator is the most important instrument on the PFD. It shows the aircraft’s pitch and bank relative to the horizon. In poor visibility or instrument conditions, pilots rely heavily on the attitude indicator to maintain control.

Why is the route line magenta in modern aircraft?

The magenta line represents the active flight plan route programmed into the aircraft’s navigation system. When the aircraft is following this line, it is tracking the correct route between waypoints.

How should beginners scan the PFD?

A simple scan pattern for beginners is:

Attitude → Airspeed → Altitude → Heading → Back to Attitude

This continuous scan allows pilots to maintain awareness of the aircraft’s performance and direction.

Summary

The Primary Flight Display (PFD) shows how the aircraft is flying.

The Navigation Display (ND) shows where the aircraft is going.

Once you understand this division of roles, modern glass cockpit aircraft become far easier to manage.

Focus first on attitude, then monitor airspeed and altitude, and finally maintain navigation awareness.

Develop a calm scanning habit rather than staring at a single instrument.

When used properly, the PFD and ND transform Microsoft Flight Simulator 2024 from a simple game into a highly immersive and realistic flight simulation experience.

How to Use the Autopilot in MSFS 2024

Tutorials

The Autopilot is one of those things that feels magical when it works and completely maddening when it doesn’t. The good news is that most “autopilot problems” in MSFS 2024 aren’t bugs at all. They’re usually mode confusion, the wrong navigation source selected, or the aircraft simply not being stable when the autopilot is engaged. Once you understand a handful of basic modes and a simple workflow, autopilot becomes a genuine workload-saver, and your flights instantly feel more realistic.

What autopilot does (and what it doesn’t)
Autopilot does exactly what you tell it to do, not what you meant.

Autopilot can

  • Hold a heading or track a navigation course
  • Hold an altitude or climb/descend at a set rate
  • Capture and track an ILS (in aircraft that support it)
  • Reduce workload during cruise, climbs, and descents

Autopilot cannot

Before you press anything


This is where most people go wrong. If you do these basics first, autopilot behaves far better.

Make sure the aircraft is stable

  • Wings level (or close to it)
  • Airspeed is stable and not close to stall
  • Trim reasonably set (not fighting the yoke/joystick)
  • No wild climbs or dives happening

Confirm your input device isn’t constantly sending tiny inputs
A noisy joystick axis can cause the autopilot to disconnect or “hunt.” If you see control surfaces twitching slightly, add a small dead zone in controls.

The core autopilot modes you must understand
You can do 90% of normal flying with these.

Heading mode (HDG)
What it does

  • The aircraft turns to and maintains the heading bug

When to use it

  • ATC gives you “turn heading 250.”
  • You want to steer the aircraft without hand-flying
  • You want a simple, predictable turn before going back to NAV tracking

How to use it properly

  • Rotate the heading bug to the heading you want
  • Engage HDG mode
  • Watch the aircraft roll into the turn and settle

Altitude hold (ALT): What it does

  • Holds your current altitude

Common mistake

  • Engaging ALT while you’re still climbing or descending, then wondering why it locks the “wrong” altitude

How to use it properly

  • Level off at your target altitude
  • Let speed settle for a moment
  • Engage ALT

Vertical speed mode (VS)

What it does

  • Climbs or descends at a selected feet-per-minute rate

When to use it

  • Smooth, controlled climbs and descents
  • Managing a descent to meet an altitude restriction (basic method)

How to use it properly

  • Select your target altitude first
  • Engage VS
  • Dial in a sensible rate
    • Light GA: 300–700 fpm often feels realistic
    • Airliners: higher rates are normal, but keep it appropriate for speed and altitude
  • As you approach the selected altitude, reduce VS (or let altitude capture work if the aircraft supports it)

Navigation mode (NAV) What it does

  • Follows a navigation source (GPS/FMS or NAV radios), depending on aircraft setup

Two common meanings in MSFS aircraft

  • NAV tracking the GPS/FMS flight plan (most GA aircraft)
  • NAV tracking a VOR/LOC signal (when source is NAV1/NAV2)

This is the number one cause of “autopilot is broken.”
If your CDI/source is set to NAV1 when you think you’re tracking GPS, the aircraft may turn away and chase the wrong signal.

Approach mode (APR): What it does

  • Captures and tracks an ILS localiser and glideslope (if available and correctly tuned)

When to use it

  • ILS approaches when you have tuned the correct frequency and course
  • You are established and intercepting the localiser at a sensible angle

Basic autopilot workflow for a normal flight
This is a simple method that works for beginners.

After takeoff

  • Hand-fly to a safe height (many people wait until 800–1500 ft AGL)
  • Stabilise the aircraft: speed, trim, wings roughly level
  • Set a heading bug to your current direction of travel
  • Engage autopilot (AP master)
  • Engage HDG mode
  • Engage ALT once you level at your initial altitude

Transition to following your flight plan (GPS)

  • Confirm your navigation source is GPS/FMS (not NAV1)
  • Turn to intercept the magenta line using HDG mode if needed
  • When you’re close and intercepting nicely, press NAV
  • Watch for the aircraft to track the route smoothly

Climb to cruise

  • Set target altitude
  • Use VS (or FLC if your aircraft supports it)
  • Monitor speed during climb and adjust power as needed
  • Let altitude capture work, or reduce VS as you approach the target

Descent

  • Set target altitude
  • Use VS to descend
  • Reduce power slightly to keep speed under control
  • Plan early: most “messy descents” come from starting too late

Common autopilot problems and fixes

Aircraft won’t follow the flight plan

Likely causes

  • NAV source is wrong (you’re on NAV1 instead of GPS)
  • You haven’t intercepted the route before pressing NAV
  • The flight plan has discontinuities or odd legs

Fix

  • Confirm CDI/source is GPS/FMS
  • Use HDG to intercept the course first, then enable NAV
  • Check the flight plan legs in the avionics

Aircraft constantly climbs or dives

Likely causes

  • You engaged ALT while not level
  • VS set is too high for the aircraft and speed
  • Trim wildly out, causing constant corrections

Fix

  • Disconnect AP, stabilise, re-trim, then re-engage
  • Use smaller VS values
  • Confirm the selected altitude is sensible

Autopilot disconnects unexpectedly
Likely causes

  • You’re overriding with control inputs
  • Overspeed or stall protection limits
  • Control axis noise or a conflicting binding

Fix

  • Hands off the controls briefly and see if it holds
  • Add a small dead zone to pitch/roll/rudder
  • Check for duplicate bindings (e.g., two devices mapped to the elevator)

Aircraft turns the wrong direction in NAV
Likely causes

  • It’s trying to rejoin the route from the wrong side
  • Wind and intercept angle are too aggressive
  • You’re tracking a VOR/LOC instead of GPS

Fix

  • Use HDG to place the aircraft on a gentle intercept (20–30 degrees)
  • Then enable NAV
  • Confirm source selection

Practical tips that make autopilot feel “real.”

  • Use autopilot to reduce workload, not to stop paying attention
  • Make small changes and give the aircraft time to respond
  • Set the target altitude before changing the climb/descent mode
  • Don’t be afraid to disconnect and hand-fly for 30 seconds to reset the situation
  • On approach, slow down early. Autopilot behaves better when the speed is stable

Summary

Autopilot in MSFS 2024 becomes easy once you treat it as a set of simple tools: HDG to point the aircraft, ALT to hold level flight, VS to climb or descend, NAV to track a route, and APR for ILS capture when properly set up. Most issues come from engaging autopilot while the aircraft is unstable or from having the wrong navigation source selected. Start stable, pick one mode at a time, and you’ll find autopilot quickly becomes one of the most useful skills you can learn in the simulator.

How to Taxi in MSFS 2024

Tutorials

Taxiing might seem simple — but for many beginners, it’s the first moment things start to feel out of control.

Aircraft swerving.
Oversteering.
Going too fast.
Missing taxiway signs.
Running off the pavement.

The good news?

Once you understand a few key principles, taxiing becomes smooth, controlled, and realistic.

Let’s break it down step by step.

Before You Move — Basic Setup

Before releasing the parking brake:

  • Check your controls are working correctly
  • Set a small amount of throttle (don’t slam it forward)
  • Make sure your rudder or nosewheel steering is calibrated

For most light aircraft like the Cessna 172:

  • 1,000–1,200 RPM is usually enough to start moving

You do not need much power.

Taxiing is about finesse, not force.

How Steering Works in MSFS 2024

Most light aircraft steer using:

  • Rudder pedals (linked to nosewheel)
  • Or joystick twist axis
  • Or keyboard rudder controls

Important:

Small movements.

If you make large steering inputs, the aircraft will snake left and right.

The correct technique:

✔ Tap gently
✔ Centre the controls
✔ Let the aircraft roll
✔ Make small corrections

Think of it like balancing a bicycle.

Taxi Speed — The Most Common Mistake

Most beginners taxi too fast.

Realistic taxi speed:

  • Walking pace
  • Around 10–20 knots maximum

If it feels fast, it probably is.

If you need constant heavy braking to stay in control, you are using too much throttle.

A good rule:

Add power briefly to get moving, then reduce power and let the aircraft roll.

Using Brakes Properly

You have two types of braking in most setups:

  • Differential braking (left/right)
  • Regular brake axis

For tighter turns:

  • Reduce throttle
  • Add a gentle inside rudder
  • Apply a slight inside brake if needed

But avoid heavy braking — it causes jerky movement.

Smoothness is key.

Following Taxiway Lines

Taxi using:

If ATC says:

“Taxi to Runway 27 via Alpha, Bravo 3”

You need to:

  • Identify taxiway Alpha
  • Follow it
  • Turn onto Bravo 3
  • Continue to the runway hold short line

Zooming your external map can help early on.

Over time, you’ll read airport signage naturally.

Wind Considerations (Advanced Tip)

In stronger crosswinds:

  • Use small rudder corrections
  • Reduce taxi speed
  • In taildragger aircraft, be especially careful

Some aircraft (like the Spitfire) require more attention due to limited forward visibility.

Taxiing in those becomes a skill in itself.

Common Taxi Problems and Fixes

Aircraft Swerves Left or Right

Likely causes:

  • Over-steering
  • Too much throttle
  • Rudder sensitivity is too high

Solution:
Lower sensitivity curve slightly.

Aircraft Won’t Move

Check:

  • Parking brake released
  • Throttle above idle
  • No toe brakes stuck on
  • Aircraft properly powered

Aircraft Feels Too Sensitive

Adjust rudder sensitivity in:
Options → Controls → Sensitivity

Lower the curve slightly.

Realism Tip

If you want taxiing to feel more realistic:

  • Avoid using an external camera during taxi
  • Keep speed under control
  • Use ATC instructions
  • Stop at hold short lines
  • Look both ways before crossing runways

Small details add immersion.

Final Thoughts

Taxiing is not just moving to the runway.

It is:

  • Aircraft control
  • Situational awareness
  • Real-world procedure
  • Smooth handling

Mastering taxi control makes takeoffs feel professional, and landings feel complete.

And once taxiing becomes natural, the simulator feels entirely different.

Microsoft Flight Simulator 2024 Beginners Guide

Beginner Guides

Last Updated: May 2026

Microsoft Flight Simulator 2024 is one of the most realistic and visually impressive flight simulators ever created for home computers. For beginners, however, it can also feel overwhelming at first. The good news is that you do not need to learn everything immediately. Like real-world flying, flight simulation is best learned step by step.

This guide will help you get started with the basics of flying, understanding the simulator, setting up controls, and completing your first successful flights in Microsoft Flight Simulator 2024.

Quick Answer

If you are new to Microsoft Flight Simulator 2024, start with a simple aircraft such as the Cessna 152 or Cessna 172, use clear weather conditions, practice short flights, and focus on smooth control inputs rather than trying to master advanced systems immediately.

Understanding the Simulator Environment

msfs 737 max jump seat

Microsoft Flight Simulator 2024 recreates the entire world using satellite imagery, advanced weather systems, realistic aircraft, and highly detailed airports. While the simulator can look intimidating initially, most beginners only need a small number of features to begin flying successfully.

The simulator includes:

  • Free flight mode
  • Training activities
  • Real-world weather simulation
  • Air traffic systems
  • Aircraft ranging from small trainers to large airliners
  • Built-in assistance settings for beginners

One of the best aspects of flight simulation is that mistakes cost nothing. If a landing goes badly or you crash the aircraft, you can instantly restart and try again. This ability to repeat flights is one of the fastest ways to improve your flying skills.

Installing and Launching Microsoft Flight Simulator

Microsoft Flight Simulator 2024 is a very large program, so installation can take some time depending on your internet speed. Ensure you have sufficient storage space available before beginning.

Once installed, the simulator may download additional updates during the first launch. This is normal. Many beginners worry that something is wrong because the initial setup takes a long time, but patience is important during this stage.

For the best experience:

  • Install the simulator on an SSD if possible
  • Keep graphics drivers updated
  • Allow time for initial content downloads
  • Use a stable internet connection

Exploring the Main Menu Interface

The main menu is the control centre of the simulator. While there are many options available, beginners should focus primarily on the following areas:

  • World Map – plan and start flights
  • Training – learn basic flying skills
  • Options – graphics and control settings
  • Marketplace – optional add-ons and aircraft
  • Profile – achievements and logbook

Do not feel pressured to understand every menu immediately. Most beginners spend nearly all of their time using the World Map and adjusting controls during the first few weeks.

Planning Flights Using the World Map

The World Map allows you to choose departure airports, destinations, aircraft, weather, and flight conditions.

For your first flights:

  • Choose a small local airport
  • Select daytime conditions
  • Use clear weather
  • Avoid strong winds initially
  • Keep flights short

Many beginners make the mistake of attempting long airliner flights immediately. Starting small will help you build confidence much faster.

Choosing Your First Aircraft

msfs-aircraft aircaft selection livieries

Your first aircraft choice is extremely important. Complex airliners may look exciting, but they are difficult for new pilots to manage.

The best beginner aircraft include:

  • Cessna 152
  • Cessna 172
  • Diamond DA40
  • Cub-style bush aircraft

These aircraft are slower, easier to control, and far more forgiving during takeoffs and landings.

As a real pilot myself, I strongly recommend learning proper flying fundamentals in a small aircraft first before moving into faster and more advanced aircraft.

Setting Up Flight Controls

msfs-2024 Advanced flight simulator at home

Good controls can dramatically improve the experience, but you do not need an expensive setup to begin.

Many beginners start successfully with:

  • An Xbox controller
  • A basic joystick
  • Entry-level yoke systems

One of the most important things you can do is reduce over-sensitive controls. Beginners often overcontrol the aircraft because the default sensitivity settings can feel twitchy.

Try to:

  • Use smooth, gentle movements
  • Avoid sudden stick inputs
  • Reduce sensitivity slightly if needed
  • Practice coordinated turns gradually

Learning the Basic Cockpit Instruments

You do not need to understand every instrument immediately. Focus on learning the primary flight instruments first.

The most important beginner instruments are:

  • Airspeed Indicator – shows aircraft speed
  • Altimeter – shows altitude
  • Attitude Indicator – shows aircraft pitch and bank angle
  • Heading Indicator – shows aircraft direction
  • Vertical Speed Indicator – shows climb and descent rate

Learning to scan these instruments while also looking outside is one of the key skills of flying.

Managing Airspeed and Altitude

New pilots often focus too much on steering and forget the importance of stable airspeed and altitude control.

In simple terms:

  • The throttle largely controls speed
  • Pitch largely controls climb and descent

If the aircraft feels unstable, small corrections are usually far better than aggressive control movements.

Smooth flying always looks better than fast flying.

Performing Your First Takeoff

Your first takeoff should be simple and calm.

Basic beginner takeoff steps:

  1. Line up on the runway centreline
  2. Apply smooth throttle
  3. Keep the aircraft straight using the rudder
  4. Gently raise the nose at the rotation speed
  5. Climb steadily without overpulling

Many beginners pull back too aggressively, causing unstable climbs or stalls. Smooth control inputs are the key.

Practicing Straight and Level Flight

Straight and level flight sounds easy, but it is one of the most important skills in aviation.

Your goal is to:

  • Maintain constant altitude
  • Hold a stable heading
  • Keep airspeed consistent
  • Use trim to reduce control pressure

Once you can comfortably maintain straight and level flight, every other skill becomes easier.

Learning Basic Turns

Turns should be smooth and coordinated.

For beginner turns:

  • Bank gently
  • Maintain altitude during the turn
  • Avoid excessive bank angles
  • Roll out smoothly onto the new heading

Overcontrolling is extremely common early on. Small inputs produce better results than large movements.

Understanding Aircraft Trim

Trim is one of the most misunderstood concepts for beginners.

Trim helps reduce the physical pressure needed on the controls. Instead of constantly pulling or pushing the joystick, trim allows the aircraft to maintain stable flight more naturally.

Good trim usage makes flying far smoother and far less tiring.

Navigation for Beginner Pilots

Navigation can initially seem complicated, but beginners can keep things very simple.

Start by:

  • Flying visually between nearby airports
  • Following roads, rivers, or coastlines
  • Using the in-game map
  • Practicing short local flights

There is no need to immediately learn complex IFR procedures or airline navigation systems.

Using GPS in Microsoft Flight Simulator

Modern aircraft in the simulator often include built-in GPS systems that make navigation much easier.

The GPS can:

  • Show your position
  • Display nearby airports
  • Provide route guidance
  • Assist with approaches

Even simple GPS usage can greatly improve confidence during early flights.

Practicing Approaches and Descents

Approaches are where many beginners struggle initially.

The most important rule is simple:

Stable approaches create better landings.

Try to:

  • Descend gradually
  • Reduce speed early
  • Stay aligned with the runway
  • Avoid steep last-minute corrections

Good landings begin long before the wheels touch the runway.

Beginner Landing Techniques

Landing is one of the most satisfying parts of flight simulation, but it takes practice.

For beginner landings:

  • Keep the aircraft stable on approach
  • Reduce power gradually
  • Look toward the far end of the runway
  • Gently flare before touchdown
  • Avoid forcing the aircraft onto the runway

Even experienced sim pilots still occasionally have rough landings. Improvement comes through repetition.

Using Autopilot Systems

Autopilot systems can help reduce workload, especially during longer flights.

However, beginners should first learn to fly manually before relying heavily on automation.

Start by learning simple autopilot functions such as:

  • Heading hold
  • Altitude hold
  • Vertical speed mode
  • Navigation tracking

Understanding what the aircraft is doing manually makes autopilot systems far easier to manage later.

Improving Graphics Performance

Microsoft Flight Simulator 2024 can be demanding on computer hardware.

If performance is poor:

  • Lower terrain detail slightly
  • Reduce traffic density
  • Use DLSS or frame generation if supported
  • Lower shadow quality
  • Avoid ultra settings unnecessarily

Smooth performance is usually more important than maximum graphics settings.

Common Beginner Mistakes

Nearly all beginners make similar mistakes early on.

Common issues include:

  • Overcontrolling the aircraft
  • Flying too fast on approach
  • Ignoring trim
  • Trying advanced airliners too early
  • Making large control corrections
  • Focusing only on cockpit instruments

Patience is one of the most valuable skills in flight simulation.

Expanding Your Flight Simulator Setup

As your interest grows, you may eventually wish to improve your setup.

Popular upgrades include:

  • Better joysticks or yokes
  • Rudder pedals
  • Head tracking systems
  • VR headsets
  • Larger or ultrawide monitors
  • Dedicated flight panels

However, excellent flying skills can still be developed using very simple hardware.

Once comfortable with the basics, add-ons can greatly improve immersion.

Popular beginner-friendly add-ons include:

  • Enhanced airports
  • Weather improvements
  • Passenger immersion add-ons
  • Career-style utilities
  • Better aircraft liveries

It is usually best to avoid overwhelming yourself with too many add-ons initially.

Building Confidence Through Practice

Flight simulation rewards consistency.

Short regular flights are often more beneficial than occasional long sessions.

As your confidence grows, you will naturally begin exploring:

  • Larger aircraft
  • Bad weather flying
  • Complex airports
  • Instrument flying
  • Online ATC networks

The learning process never really ends, which is part of what makes flight simulation such a rewarding hobby.

Final Thoughts

Microsoft Flight Simulator 2024 can feel overwhelming at first, but every experienced pilot started exactly where you are now.

Keep things simple, practice regularly, and focus on smooth, stable flying rather than perfection.

With patience and curiosity, flight simulation becomes an incredibly rewarding hobby and one of the most immersive experiences available on a PC today.

Frequently Asked Questions

Is Microsoft Flight Simulator difficult for beginners?

Not if you approach it gradually. Start with simple aircraft, clear weather, and short flights.

Do I need expensive flight controls?

No. Many beginners successfully start using an Xbox controller or an entry-level joystick.

What is the best beginner aircraft?

The Cessna 152 and Cessna 172 are among the best aircraft for learning the basics.

Should beginners use autopilot?

It is better to first learn basic manual flying skills before relying heavily on autopilot systems.

How long does it take to become comfortable with the simulator?

Most beginners begin feeling significantly more confident after a few weeks of regular practice.